The Okera Call-to-Action Home Page
After you log into the Okera UI, an Okera Home page appears. Depending on the roles and permissions assigned your Okera username, you will see either the Call-to-Action Home page or the User Profile Home page. In addition, the options available to you vary, based on your roles and permissions. This page describes the Call-to-action Home page. For information about the User Profile Home page, see The Okera User Profile Home Page.
For information about how roles and permissions affect your Home page view, see Manage Access to UI Features and the Home Page Access Reference. For information about configuring the Okera UI, see Configure the UI.
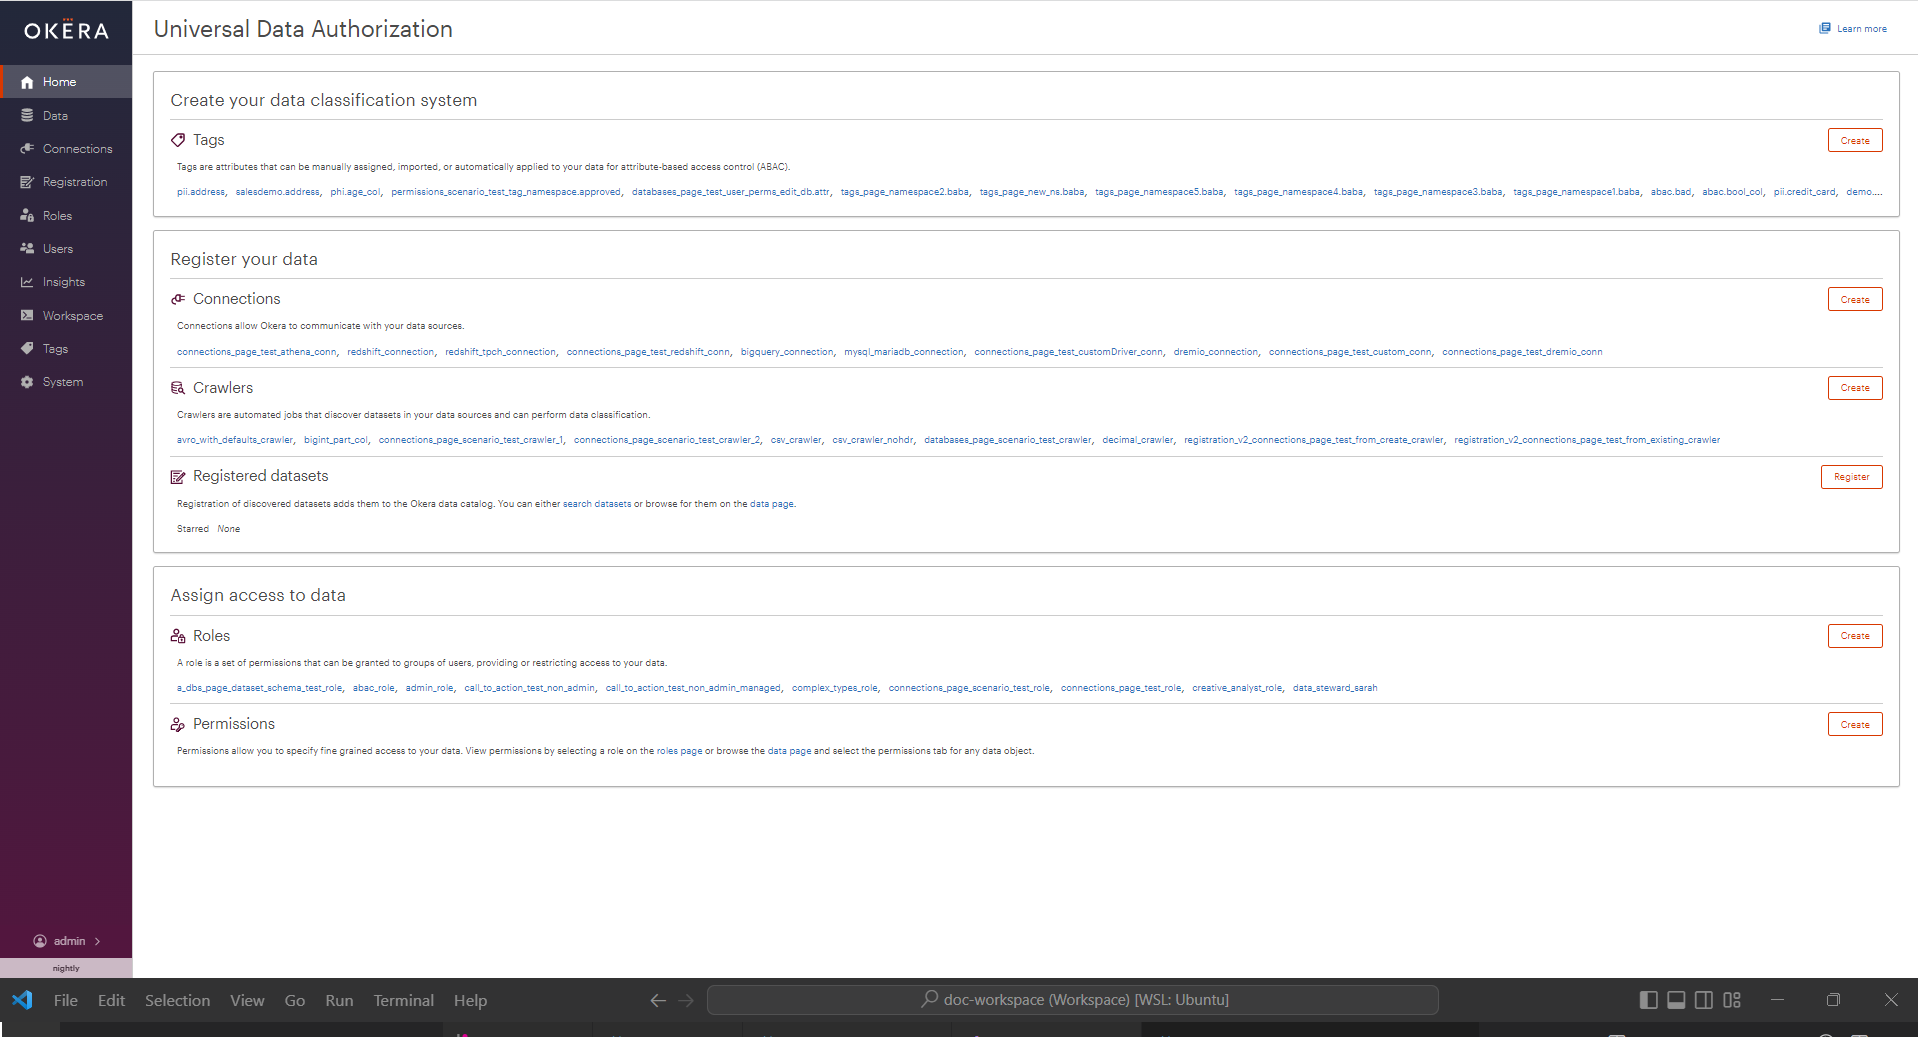
The Call-to-Action Home page looks like this for all admin users of Okera:
The Sidebar Menu
The left sidebar of the Home page allows you to access the major pages in the UI. The options available to you depend upon the permissions assigned to your username and the groups to which you belong.
| Select | To access the |
|---|---|
| Data | Data page |
| Connections | Connections page |
| Registration | Registration page |
| Roles | Roles page |
| Users | Users page |
| Insights | Insights page |
| Workspace | Workspace page |
| Tags | Tags page |
| System | System Information page |
Selecting the Home option brings you back to whatever Home page you have permissions to see.
Other Home Page Features
The rest of the Home page is divided into sections that are intended to help new users get started using Okera to protect their data. The sections are intended to be performed from top to bottom.
-
The first thing you should do is classify your data. This involves identifying and defining the tags you need for the data you intend Okera to protect. See Manage Tags.
-
After classifying your data, create connections to your data stores. See Connections Overview.
-
After a connection is created (and tested), create and run an Okera crawler to crawl the data in the connection. The crawler will identify the datasets in your data store and store schemas for those datasets in Okera. (Actual data is never stored in Okera.) See Crawler Overview.
-
When the crawler is complete, the datasets that are found must be registered to an Okera database before you can create permissions to control access to the data. See Register Datasets.
-
After the datasets are registered, you should review and manage the roles defined in your Okera environment. Permissions can be based on a role or the data. See Manage Roles.
-
Finally, create permissions for the data or role. See Manage Data Permissions.
At any time, you can make a selection from the ![]() menu to access the documentation.
menu to access the documentation.