Tutorial: Configuring Okta for Okera
In this tutorial, we will configure Okera to use Okta SAML for logging in via single-sign on to the Okera Web UI, as well as using the Okta LDAP Interface to do group resolution (avoiding the need for synchronizing groups between Okta and Okera).
Create a SAML App
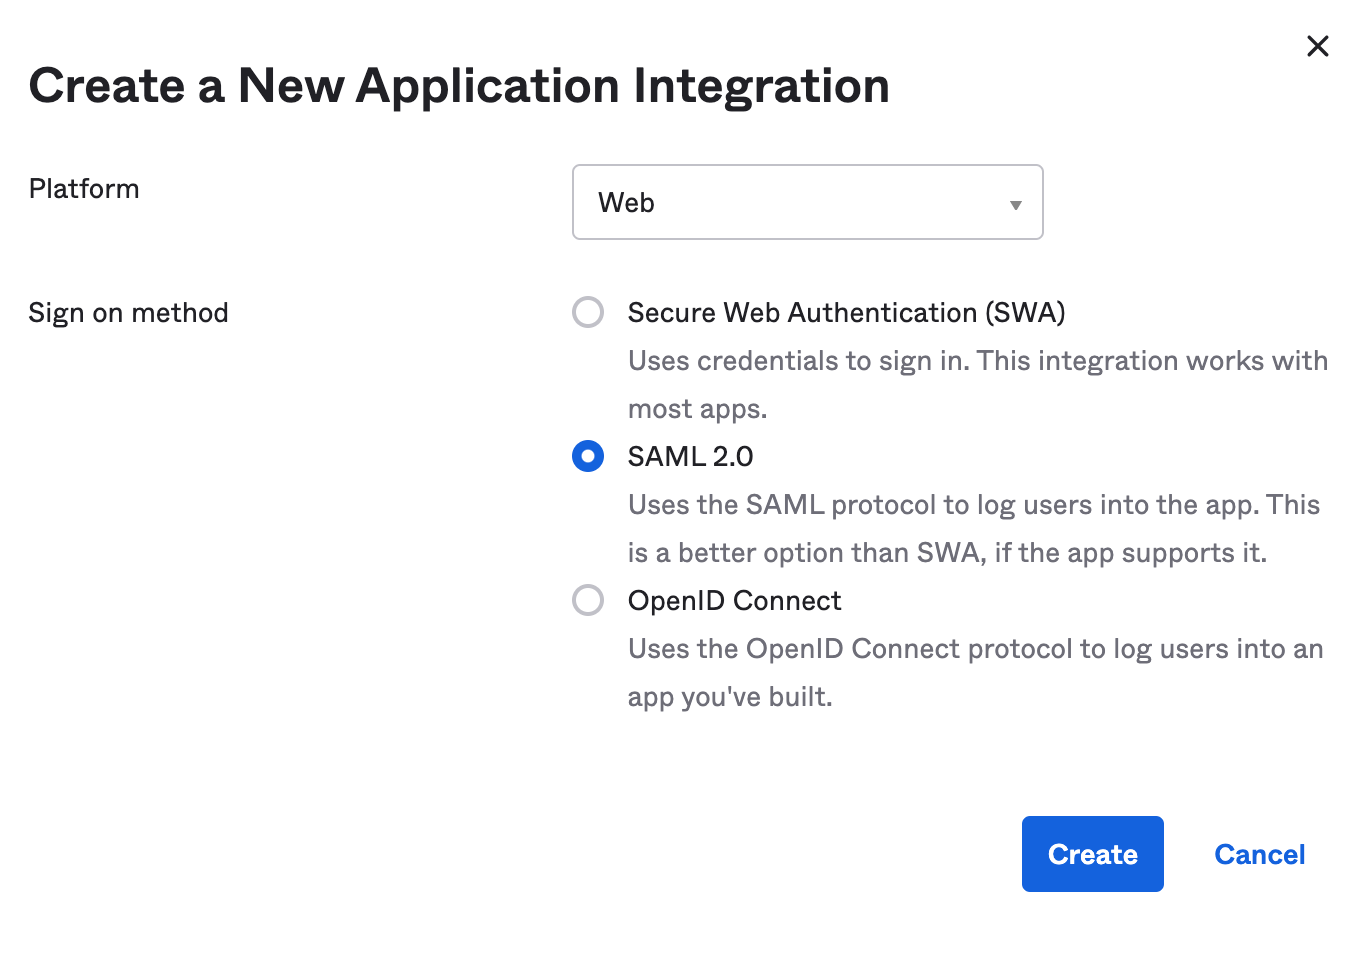
To configure Okta to authenticate to Okera using SAML, we will first create a SAML application.
To do this, go to the Applications page in your Okta administration UI, and choose Create New App, filling it in with the info below:
Once that is complete, fill in the app name and icons, and navigate to the next screen to enter your settings.
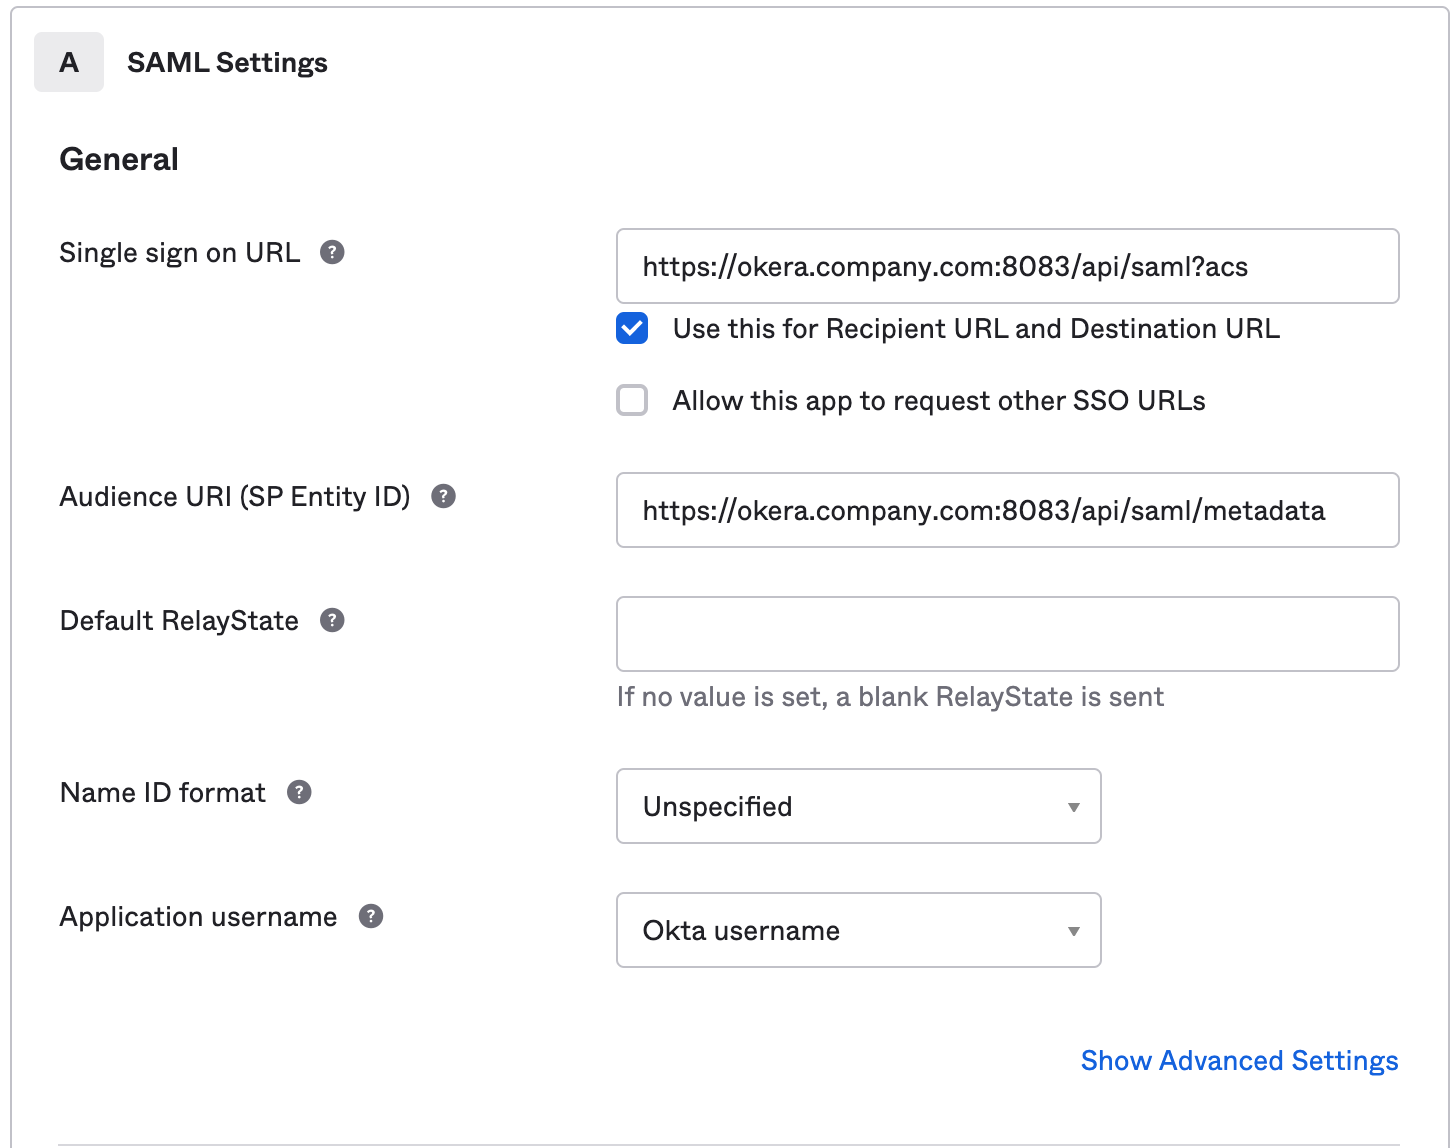
On this screen, we will fill in the SAML connectivity information such as the Assertion Consumer Service (ACS) URL and others.
Assuming your Okera cluster's UI is at https://okera.company.com:8083/, you can use the following settings:
Single sign-on URL:https://okera.company.com:8083/api/saml?acsAudience URI:https://okera.company.com:8083/api/saml/metadata- Leave
Default RelayStateblank. Name ID Format:UnspecifiedApplication username:Okta username
Your setup will look roughly like this:
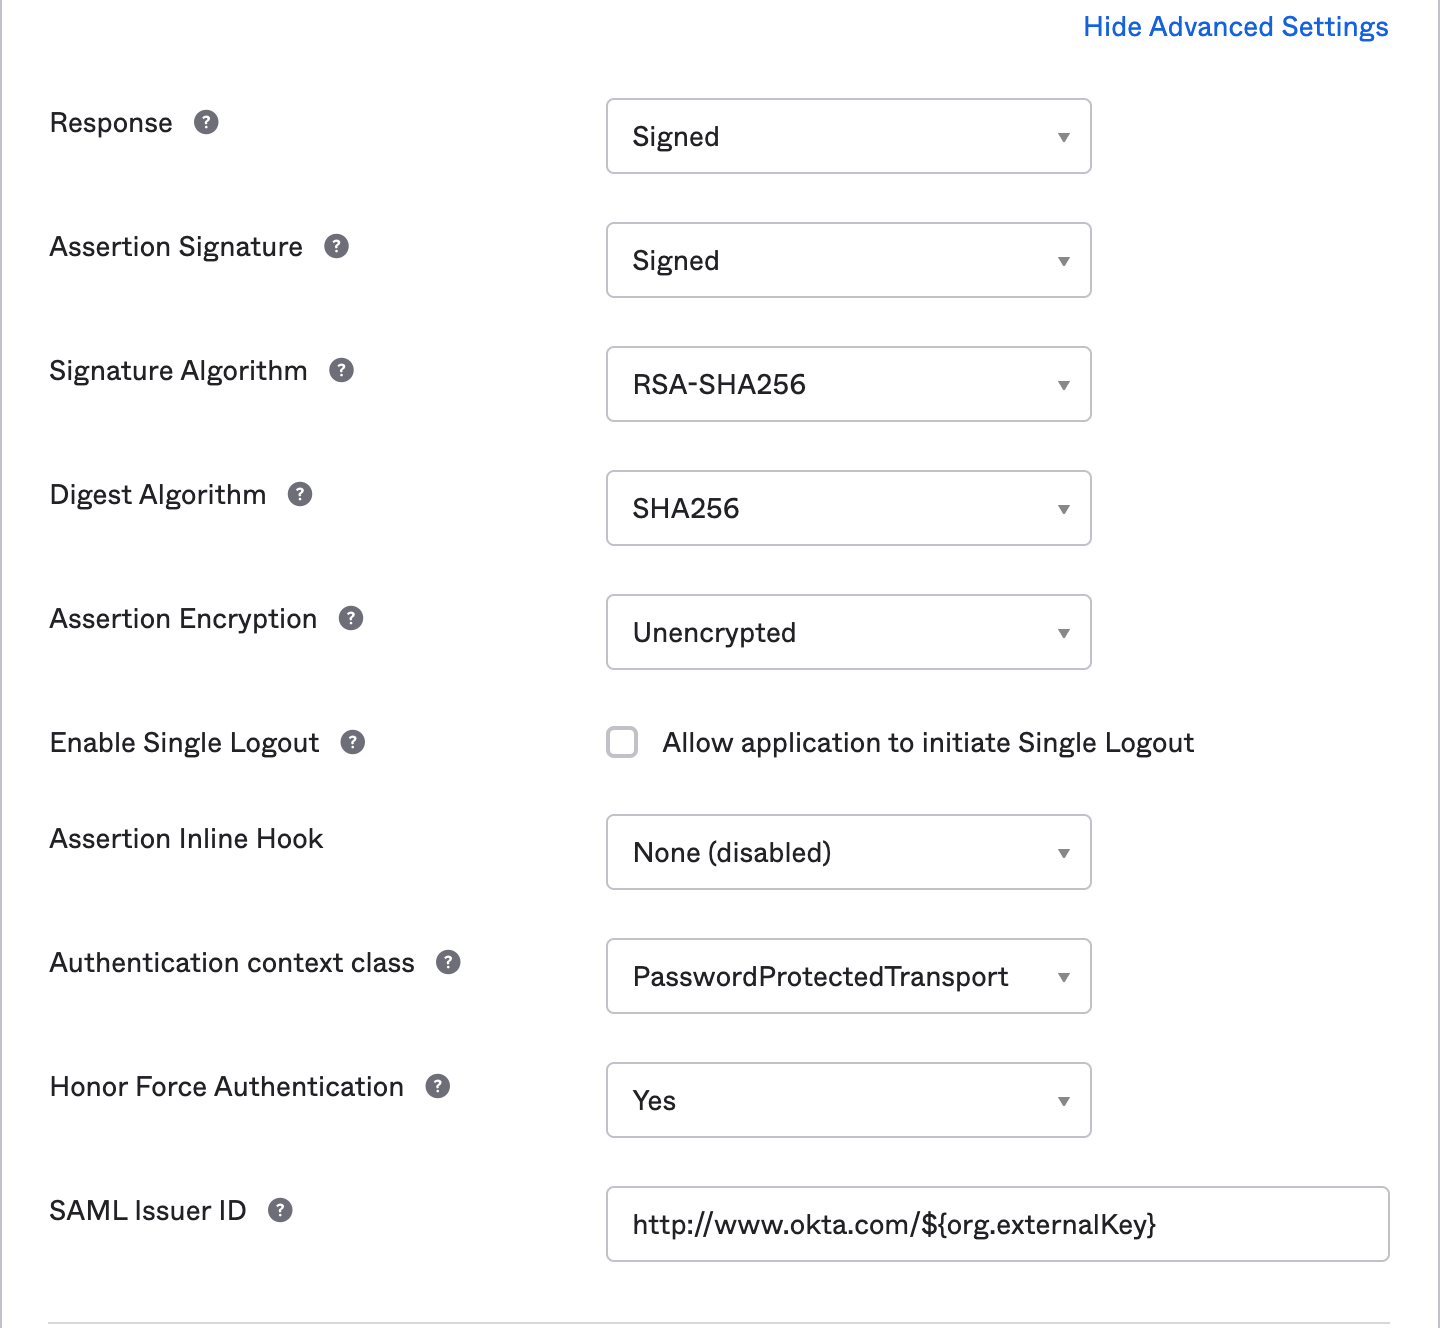
We will also add in more information by clicking the Show Advanced Settings link, entering the following info:
Response:SignedAssertion Signature:SignedSignature Algorithm:RSA-SHA256Digest Algorithm:SHA256Assertion Encryption:UnencryptedEnable Single Logout: No (unchecked)Assertion Inline Hook:None (disabled)Authentication context class:PasswordProtectedTransportHonor Force Authentication:YesSAML Issuer ID:http://www.okta.com/${org.externalKey}(default value)
Note: These are default values for the most part, and can be further customized if desired.
Your setup will look roughly like this:
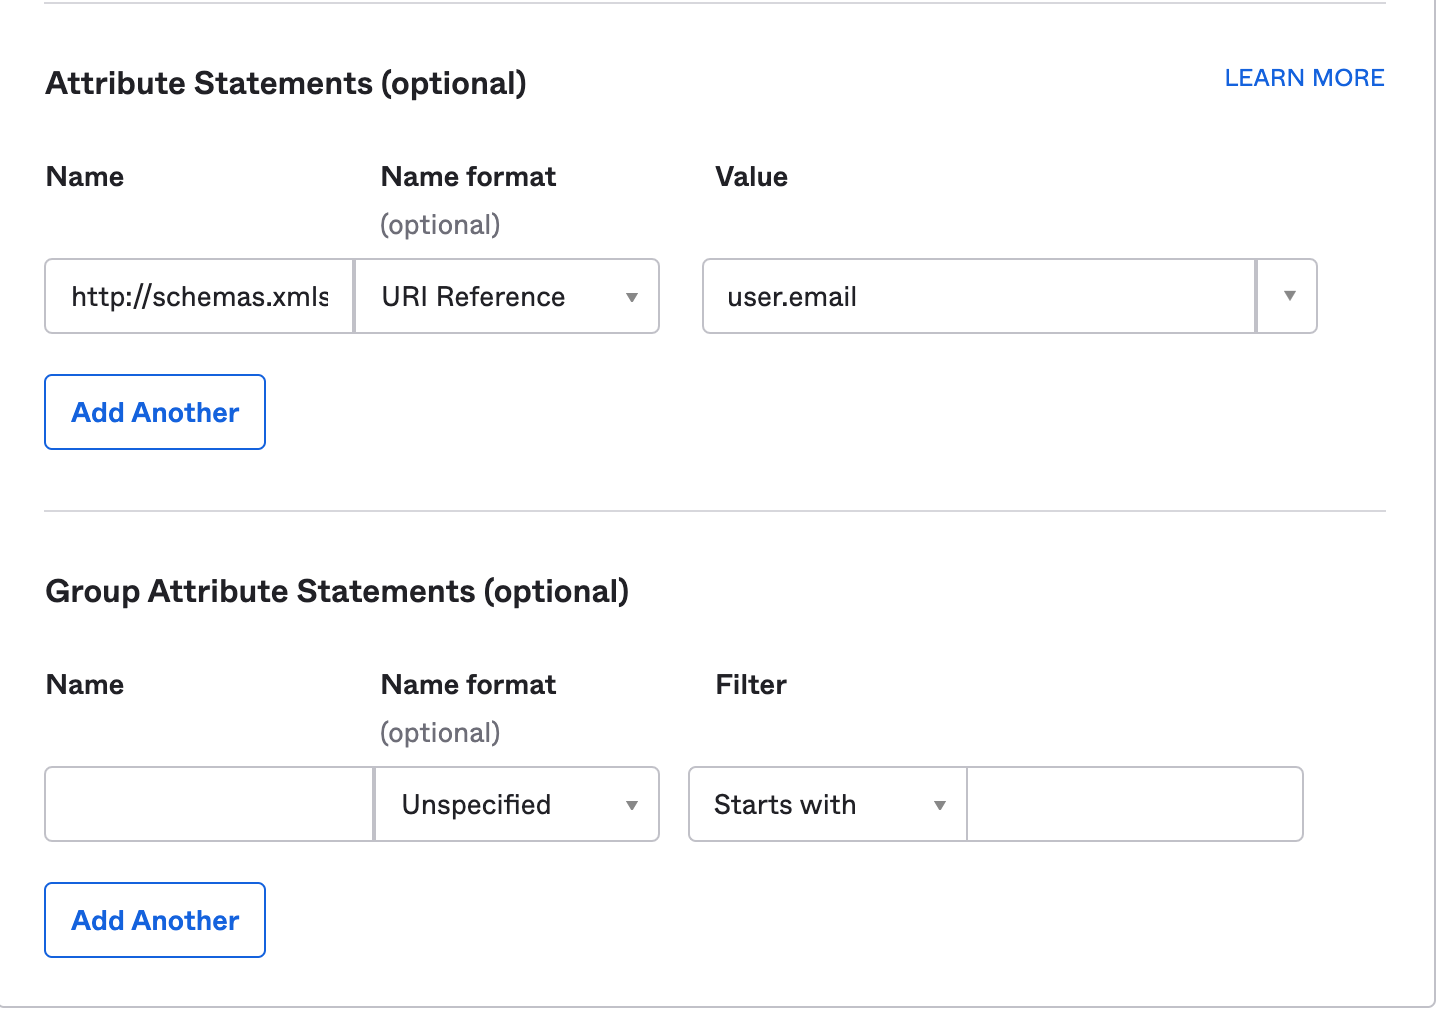
We will now setup the assertions for the username with the following values in the Attribute Statements section:
Name:http://schemas.xmlsoap.org/ws/2005/05/identity/claims/upnName Format:URI ReferenceValue:user.email(if you wish to use a different value for the username, change it here)
Click Next, which will ask you for some basic information about your app:
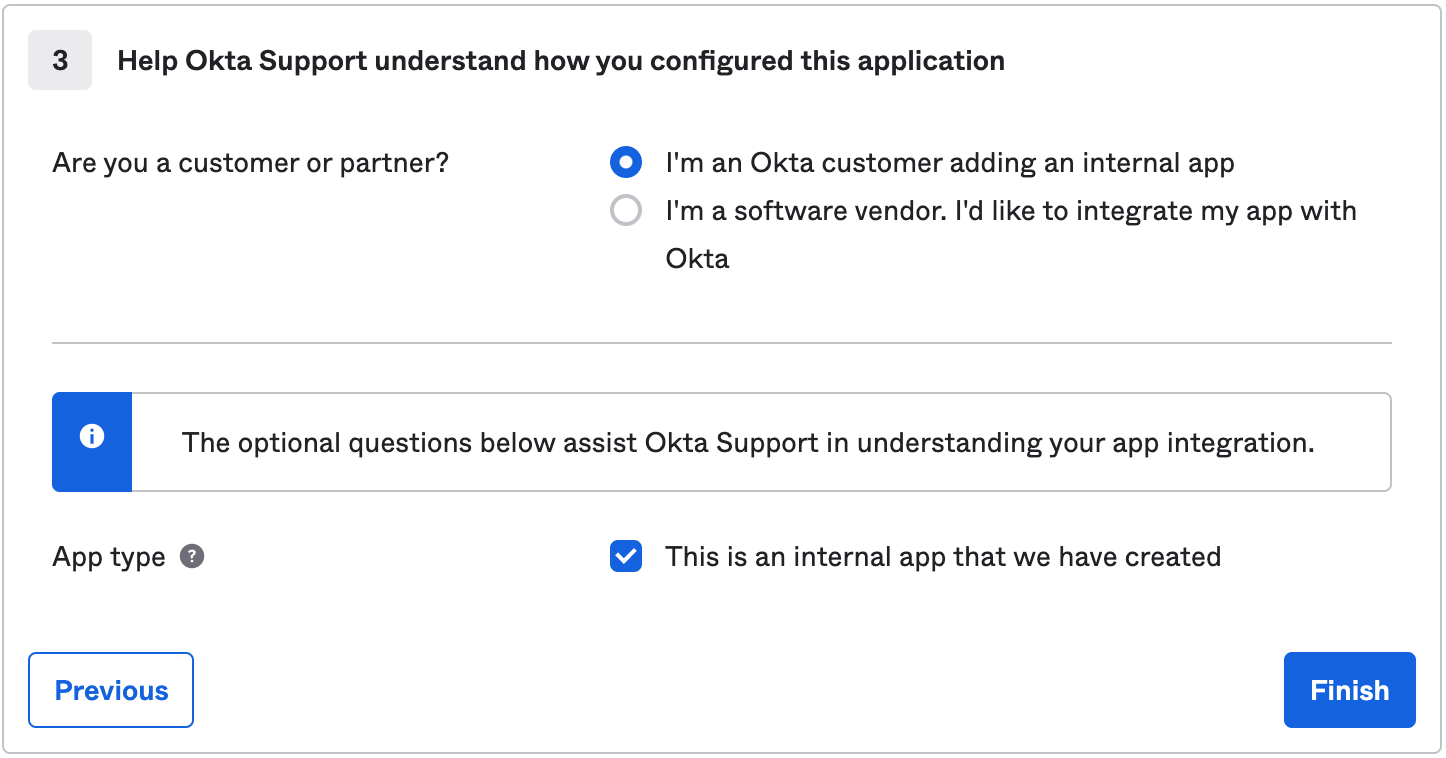
Your app is now created. Click on the View Setup Instructions button:
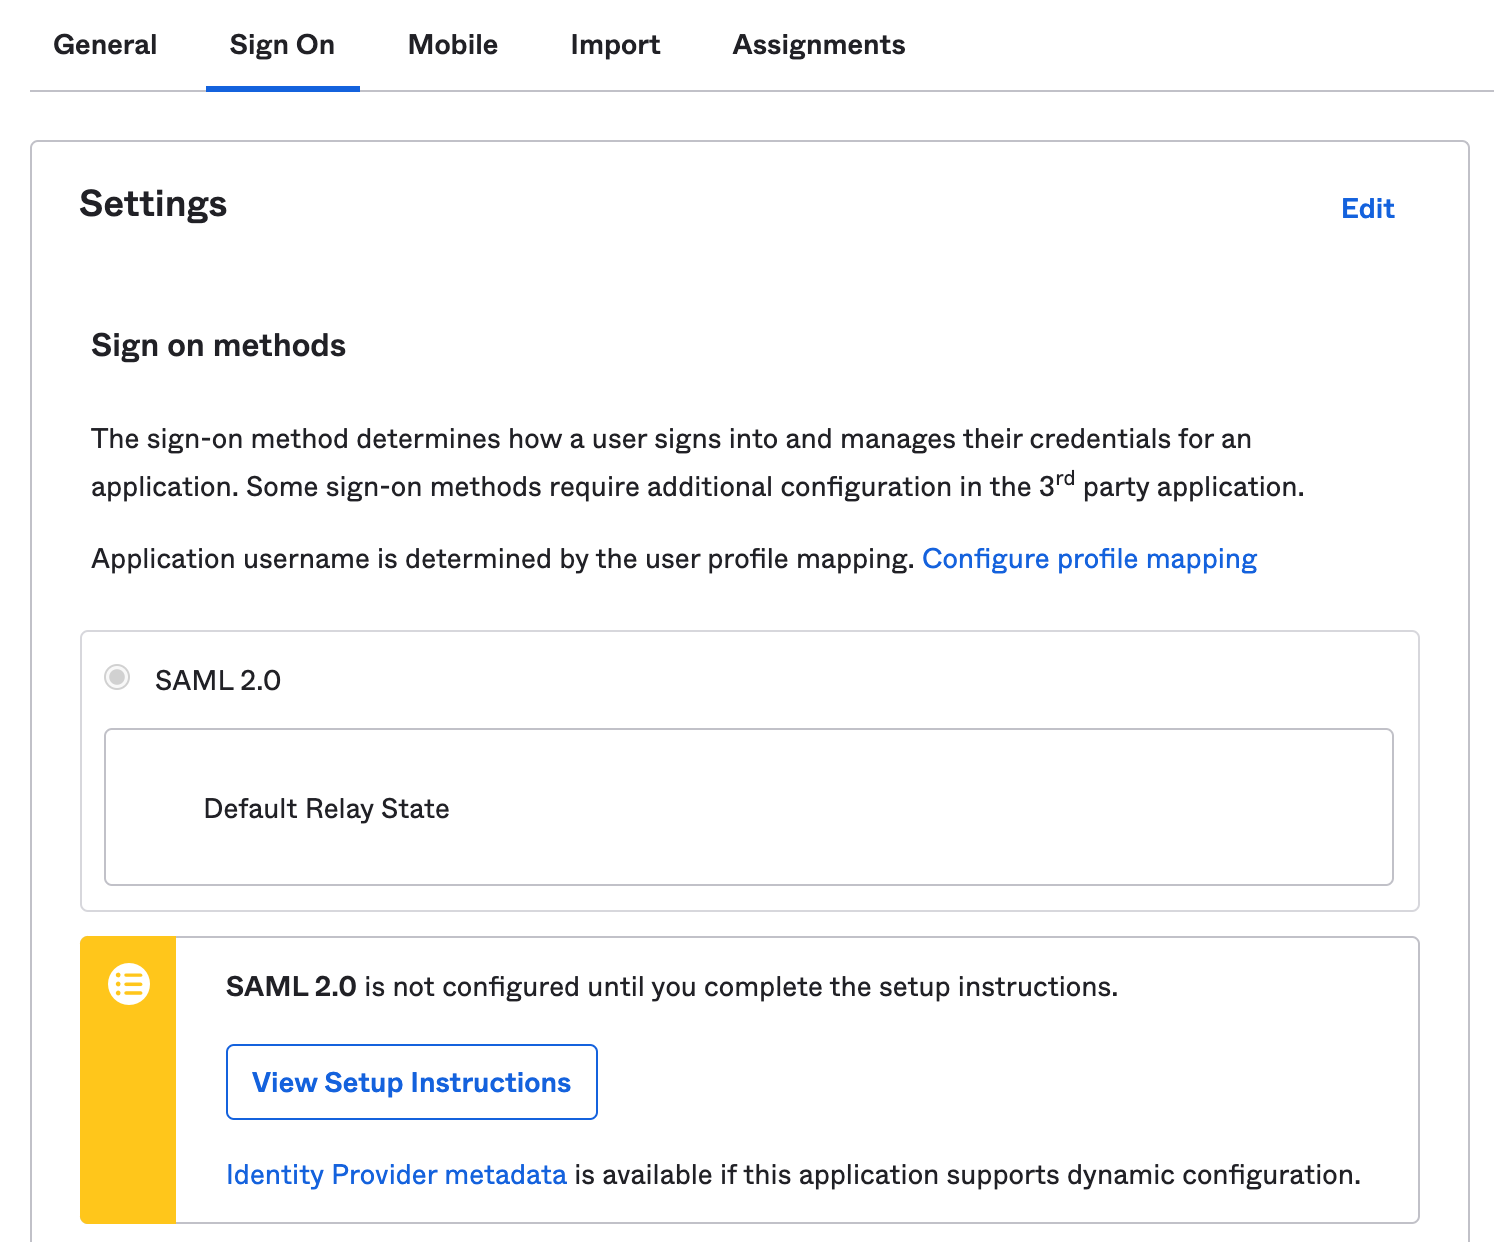
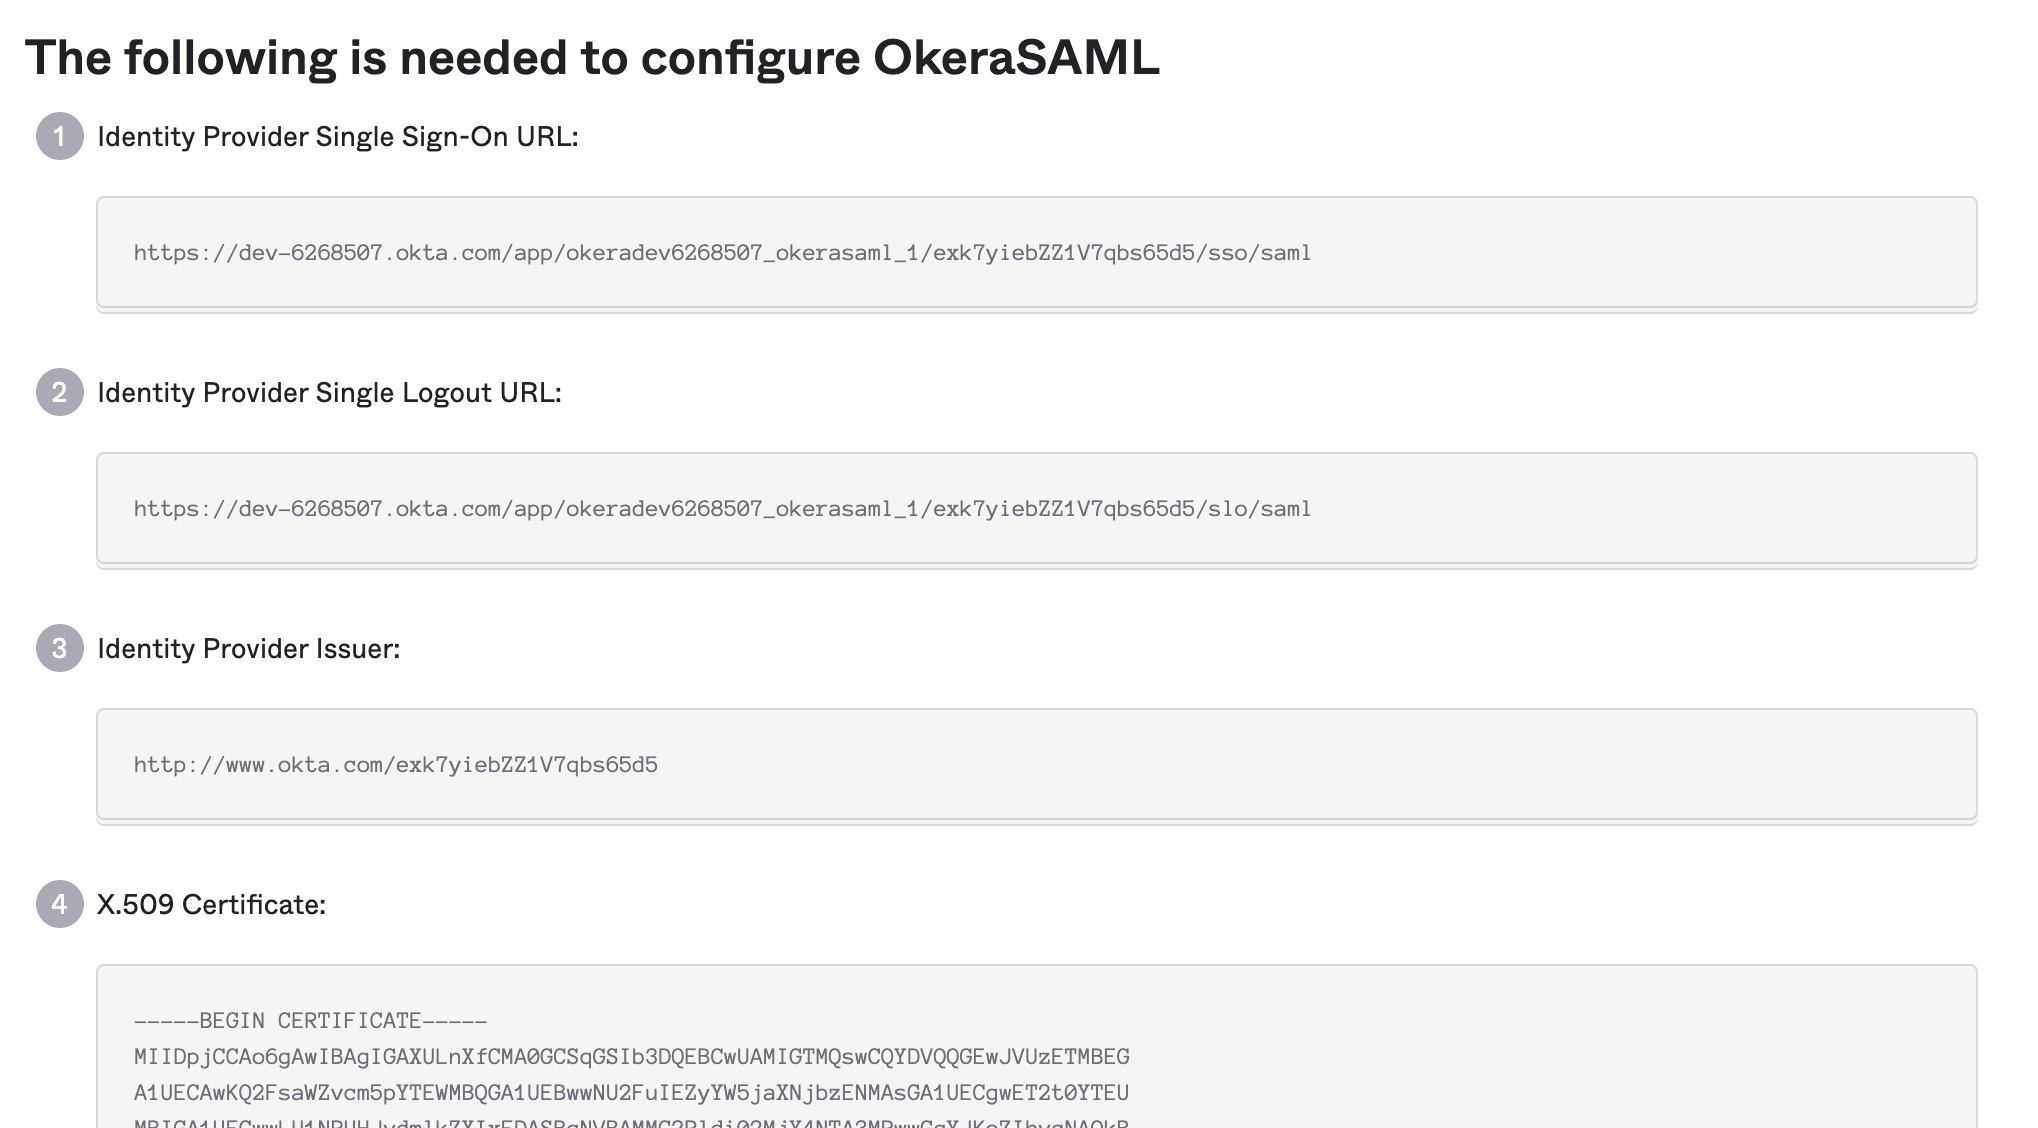
Keep the SAML information open:
Configuring Okera for Okta SAML
Once you've created your SAML app, you can configure Okera for SAML.
You will be following the instructions in the general SAML guide guide, and your saml.json will look like this:
{
    "okera_url": "https://okera.company.com:8083/,
    "lowercaseEncoding": false,
    "strict": true,
    "debug": false,
    "sp": {
        "entityId": "https://okera.company.com:8083/api/saml/metadata",
        "assertionConsumerService": {
            "url": "https://okera.company.com:8083/api/saml?acs",
            "binding": "urn:oasis:names:tc:SAML:2.0:bindings:HTTP-POST"
        },
        "singleLogoutService": {
            "url": "https://okera.company.com:8083/api/saml?sls",
            "binding": "urn:oasis:names:tc:SAML:2.0:bindings:HTTP-Redirect"
        },
        "NameIDFormat": "urn:oasis:names:tc:SAML:1.1:nameid-format:unspecified",
        "x509cert": "<An x509 certificate in PEM format>",
        "privateKey": "<An x509 certificate private key in PEM format>"
    },
    "idp": {
        "entityId": "http://www.okta.com/exk7yiebZZ1V7qbs65d5",
        "singleSignOnService": {
            "url": "<Okta single sign on url from SAML information page>",
            "binding": "urn:oasis:names:tc:SAML:2.0:bindings:HTTP-Redirect"
        },
        "singleLogoutService": {
            "url": "<Okta logout / SLO url from SAML information page>",
            "binding": "urn:oasis:names:tc:SAML:2.0:bindings:HTTP-Redirect"
        },
        "x509cert": "<Okta certificate from SAML information page>"
    },
    "security": {
        "nameIdEncrypted": true,
        "authnRequestsSigned": true,
        "logoutRequestSigned": false,
        "logoutResponseSigned": false,
        "signMetadata": true,
        "wantMessagesSigned": false,
        "wantAssertionsSigned": false,
        "wantNameId": true,
        "wantNameIdEncrypted": false,
        "wantAssertionsEncrypted": false,
        "signatureAlgorithm": "http://www.w3.org/2000/09/xmldsig#rsa-sha1",
        "digestAlgorithm": "http://www.w3.org/2000/09/xmldsig#sha1"
    },
    "contactPerson": {
        "technical": {
            "givenName": "Company",
            "emailAddress": "okera@company.com"
        },
        "support": {
            "givenName": "Company",
            "emailAddress": "okera@company.com"
        }
    },
    "organization": {
        "en-US": {
            "name": "okera @ company",
            "displayname": "Okera SAML App",
            "url": "http://okera.company.com"
        }
    }
}
Note: You will want to replace all the values in
<...>as well as references tohttps://okera.company.com:8083with your appropriate URL.
Configuring Okta Group Resolution
Okta can serve as a group provider by enabling its LDAP interface capability, which Okera will connect to in order to resolve groups on-demand, avoiding the need to synchronize groups between the two.
Configuring Okta
Enabling the LDAP Integration
Follow the Okta instructions to enable the Okta LDAP interface here.
Once enabled, note the values in the Settings page.
Note: You may need to ask Okta Support to enable this capability for your Okta account, which can be done via an Okta Support ticket.
Creating a service user
To access the Okta LDAP interface, a user that has sufficient permissions to read user info and group mappings is required.
It is recommended to create a dedicated service user for this, and grant it the Read only administrator administration privilege:
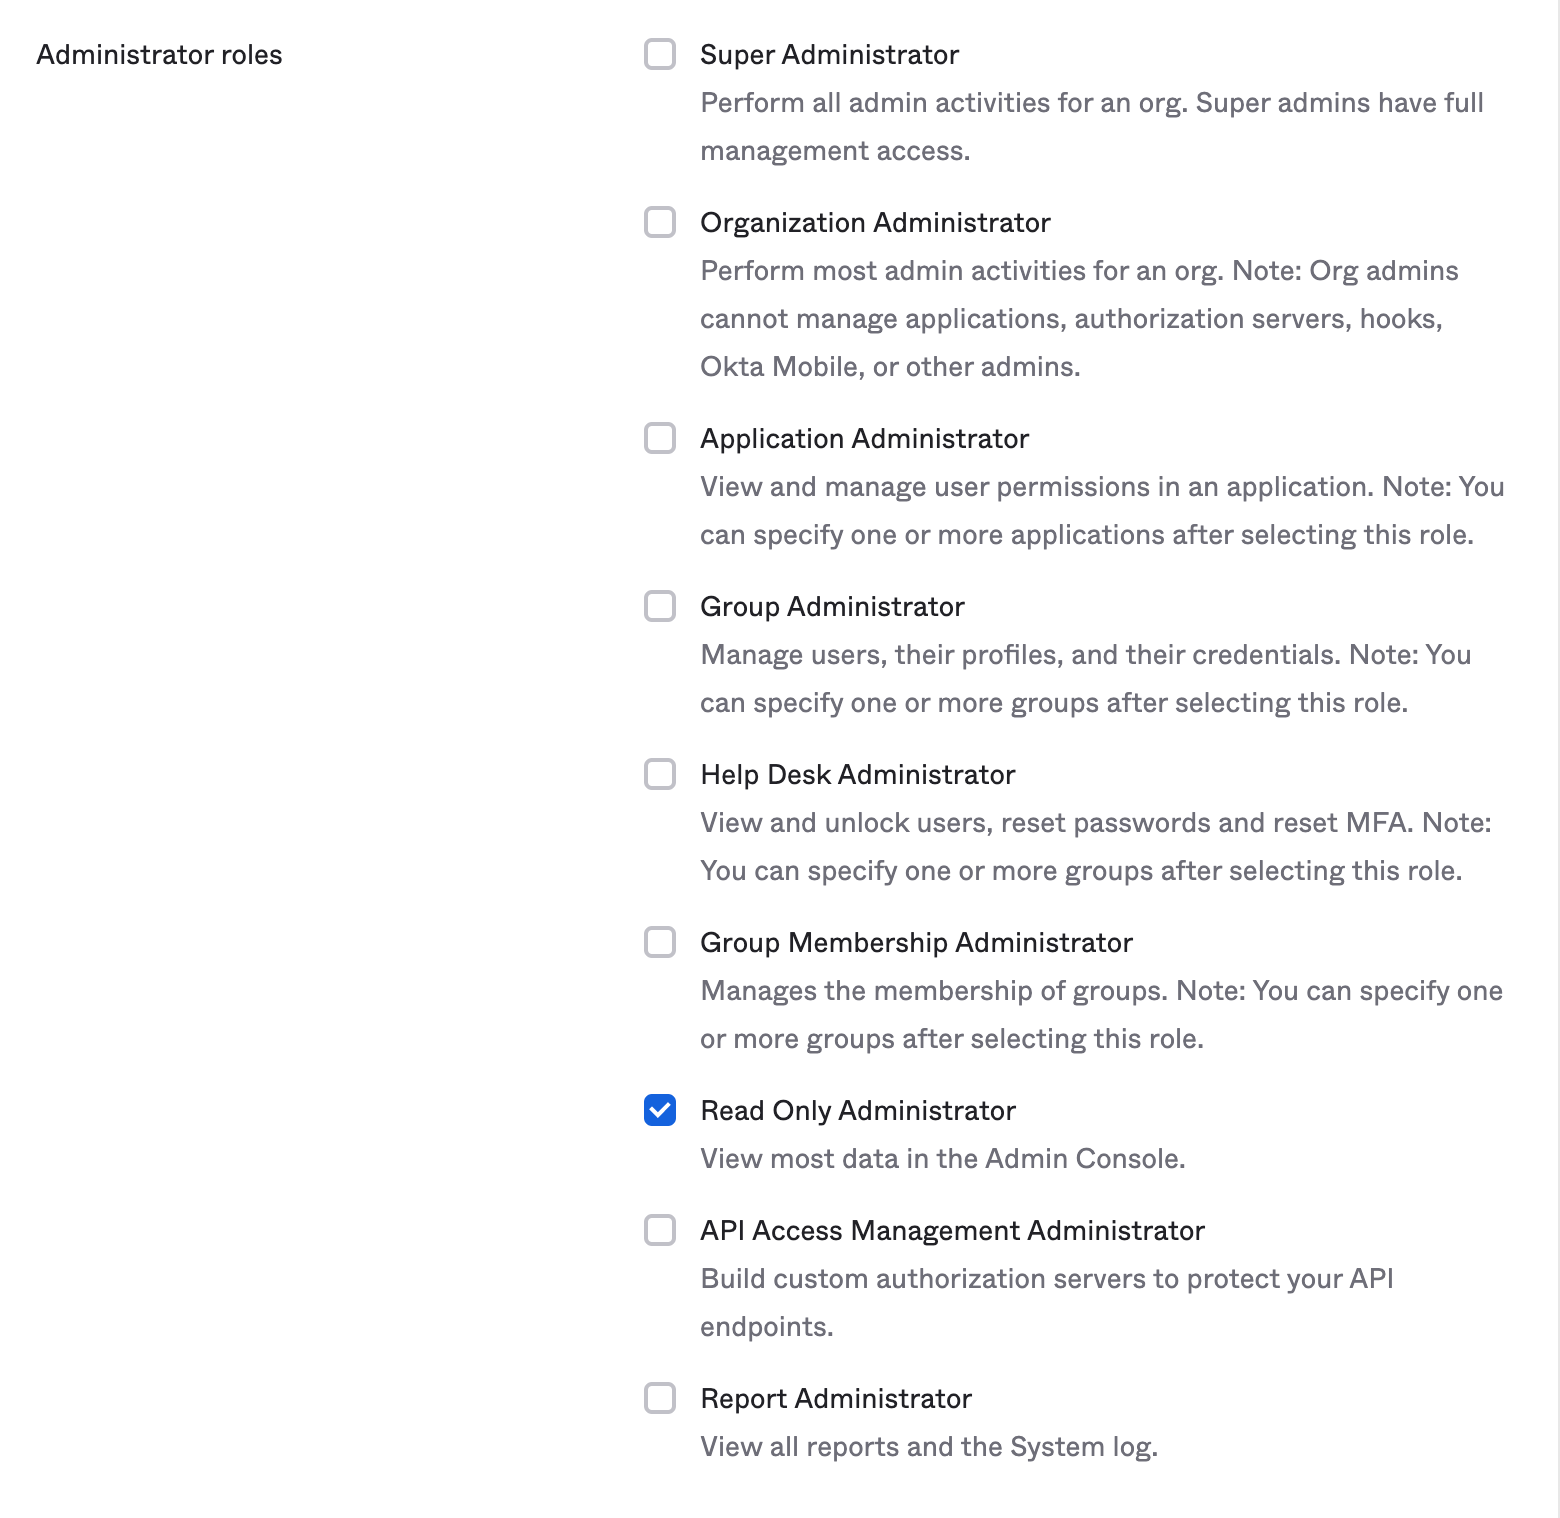
This user (e.g. okera_okta@company.com) will then be used in the Okera/Okta configuration.
Configuring Okera
Once you've enabled the LDAP integration and created a service user, you can configure Okera.
Put the following values in your Okera configuration file (replacing the <...> values and company.com values):
GROUP_RESOLVER_LDAP_HOST: "ldaps://<Okta LDAP host, e.g. company.ldap.okta.com>"
GROUP_RESOLVER_LDAP_PORT: 636
GROUP_RESOLVER_LDAP_USE_SSL: true
GROUP_RESOLVER_LDAP_BASE_DN: "<Okta Base DN, e.g. dc=company, dc=okta, dc=com>"
GROUP_RESOLVER_LDAP_USER_SEARCH_FILTER: "(&(objectClass=person)(uid={0}@company.com))"
GROUP_RESOLVER_LDAP_GROUP_SEARCH_FILTER: "(objectClass=groupofUniqueNames)"
GROUP_RESOLVER_LDAP_MEMBER_FIELD_NAME: "uniqueMember"
GROUP_RESOLVER_LDAP_USER: "<Okta service user DN, e.g. uid=okera_okta@company.com,dc=company,dc=okta,dc=com>"
GROUP_RESOLVER_LDAP_PASSWORD: "<Okta service user password>"
Note that you can change the GROUP_RESOLVER_LDAP_USER_SEARCH_FILTER to a different pattern if it is more suitable for your organization.