Create a Connection Using the UI
Complete the following steps to create a connection using the Okera UI. This will only create the connection. For information on crawling and registering datasets found for a connection, see Crawl Data and Register Datasets.
-
Log into the Okera UI as a user with permissions to create connections. See Who Can Manage Connections.
-
Select Connections on the UI side menu to access the Connections page and then select
 on the Connections page.
 Alternatively, you can select the
 button on the Call-to-Action Home page in the Connections section and follow the prompts.
The Create connection dialog appears.
-
Specify a connection a name in the Connection name field and then select your Connection Type.
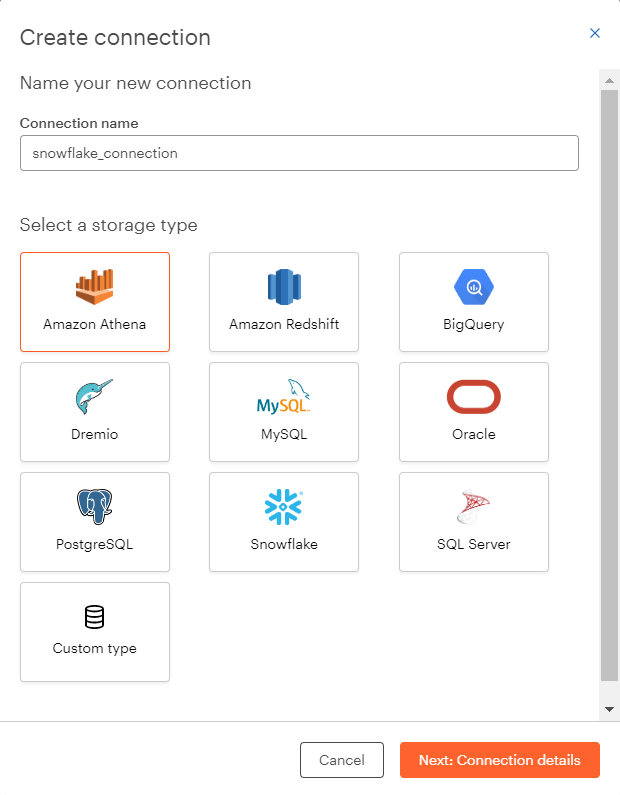
Note: If you are using a SaaS tenant, only the data source types supported for your tenant are shown.
-
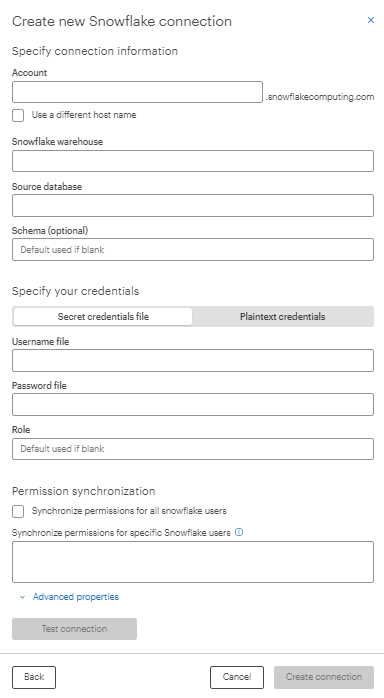
Specify the relevant connection properties for your data source. For examples of the specific properties for each data source please click on the docs link for your specific data source. The example below is the dialog that appears for a Snowflake data source.
-
Select whether you will provide plaintext or secure credentials. Select Plaintext credentials to specify plaintext credentials; select Secret credentials file to specify a path to the secrets credentials file. Okera recommends that you always use secure credentials. See Provide Secure Credentials.
Note: Use of plaintext credentials must be enabled using the
OKERA_SECRET_PREFIXandOKERA_SECRET_STOREconfiguration parameters in the the YAML file (the default file isvalues.yaml) for your Okera cluster. -
Optionally, provide advanced properties for the connection in the Advanced properties box.
-
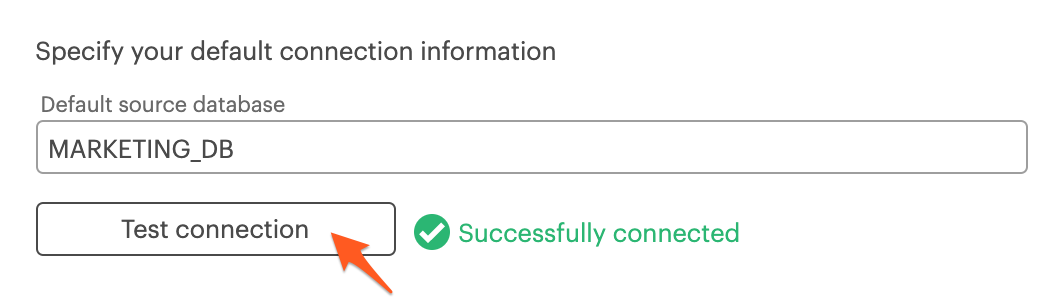
Test your connection to verify the properties are correct. Select
 .
.
-
If the connection test is successful, select
 . The Create crawler dialog appears.
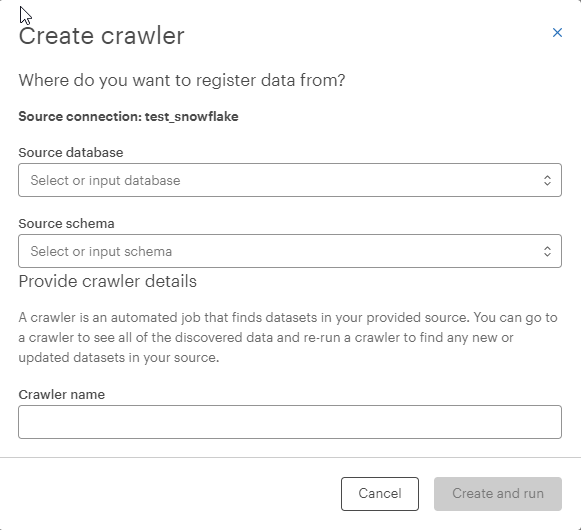
-
Select a source database for this connection's crawler from the drop-down list in the Source database field.
-
Select a schema for the crawler from the drop-down list in the Source schema field.
-
Specify a name for the crawler in the Crawler name field.
-
Select
 to create and run the crawler for this connection.
After you've created a connection, crawl the connection for the datasets it contains and register the datasets inside the Okera catalog. See Crawl Data and Register Datasets.