Create and Run a Crawler
A crawler automatically connects to your data store and discovers its datasets.
To create and run a crawler in the UI:
-
Log into the Okera UI as a user with permissions to create crawlers. See Who Has Access to Crawlers.
-
Select Register on the UI side menu to access the Registration page and then select
 on the Registration page.
Alternatively, you can select the
 button on the Call-to-Action Home page in the Crawlers section and follow the prompts.
 -
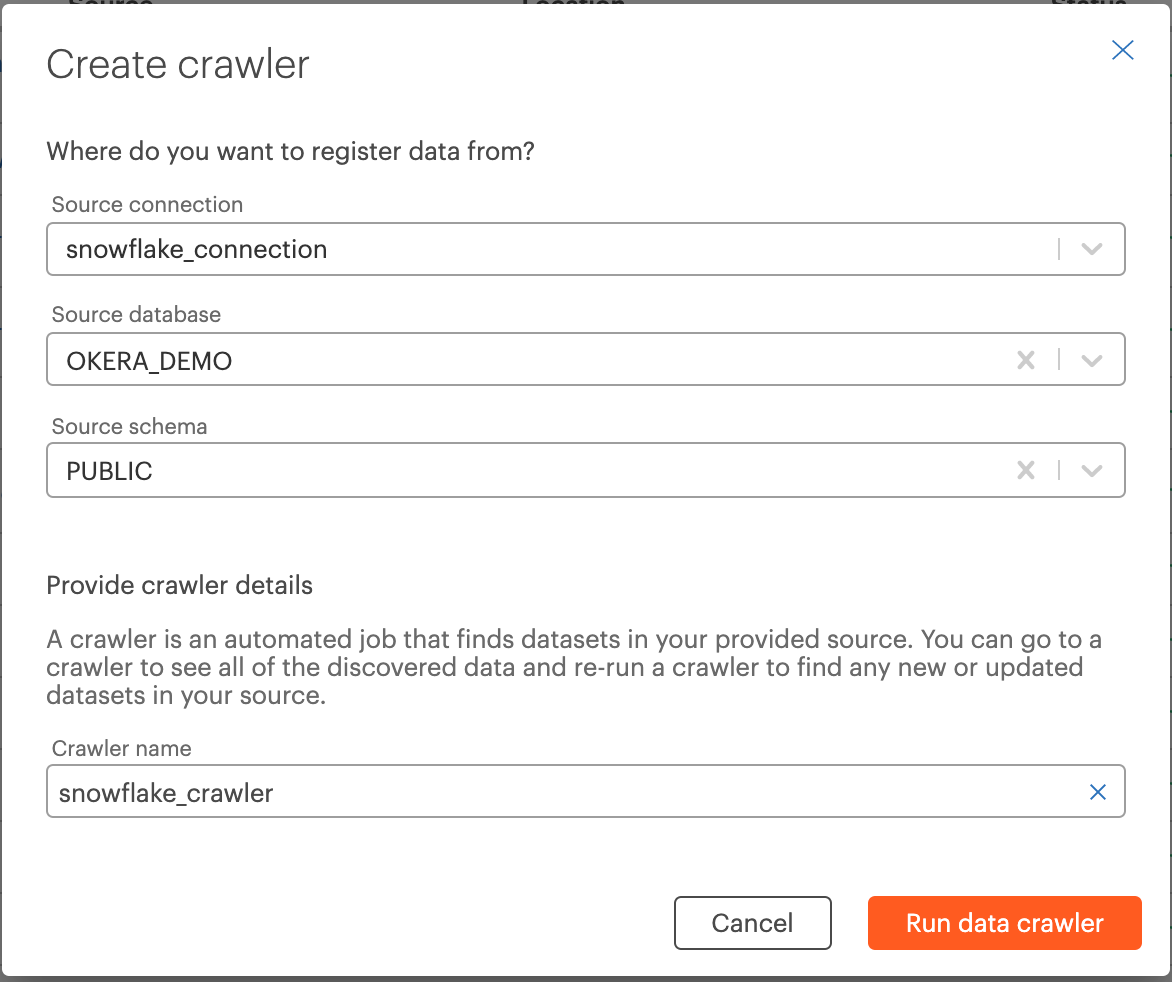
The Create crawler dialog appears.

-
Supply the following values on the dialog:
-
Use the drop-down list in the Source connection box to select the Okera connection to the data store you wish to crawl. For more information about connections see Connection Overview.
-
For relational data store connections, use the drop-down lists in the Source database and Source schema boxes to select the database and schema to be crawled.
For object storage connections, specify the path for the bucket or folder to be crawled. For more information about configuring crawlers for object storage connections, see Configure Object Storage Crawlers.
-
Specify a unique name for your crawler in the Crawler name box.
-
-
Select
 on the modal. The crawler is saved and runs. It appears in the list of crawlers on the Registration page with the status
 Crawling…while it is running. When the crawler finishes running, you can register the datasets it discovered to Okera databases for policy enforcement. See Register Datasets.
See Crawler Questions and Answers to diagnose any common errors that occur during crawler creation and processing.