Connecting to Microsoft Power BI
Before you begin
In order to connect to Okera's Presto endpoint via Power BI you will need the following:
- Presto ODBC Driver
- Okera's Presto Host/Port
- Your authentication credentials (depending on what your cluster is setup to authenticate with this could be LDAP or JWT)
Download the Presto ODBC driver
You will need to download a Presto ODBC driver in order to connect to Power BI. You can download a free version from Tableau by selecting "Presto" and then "Windows" from Tableau's drivers page. Download the last option on the page for Tableau Desktop and Server. Alternatively you can also purchase Simba's Presto ODBC Driver.
Setting up the DSN (Data Source Name)
The next step in configuring the Presto ODBC driver is setting up the DSN.
-
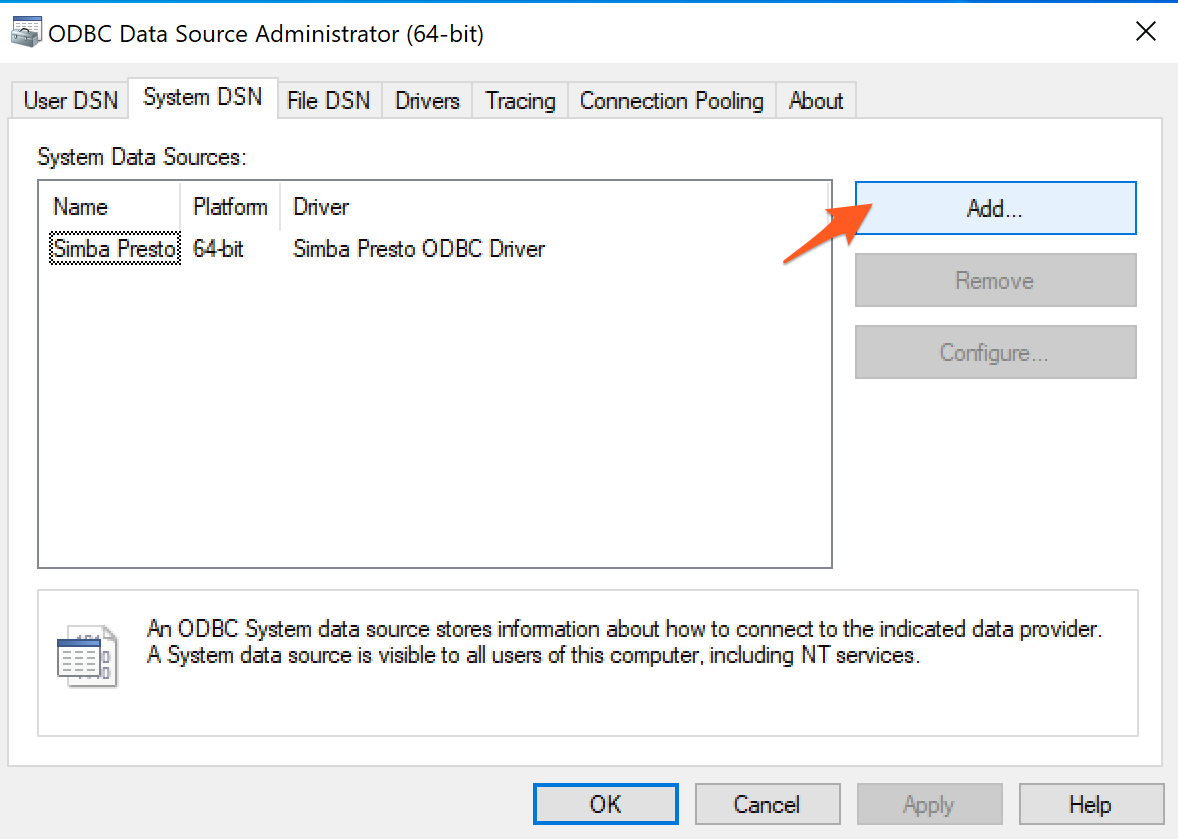
Open up the ODBC Data Sources App (odbcad64.exe) on Windows
-
Navigate to System DSN tab and press Add.
-
Select the Simba Presto ODBC Driver.
-
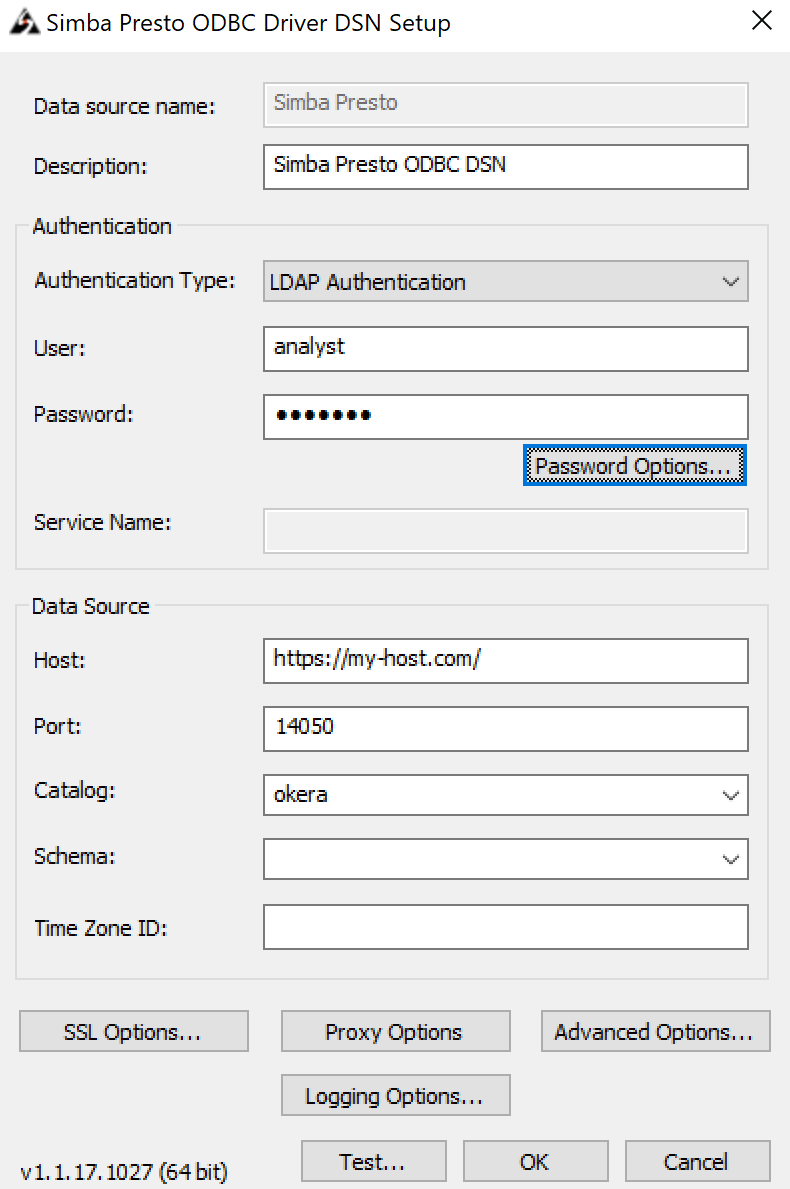
Specify a data source name and description for Data Source Name and Description.
-
For Authentication Type select LDAP Authentication.
-
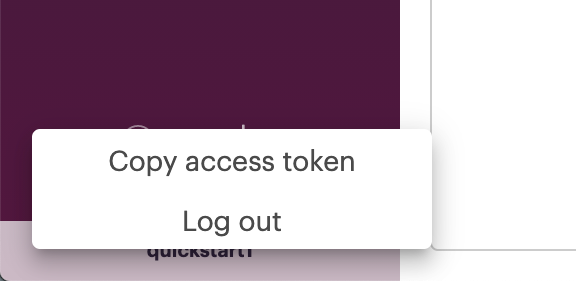
Enter your username and password in the User and Password fields. Your password will be either your LDAP credentials or your token (depending on how your Okera cluster is configured). If it is a token, you can copy your token by clicking on user profile icon in the bottom left corner of the Okera UI.
-
The Host and Port information should correspond to Okera's Presto endpoint
hostand itsport(the default is 14050). You can find these on the *System page in the Okera UI. -
For Catalog, specify
okera.
-
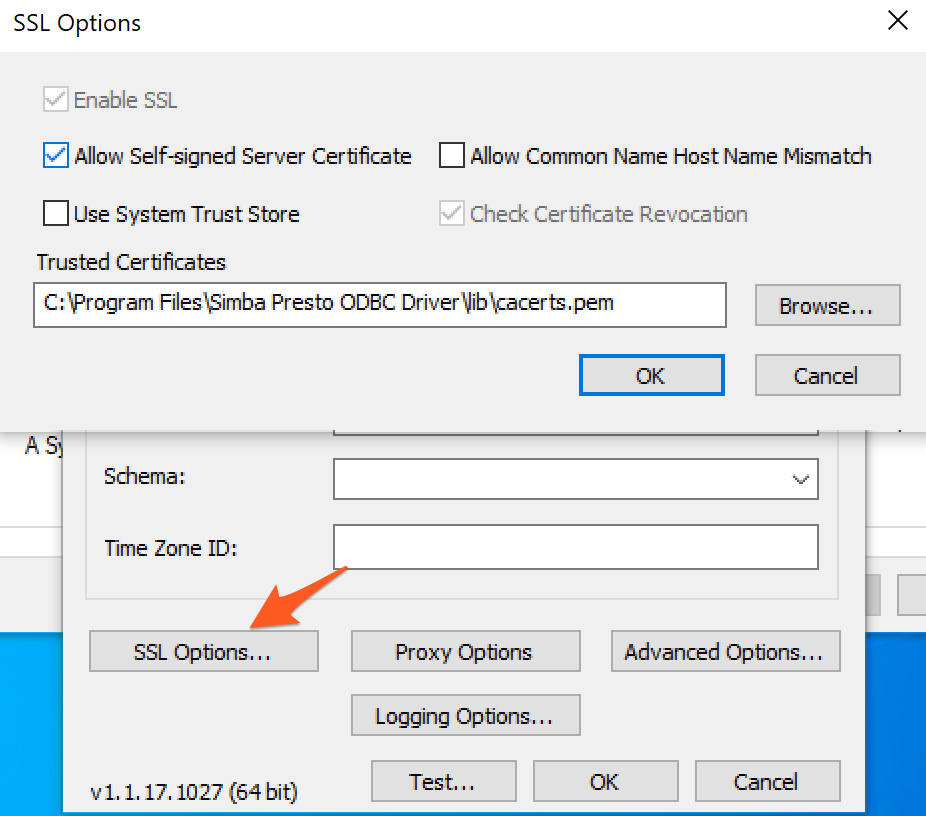
SSL configuration: If your Okera cluster uses an SSL certificate from a trusted Certificate Authority, you only need to make sure Enable SSL is selected. If you have a self-signed certificate, you’ll need to configure the Simba driver to accept self-signed certificates.
Connecting in Power BI
-
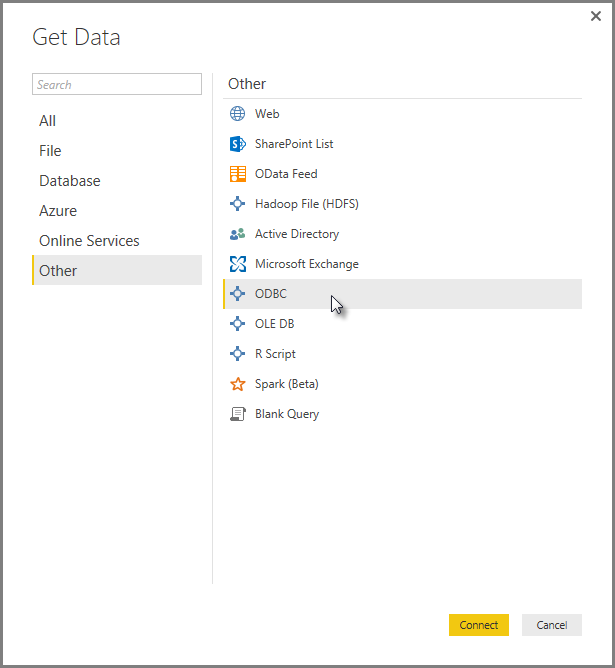
In Power BI press Get Data, and click More…
-
Navigate to Other and select ODBC.
-
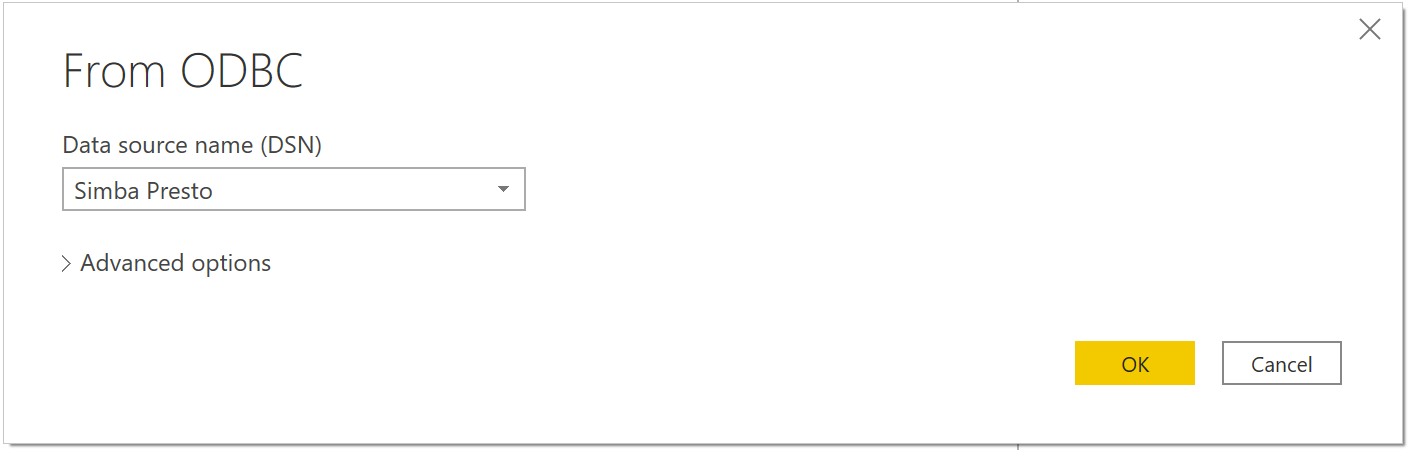
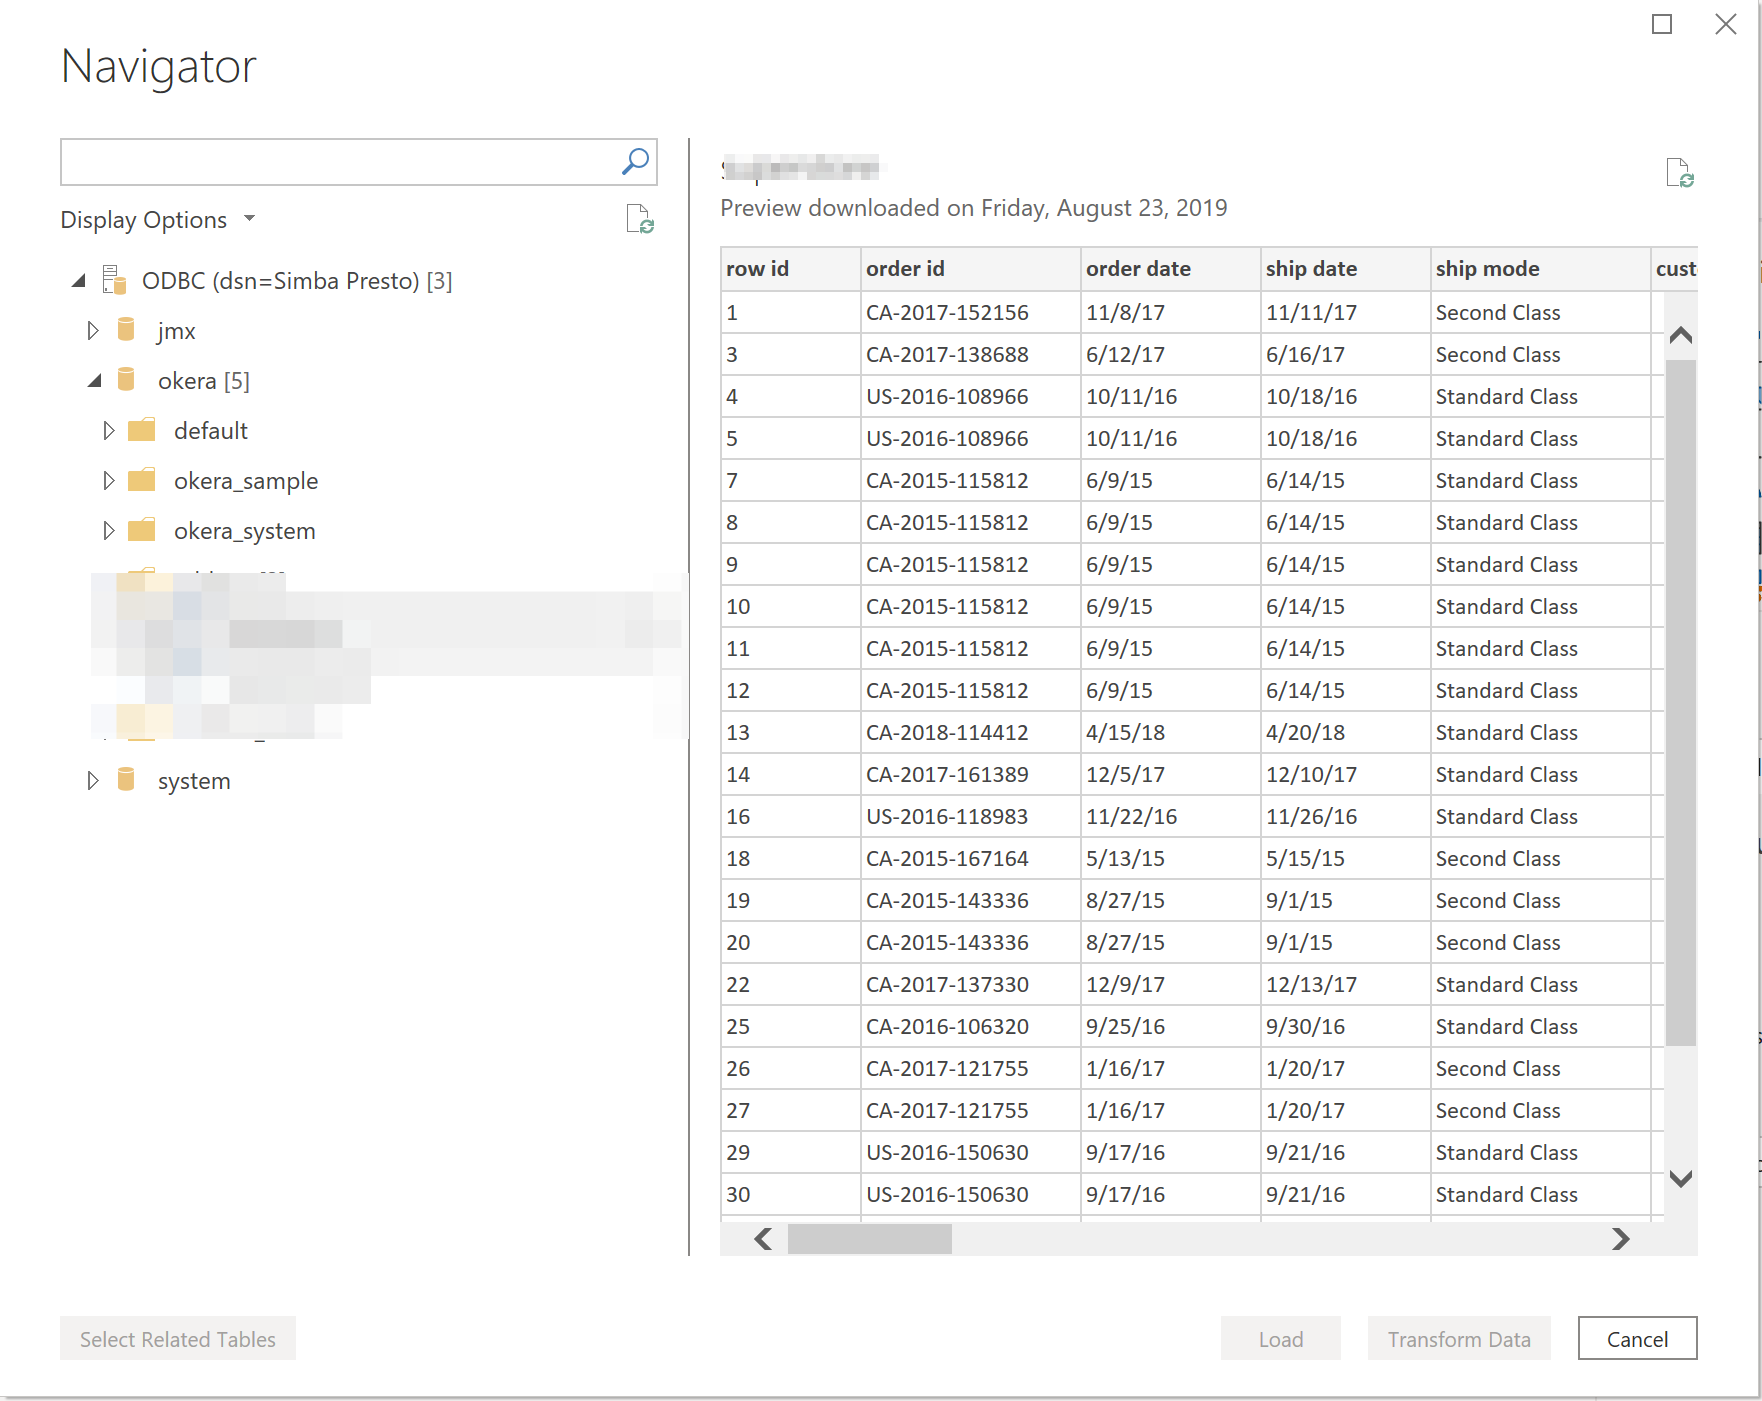
Select the Simba Presto DSN (or whatever name you specified above). Optionally, specify a query. Otherwise select OK and select the datasets to load.
Note: When specifying a query, do not include a semicolon at the end.