Register New Data
After setting up your new sales organization, you may want to protect data for other areas of your organization, such as for Marketing or Human Resources. In this section of the Okera test drive, we demonstrate how to add and register new data in Okera so you can grant access and protect it.
Note: At the end of all of the sections on this page, a video of all of the steps in the sections is provided.
What Are Crawlers?
A crawler automatically connects to your data source and locates and pulls any discovered datasets (tables) into Okera.
Create a Database
To create a new database for the new data, complete these steps:
-
Log in to Okera as
admin_<tenant>. -
Navigate to the Data page and select
 . The Create new database dialog appears.
 -
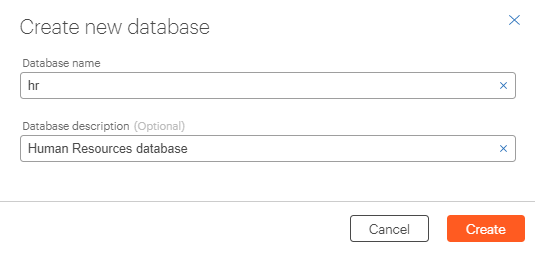
Specify hr in the Database name box and add a description.
-
Select
 . The Database created dialog appears.
 -
Select
 . The Data page appears for the
 hrdatabase.
Create a Crawler
To create a crawler to crawl your data and pull datasets (tables) into Okera, complete these steps:
1.Select Go to Registration to begin the crawler creation process and register new datasets in the database. The Registration page appears.
-
Select
 to open to the Create crawler dialog.
 -
Leave the Source connection set to Object storage on the dialog.
-
Type
s3://okera-lake/hras the Amazon S3 bucket link where the HR data is stored in the Source path box. -
Type
hr_crawlerin the Crawler name box. The dialog should look like this: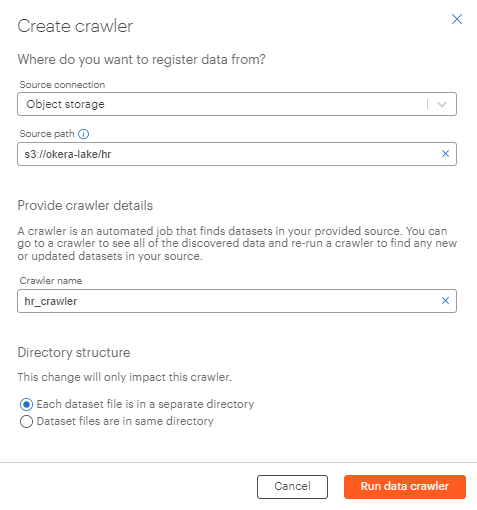
-
Select
 .
. -
Select
 . You are returned to the Registration page for the
 hr_crawler. -
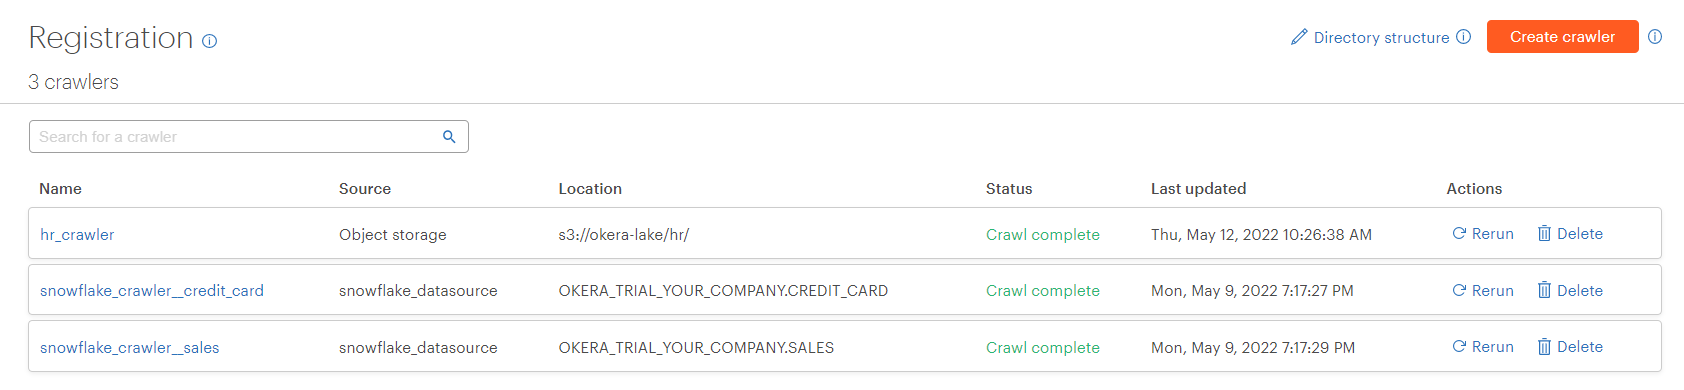
Select Registration in the left side menu to see all the crawlers defined in Okera. The Status column shows the status of the crawl.
Register Datasets
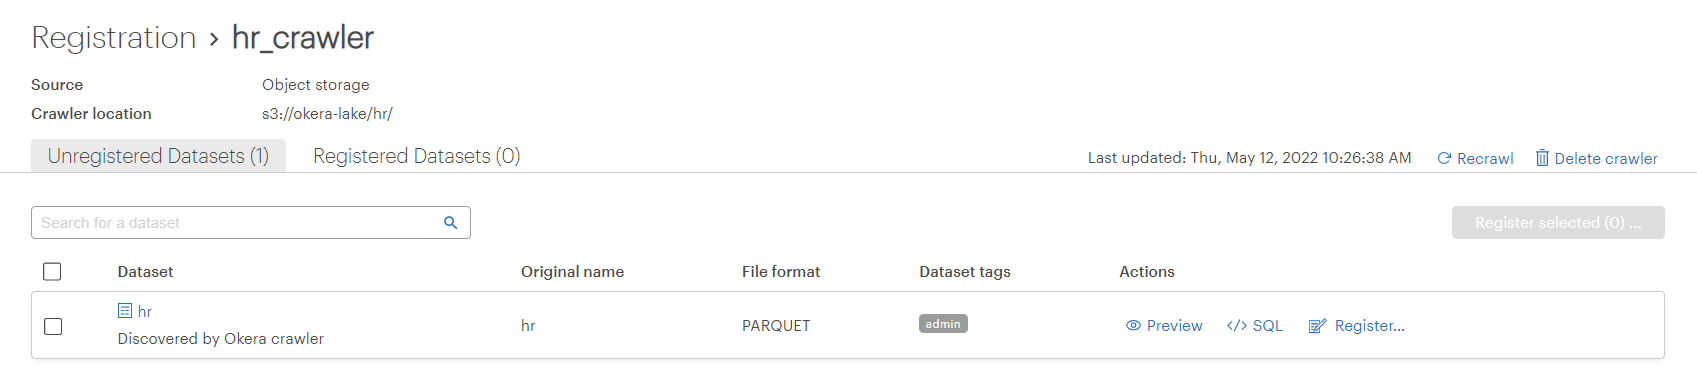
After the Status of the hr_crawler crawler changes to “Crawl complete,” you can register the data it found in Okera.
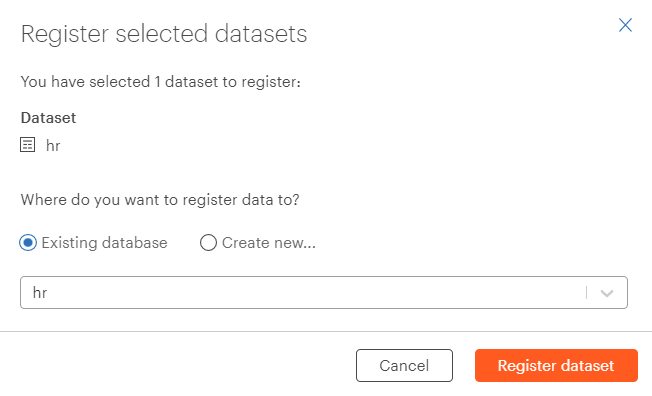
-
Select the
hr_crawlercrawler to view any unregistered data that the crawler discovered. One unregistered dataset was discovered from the crawler path we specified.
-
Select the checkbox to the left of the
hrdataset row. Then select . The Register selected datasets dialog appears.
 -
Make sure Existing database is selected on the dialog and then select the
hrdatabase from the dropdown menu. Then select . The Datasets registered successfully dialog appears. (Select OK on this dialog.)
-
Select Data on the left-hand menu and then select the
hrdatabase. You will see thehrdatabase now has thehrdataset in it. You can now grant access to your Human Resources team and create access conditions to protect your data.

Video
Here is a video of all the procedures above.