Connecting to SQL Workbench/J
A popular tool is the free SQL Workbench/J, which is written in Java and requires a working Java runtime to be installed. You then download the SQL Workbench/J archive as a single file and unpack it into a place of our choice.
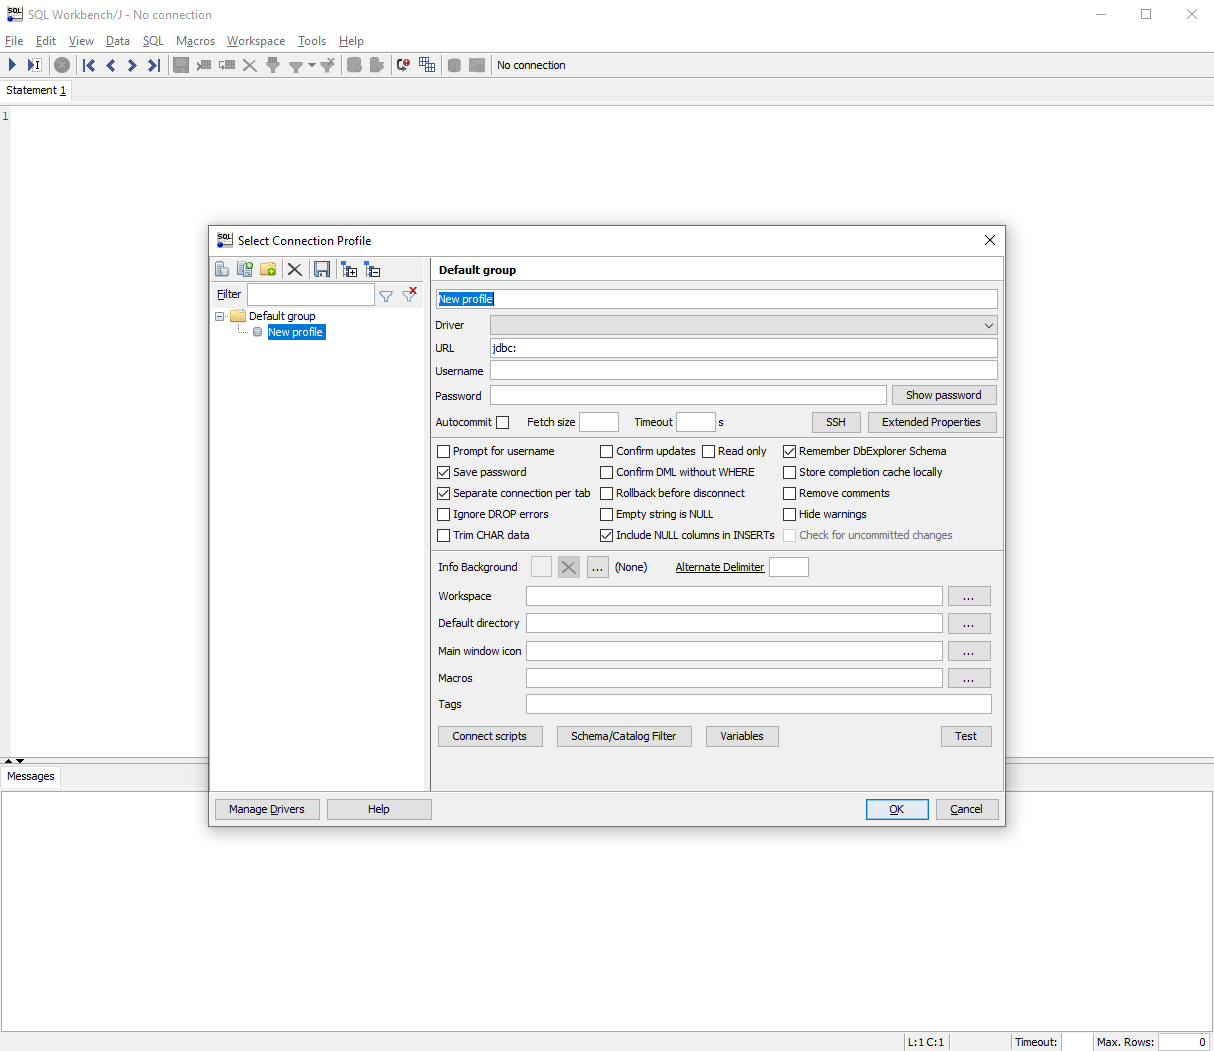
Once started, it presents the main window and also opens the Select Connection Profile dialog so that you can set up a first database connection:
The first step is to provide a driver JAR file so that SQL Workbench/J can connect to it via JDBC. Okera suggests you use its own Presto driver JAR file, as it adds additional options (see below). You can download the driver file from the following URL:
https://okera-release-useast.s3.amazonaws.com/2.18.1/presto-jdbc-driver/presto-jdbc-0.234.2.jar
-
On the Select Connection Profile dialog, select the Manage Drivers button at the bottom left. The Manage Drivers dialog appears.
-
Select the New Driver button (the
 icon at the top left of the Manage Drivers dialog) and specify a new name for the driver (for example,
 Okera). -
Select te Folder Open button (the
 icon) and select the location and JAR file of the Presto driver you downloaded.
 -
Ensure that the "Classname" is set to
com.facebook.presto.jdbc.PrestoDriverand select OK: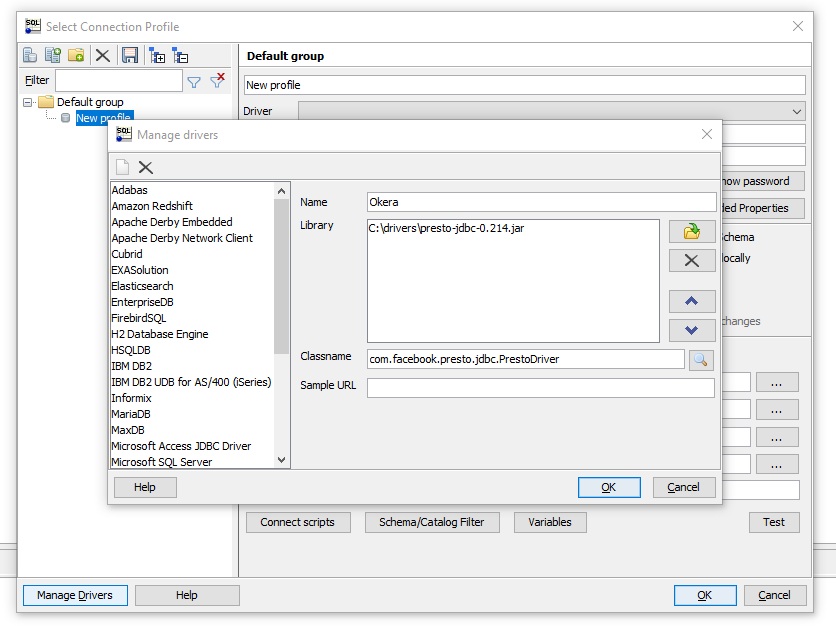
-
In the Select Connection Profile dialog, enter a name for the connection in the main field (for example,
Okera Cluster). -
Select the newly created driver (for example,
Okera) from the dropdown list, and paste the JDBC connection URL as copied from the Okera cluster UI (see Endpoint Information). -
Enter a username and password from your corporate directory service.
Note: Be sure to select the "Autocommit" box underneath the "Password" field. Otherwise, SQL Workbench/J will report pending transaction errors.
-
Finally, select the Extended Properties button. Select the new property button (the
icon) and create a new property called SSLwith the value oftrue. Select OK: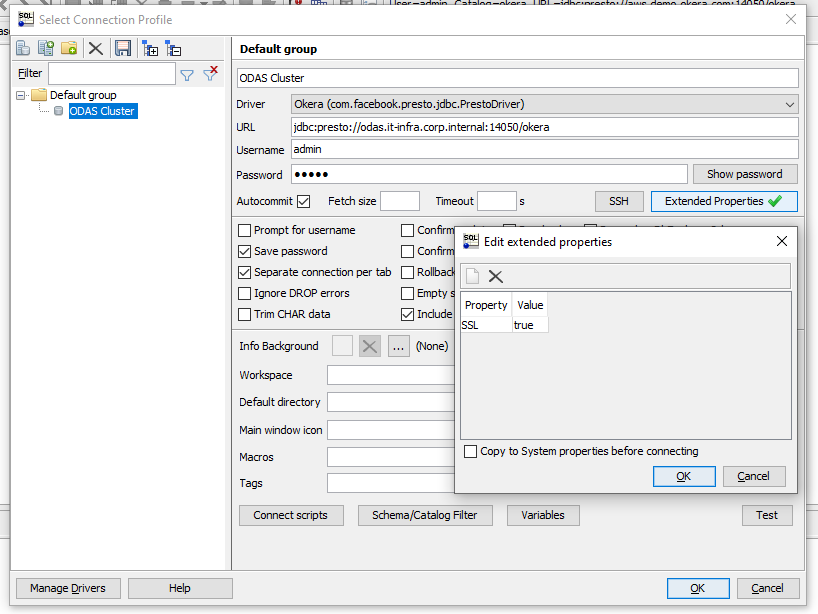
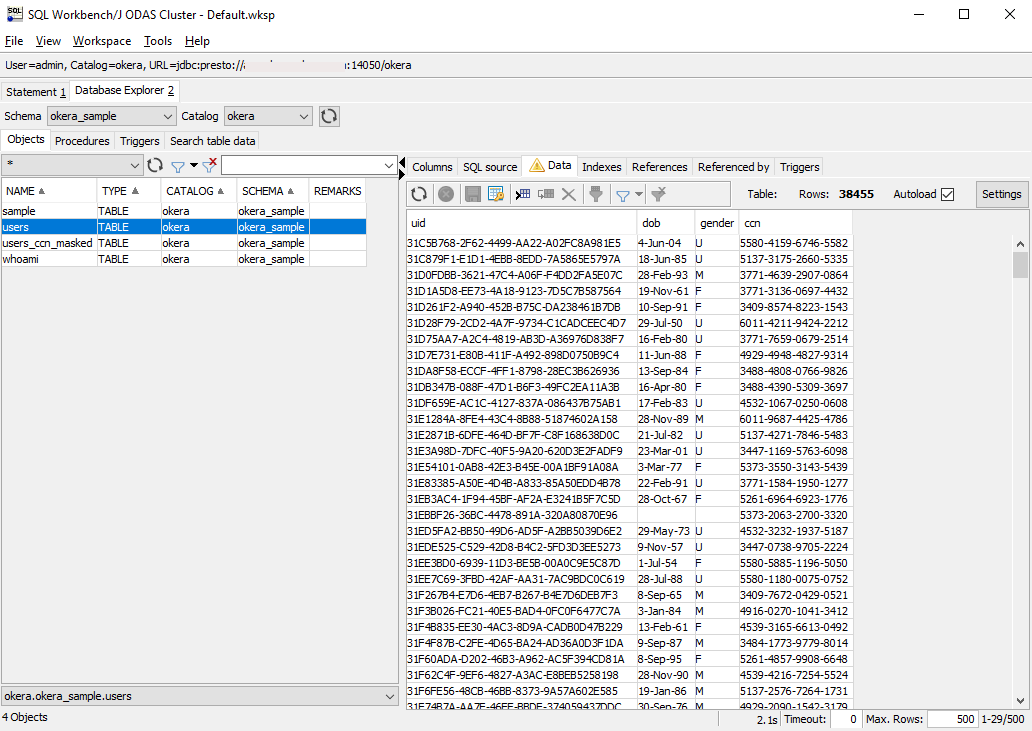
If all is correct, you can select Show Database Explorer from the Tools menu to browse the Okera-managed datasets and look at the data:
SQL Workbench/J with Self-Signed Certificates
As explained for DBeaver, the information above works as-is with Okera clusters using properly signed TLS/SSL certificates. For a non-production cluster it may be that self-signed certificates are used for the sake of simplicity (Okera can automatically create those).
Note: Okera strongly advises all users of the software to install a properly signed and company-managed certificate. Not doing so effectively disables the SSL check and leaves the connection vulnerable for possible exploits.
In that case, you need to add the same extra property to the connection to ignore errors when the self-signed certificate is validated.
-
Select the
Okera Clusterconnection from the Open - Connect window menu. -
Select the Extended Properties button again and add a property named
SSLAllowSelfSignedCertwith a value oftrue. -
Select the OK button for this and the main dialog to accept the change:

SQL Workbench/J will be able to work with cluster using self-signed certificates.