Connecting to Tableau Desktop
Before you begin
In order to connect to Okera's Presto endpoint via Tableau you will need to do the following:
- Download Tableau's Presto JDBC Driver
- Get your Okera Presto endpoint Host/Port
- Get your authentication credentials (depending on what your cluster is setup to authenticate with this could be LDAP or JWT)
- Verify your Okera SSL certificate is not self-signed and that your certificate contains its root chain. For more info see here.
Install Tableau's Presto Driver
You will need to download Tableau's Presto driver. You can download it from this page. Depending on your platform, you may end up downloading the driver or an entire bundle of drivers. If you get the bundle, you only need the Simba Presto driver.
Note: On Windows you may need to configure the DSN for Tableau Presto ODBC Driver, however this should auto create.
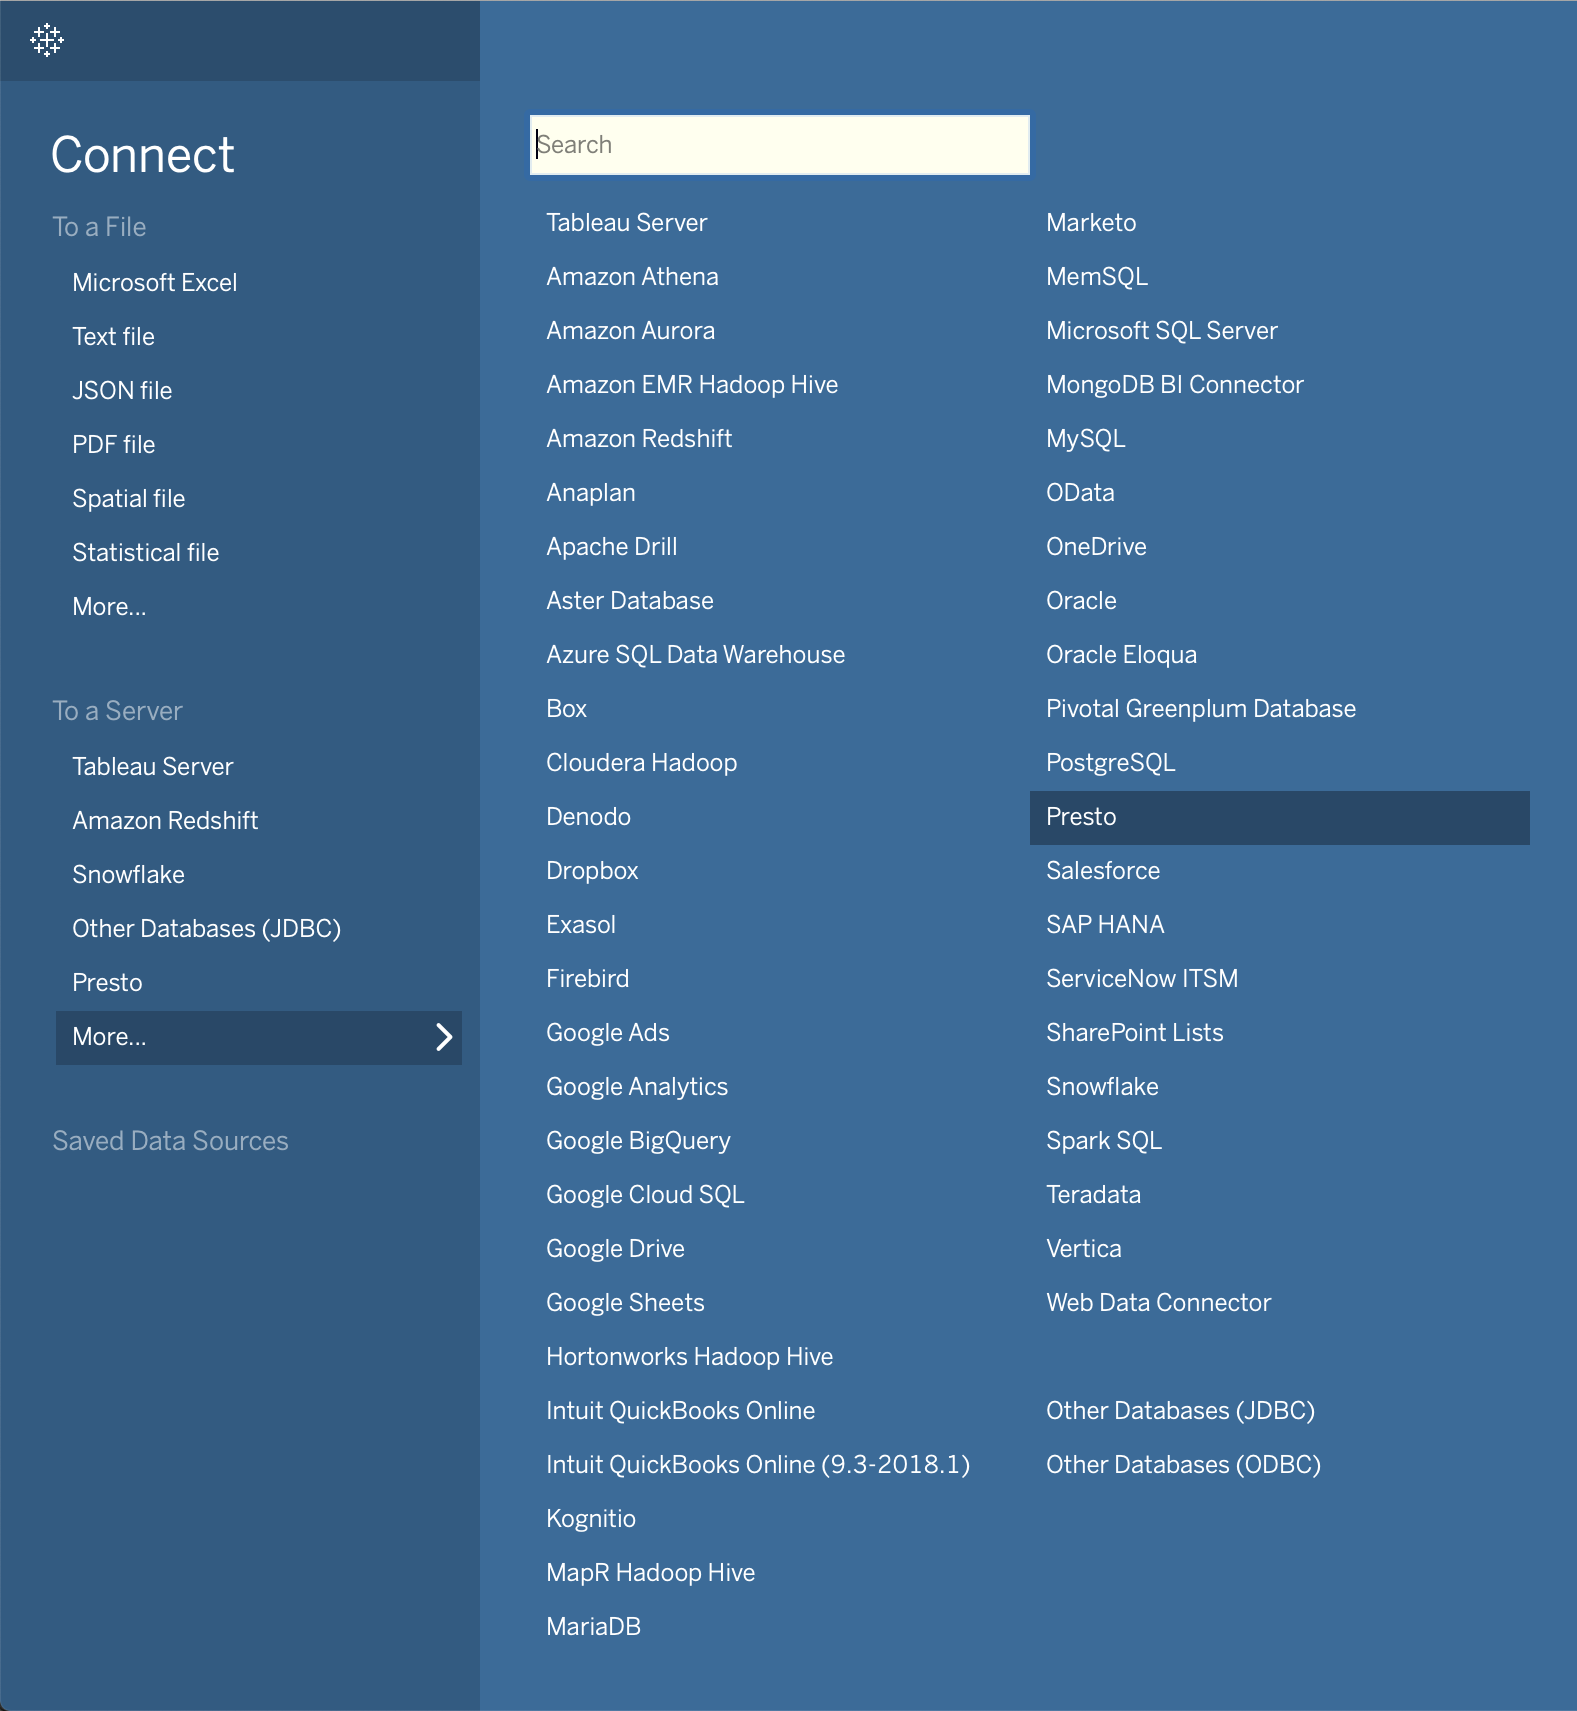
Connect to Okera
Once you've installed the driver, open Tableau and in the Connect panel, look under the subsection To A Server for the More… option. Find Presto (listed alphabetically) and select it.
You should then see this panel:
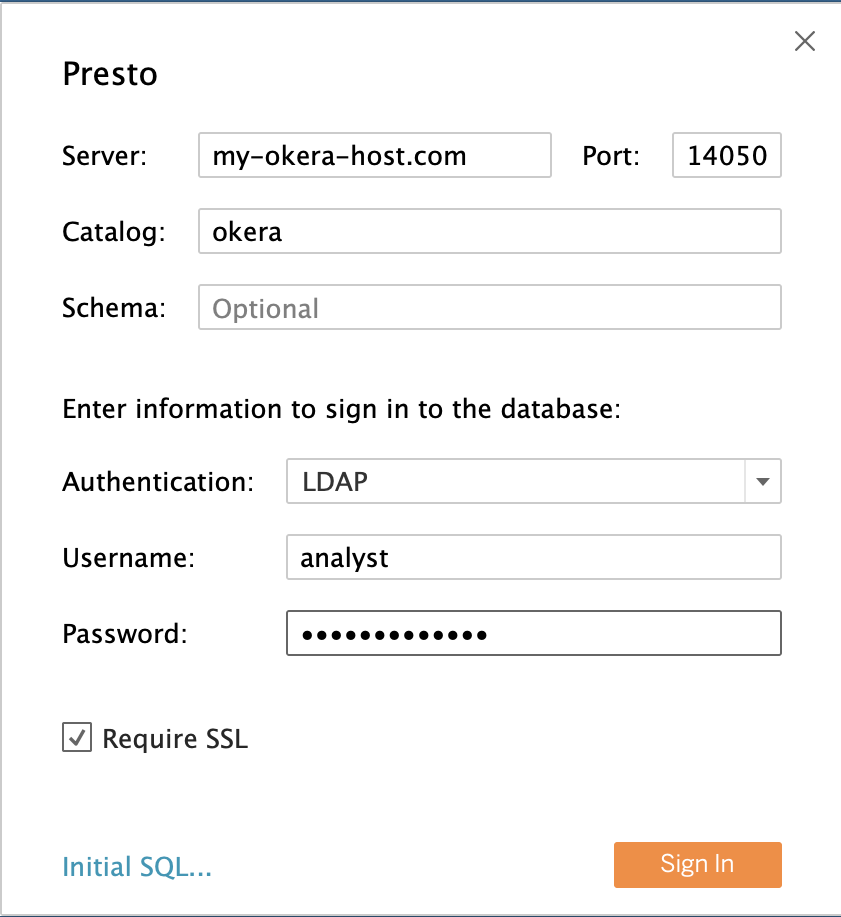
- Host/Port: You will need the enter the Presto host and its port assignment (the default is 14050).
You can find this in the Okera UI by clicking on the
Systempage. - Catalog: The catalog name is
okera -
Username/Password: Enter your
usernameandpassword. Your password will either be your LDAP credentials, or your token (depending on how your Okera cluster is configured). If token, you can grab your token by clicking on user profile icon in the bottom left corner.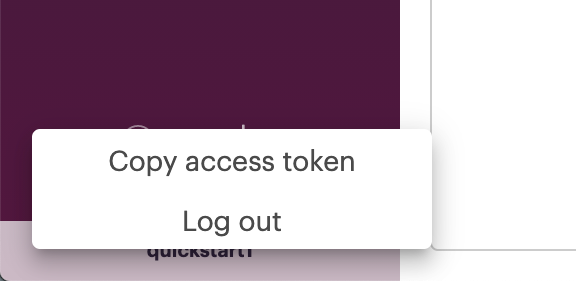
-
SSL: Be sure to check the Require SSL box. If your Okera cluster uses an SSL certificate from a trusted Certificate Authority, you have what you need to connect. If you have a self-signed certificate, you’ll need to configure the Simba driver to accept self-signed certs.
Once you click Sign in you should see this view:
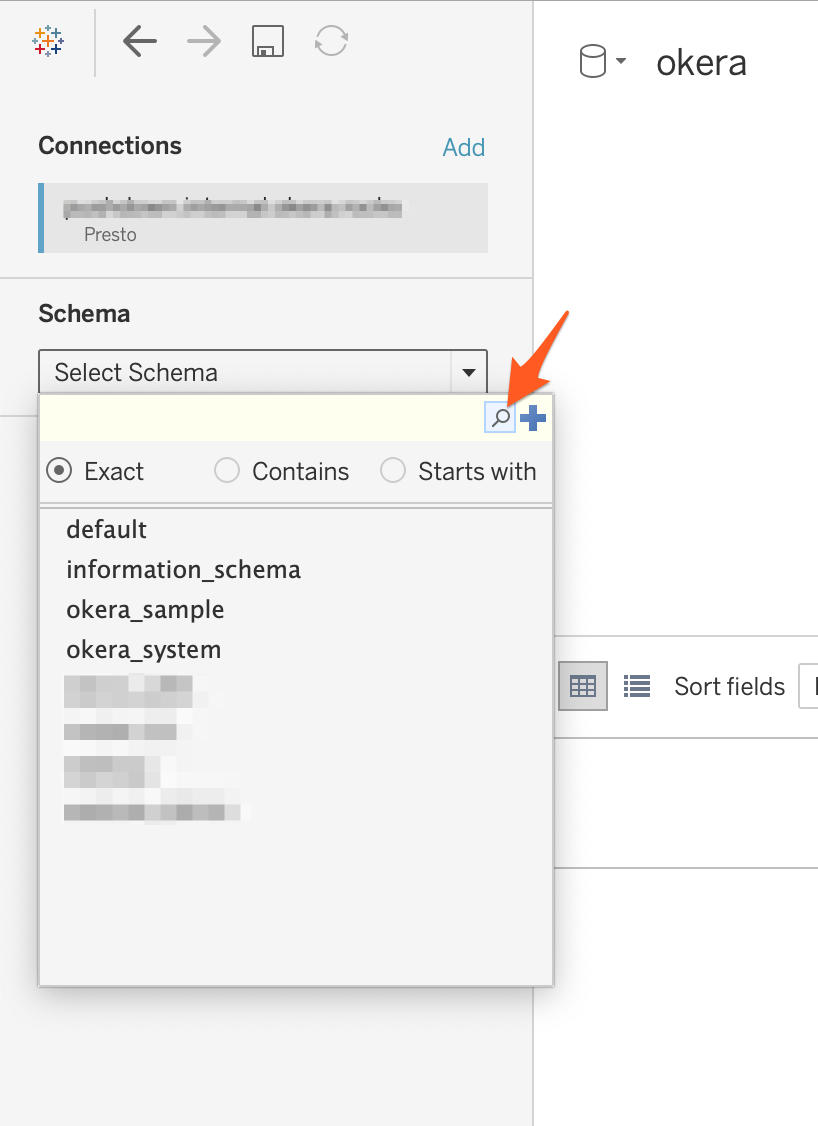
A Tableau schema maps to what Okera calls a database. Clicking Select Schema will open a search panel for listing database objects. You will need to click the magnifying glass icon to load the list.
Once you select a database, another dialog to search for datasets will appear.
Using self-signed certificates
Navigate to the location Tableau Desktop uses for driver configuration.
On a Mac, this location takes the form /Users/Presto.tdc and add the following configuration:
<?xml version='1.0' encoding='utf-8' ?>
<connection-customization class='presto' enabled='true' version='10.1'>
<vendor name='presto' />
<driver name='presto' />
<customizations>
<customization name='odbc-connect-string-extras' value='SSL=1;AllowSelfSignedServerCert=1;AllowHostNameCNMismatch=1' />
</customizations>
</connection-customization>
Connection error
If you hit the following connection error:
[Simba][Presto] (1020)
Error with HTTP API at https://<server address>:8443/v1/statement:
Peer certificate cannot be authenticated with given CA certificates