SaaS Deployments
Okera can be deployed as a SaaS tenant. Some Okera functionality may not be available as a SaaS tenant. For example, you can only connect to Snowflake data stores using Okera's policy synchronization enforcement. Where appropriate in this documentation, SaaS limitations are described.
Okera SaaS User Management
If you are an Okera SaaS tenant account admin, you can manage the other users of the SaaS tenant. If you are an Okera SaaS tenant admin, the management dialog looks like this, with menu options on the left:
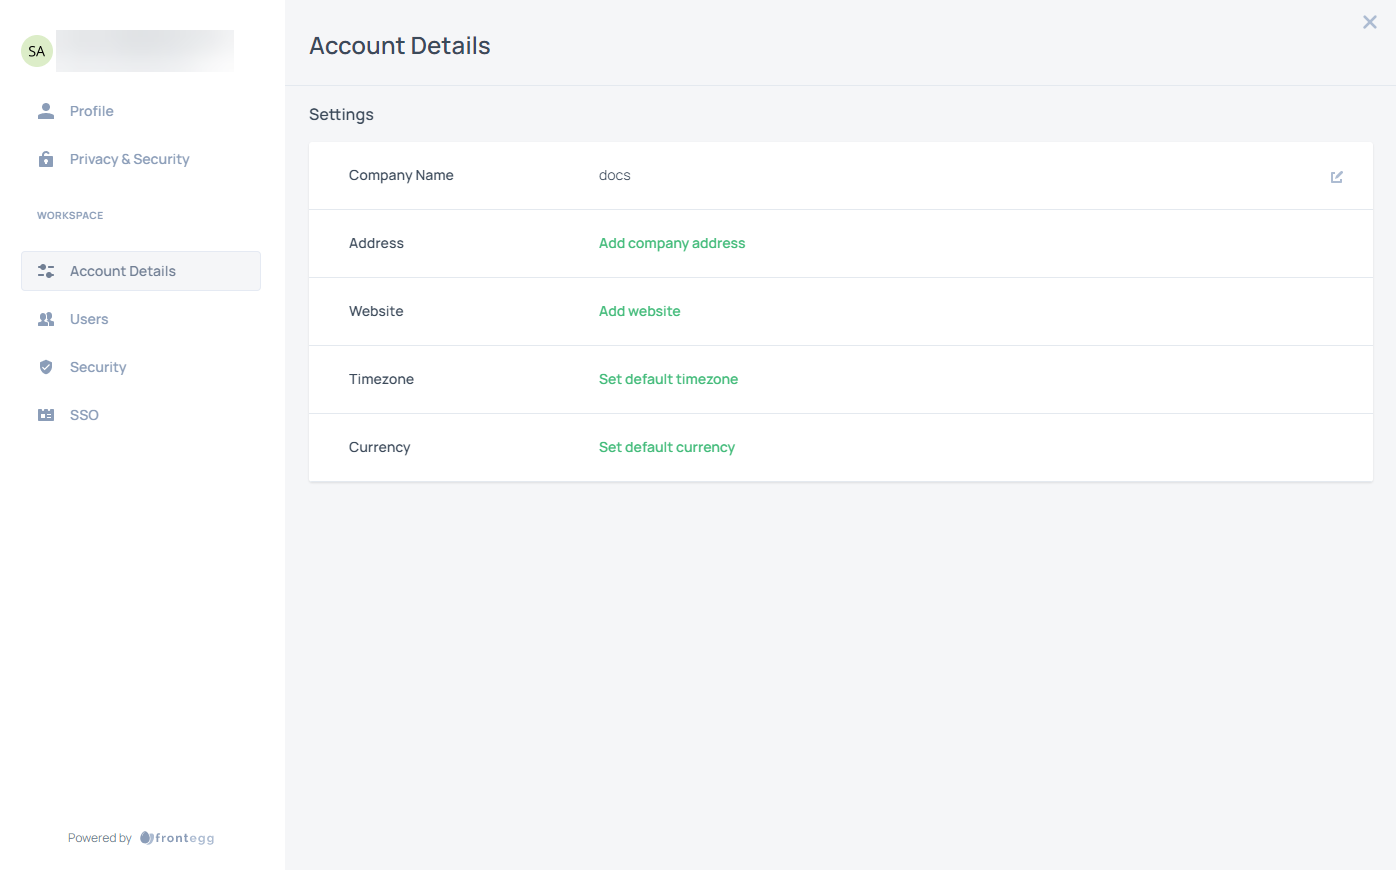
If you do not have admin privileges, only the top two menu options are available, Profile and Privacy & Security. If you are an admin, all of the Workspace options are shown.
-
The Profile and Privacy & Security options allow all users to access their user profiles and change their passwords.
-
The Workspace options allow admins to specify account information, add and remove users from the SaaS tenant, and set up security and single sign-on (SSO) for the tenant. For complete information about using this dialog, see this documentation.
View Your SaaS User Profile
If your Okera environment has been deployed as a SaaS tenant, you can access your SaaS user profile. To access it, select your username at the bottom of the Okera UI navigation menu and select Open user profile. A dialog opens on which you can view your Okera SaaS user profile and other options. (If you are not using an Okera SaaS tenant, you will not see this option.) For more information, see Okera SaaS User Management.
SaaS Authentication (Preview Doc)
To set up SaaS authentication, complete these steps.
-
Within the Okera SaaS tenant, select your user name (at the bottom left of the page) and then select Manage user profile.
-
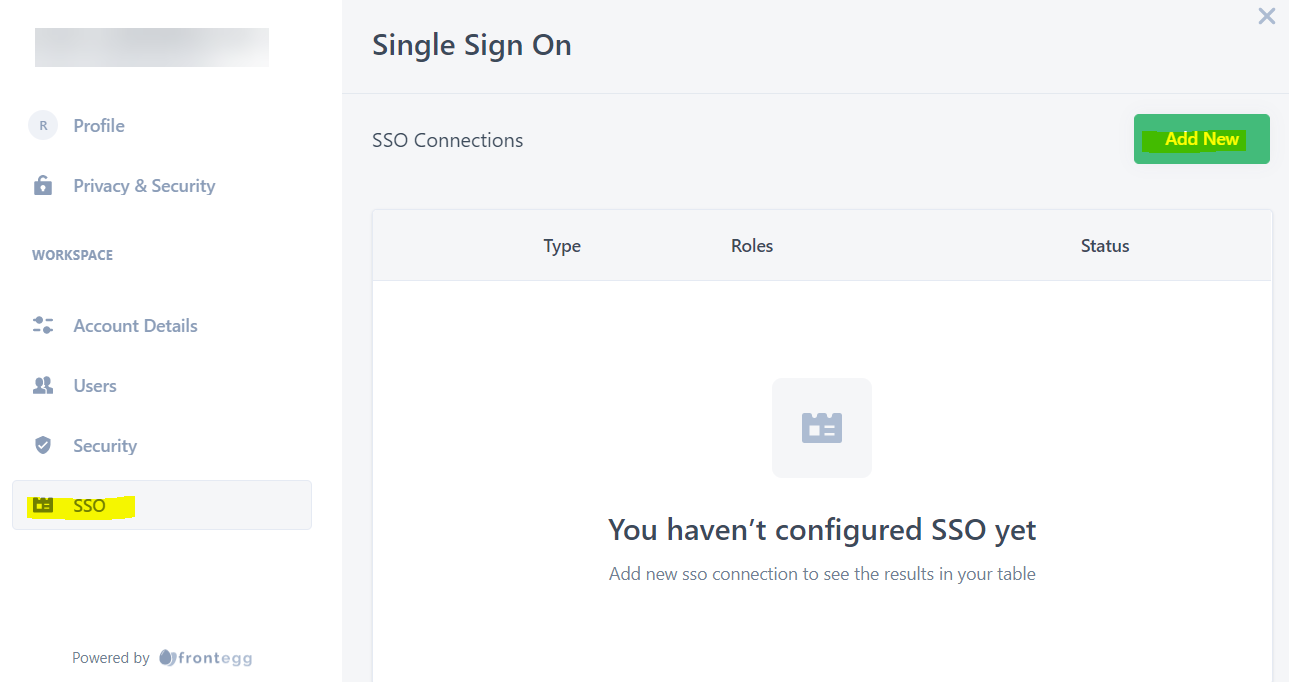
Select SSO and then Add New.
-
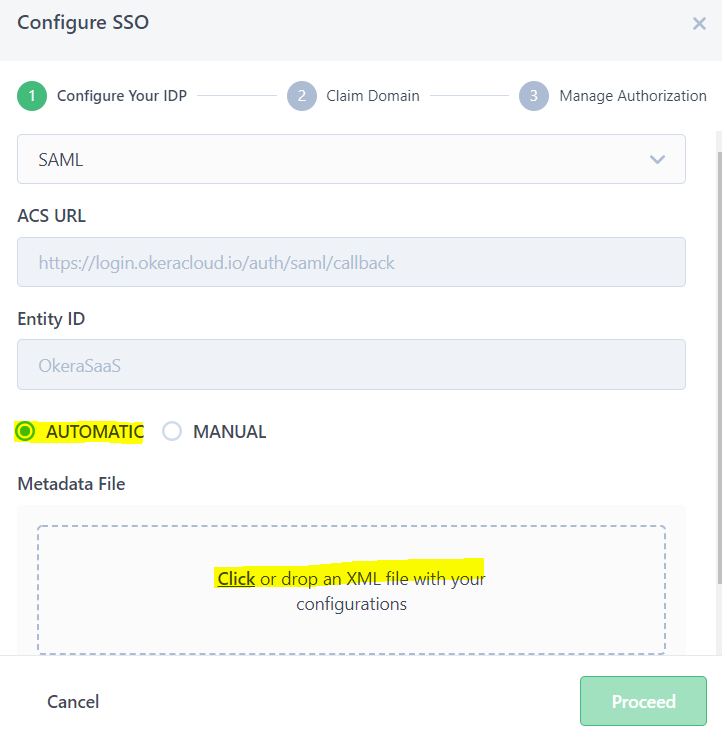
Select the Automatic button. The Configure SSO page appears.
-
Obtain and download the appropriate identity provider (IdP) XML file.
The options available for authentication vary depending on the identity provider (IdP) you choose. Azure AD and Okta IdP examples are provided on this page. Complete the steps in either Integrate With Azure AD or Integrate With Okta.
Note: The automatic process uses the XML from your IdP, but you may also manually connect to your IdP by selecting Manual and adding the SSO endpoint and public certificate from your IdP.
Integrate With Azure AD
-
Use an existing Azure AD environment or set up Azure AD (see Azure SAML).
-
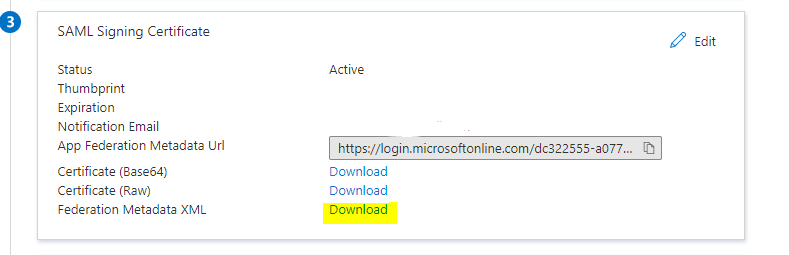
In Azure, make the following selections: Enterprise Application, followed by Manage, followed by Single Sign On.
-
Select box #3 and Download for Federation Metadata XML.
-
Return to the Okera SaaS UI and make sure that Automatic is selected.
-
Select Drop to add the XML file.
-
Drag and drop the downloaded XML file to the Metadata File box on the Configure SSO: Configure Your IdP panel.
Select Proceed. The Configure SSO: Claim Domain panel appears.
-
Enter the domain name for SSO on the Claim Domain panel.
-
Create DNS Txt record into DNS file; Record name/record value.
Select Proceed. The Configure SSO: Manage Authorization panel appears.
-
Map user groups to roles on the Manage Authorization panel.
Select Proceed and Done.
Integrate With Okta
-
Use an existing Okta environment or set up OktaD (see Customer SAML IDP Setup).
-
Download the XML.
-
Drag and drop the downloaded XML file to the Metadata File box on the Configure SSO: Configure Your IdP panel.
Select Proceed. The Configure SSO: Claim Domain panel appears.
-
Enter the domain name for SSO on the Claim Domain panel.
-
Create DNS Txt record into DNS file; Record name/record value.
Select Proceed. The Configure SSO: Manage Authorization panel appears.
-
Map user groups to roles on the Manage Authorization panel.
Select Proceed and Done.