Create Roles
You can create roles using the UI or using Okera SQL commands in the Okera workspace. Roles can be created in the UI with templates if you are a system or catalog admin, or without templates if you are non-admin user.
Using the UI Without Role Templates
When you create roles without using a template, you must manually create the initial permissions for the role. They are not automatically generated for you as they are when you create a role using a role template.
To create a new role in the UI:
-
Select Roles on the UI side menu to access the Roles page and then select
 on the Roles page.
Alternatively, you can select the
 button on the Call-to-Action Home page in the Roles section and follow the prompts.
 The Create role dialog appears.

-
Specify a name for the role in the Role name box (this is required). Then, optionally, select groups in the Assigned groups box to assign groups to the role.
Notes: The maximum length of role names allowed in Okera is 128 characters. In addition, group names that include blanks (white spaces) cannot be added to a role using the Okera UI. However, they can be added to a role using Workspace:
grant role <role> to group '<group-name>'. -
Select
 to create the role.
Using the UI With Role Templates
When you create a role using a role template, Okera automatically generates the SQL required to assigns group and create permissions for the new role based on your template specifications.
Note: At this time, role templates can only be used by Okera system or catalog admins. All other users will see the traditional workflow when creating roles.
To create a new role in the UI:
-
Select Roles on the UI side menu to access the Roles page and then select the
button.Alternatively, you can select the
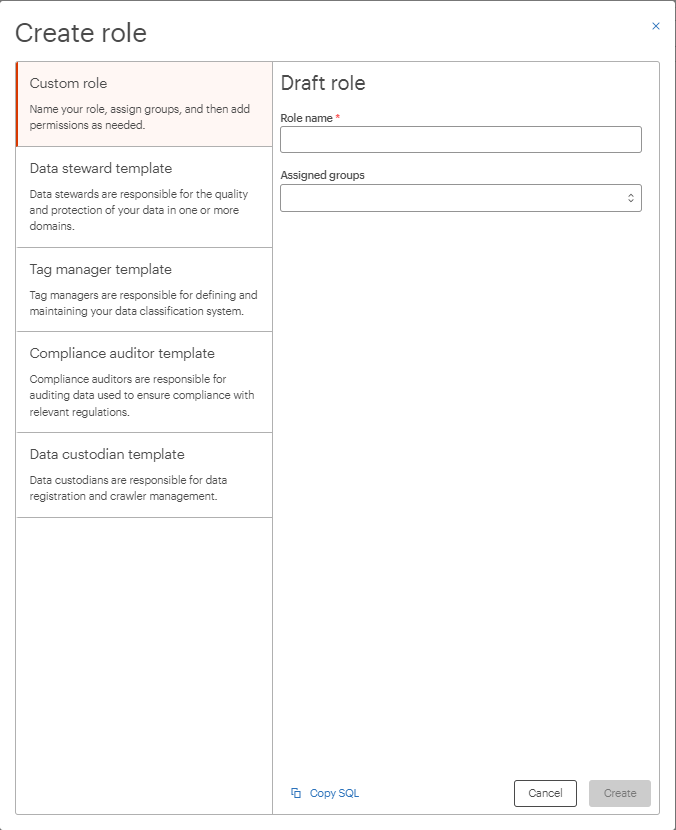
button on the Call-to-Action Home page in the Roles section and follow the prompts. The Create role dialog appears. The left side of this dialog lists role templates you can use; the right side provides fields you should provide values in for the role definition. The fields vary based on the role template you select. For more information about the provided templates, see Role Templates.
-
Select the template you want to use for the new role from the list on the left.
Note: The Custom role template is provided to allow you to create your own roles without using a template. When you create a role using the Custom role template, you must manually create the initial permissions for the role.
-
On the right side of the dialog, specify a name for the role in the Role name box (this is required).
Note: The maximum length of role names allowed in Okera is 128 characters.
-
Optionally, select groups in the Assigned groups box to assign groups to the role. You can also type in a new group name and then select the Add group
<new-group>option when it appears on the dialog box.In addition to belonging to a group of users, a user is always a member of their own personal group. For example, user
sallyis a member of thesallygroup. So you can add personal group names to a role if you want to add an individual user to a role.Note: Group names that include blanks (white spaces) cannot be added to a role using the Okera UI. However, they can be added to a role using the Workspace page:
grant role <role> to group '<group-name>'. -
Supply any other information required by the template. Fields that are required have asterisks next to them. Templates are described in Role Templates.
When you create a role using a template, Okera automatically generates SQL commands to create the role and the permissions for the role, based on the input you provided in the template. If you would like to review these SQL commands, select the
 button at the bottom of the Create role dialog.
 -
Select
to create the role. The Roles page displays the new role.
Using Okera SQL
On the Workspace page, issue the following Okera SQL commands to create a new role and assign a new group to it:
CREATE ROLE <new-role-name> ;
GRANT ROLE  <new-role-name> TO GROUP '<new-group-name>';
Substitute the name of your new role for <new-role-name> and the name of your new group for <new-group-name>.
For example:
CREATE ROLE SALES_MGR;
GRANT ROLE SALES_MGR TO GROUP MANAGERS_EAST;