Grant Data Access Using Permissions
Now that you’ve explored the Okera catalog, let’s grant access to the data using permissions.
We'll explore the access conditions already in place that may be affecting your new sales director, danny_<tenant> and your two sales analysts, sam_<tenant> and sally_<tenant>. We will then use several types of access conditions to protect the data.
Simulate the End User Experience
Embedded links for Apache Superset, JupyterHub, and Snowflake on the Home page of Okera allow you to access these applications and simulate what different users see when they access data through Okera. Simply log in to these applications using the same login credentials provided in your test drive email.
Several preconfigured dashboards are provided in Apache Superset; however, you can create new dashboards based on the data in this test drive environment if you would like to test different views or simulate how users might query data. You can also manage dashboards and the users with access to the dashboards by logging into Superset as the admin_<tenant> user.
-
Navigate to Apache Superset using the Open Superset link on the Okera Home page or the link provided in the test drive email.
-
Log in as the
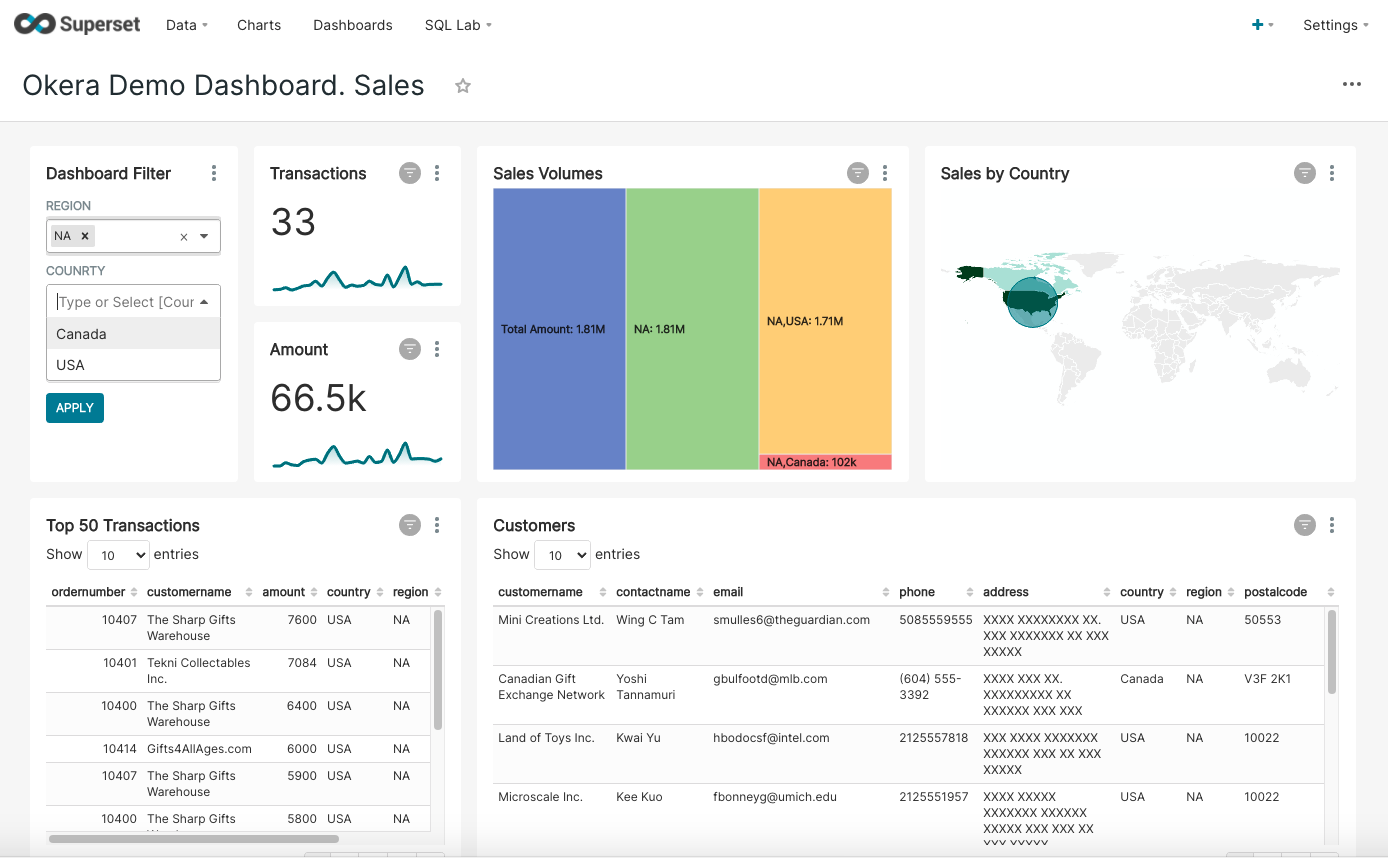
admin_<tenant>user using the password provided in the test drive email and select Dashboards at the top of the Superset page to navigate to the Superset Dashboards page. The image below shows the dashboard view after logging in asadmin_<tenant>.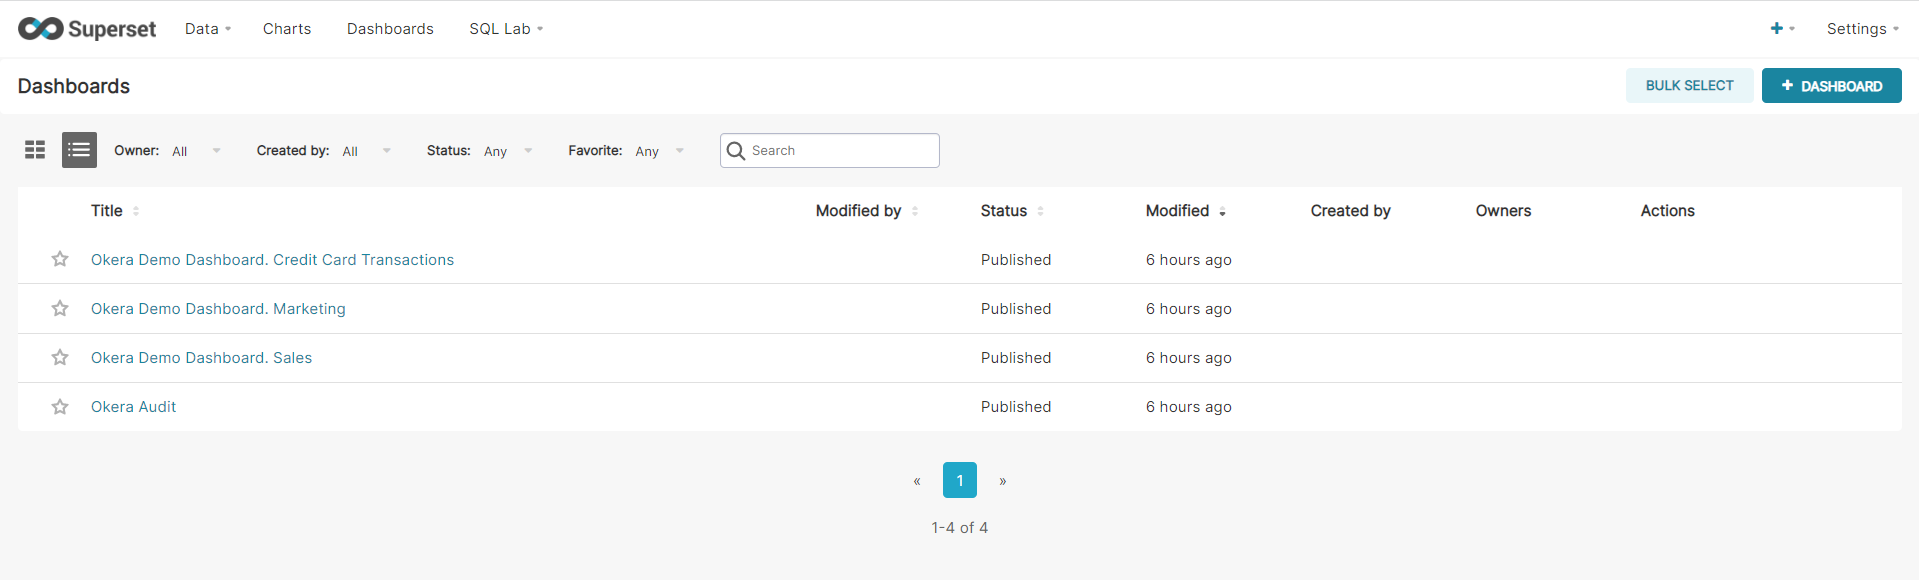
-
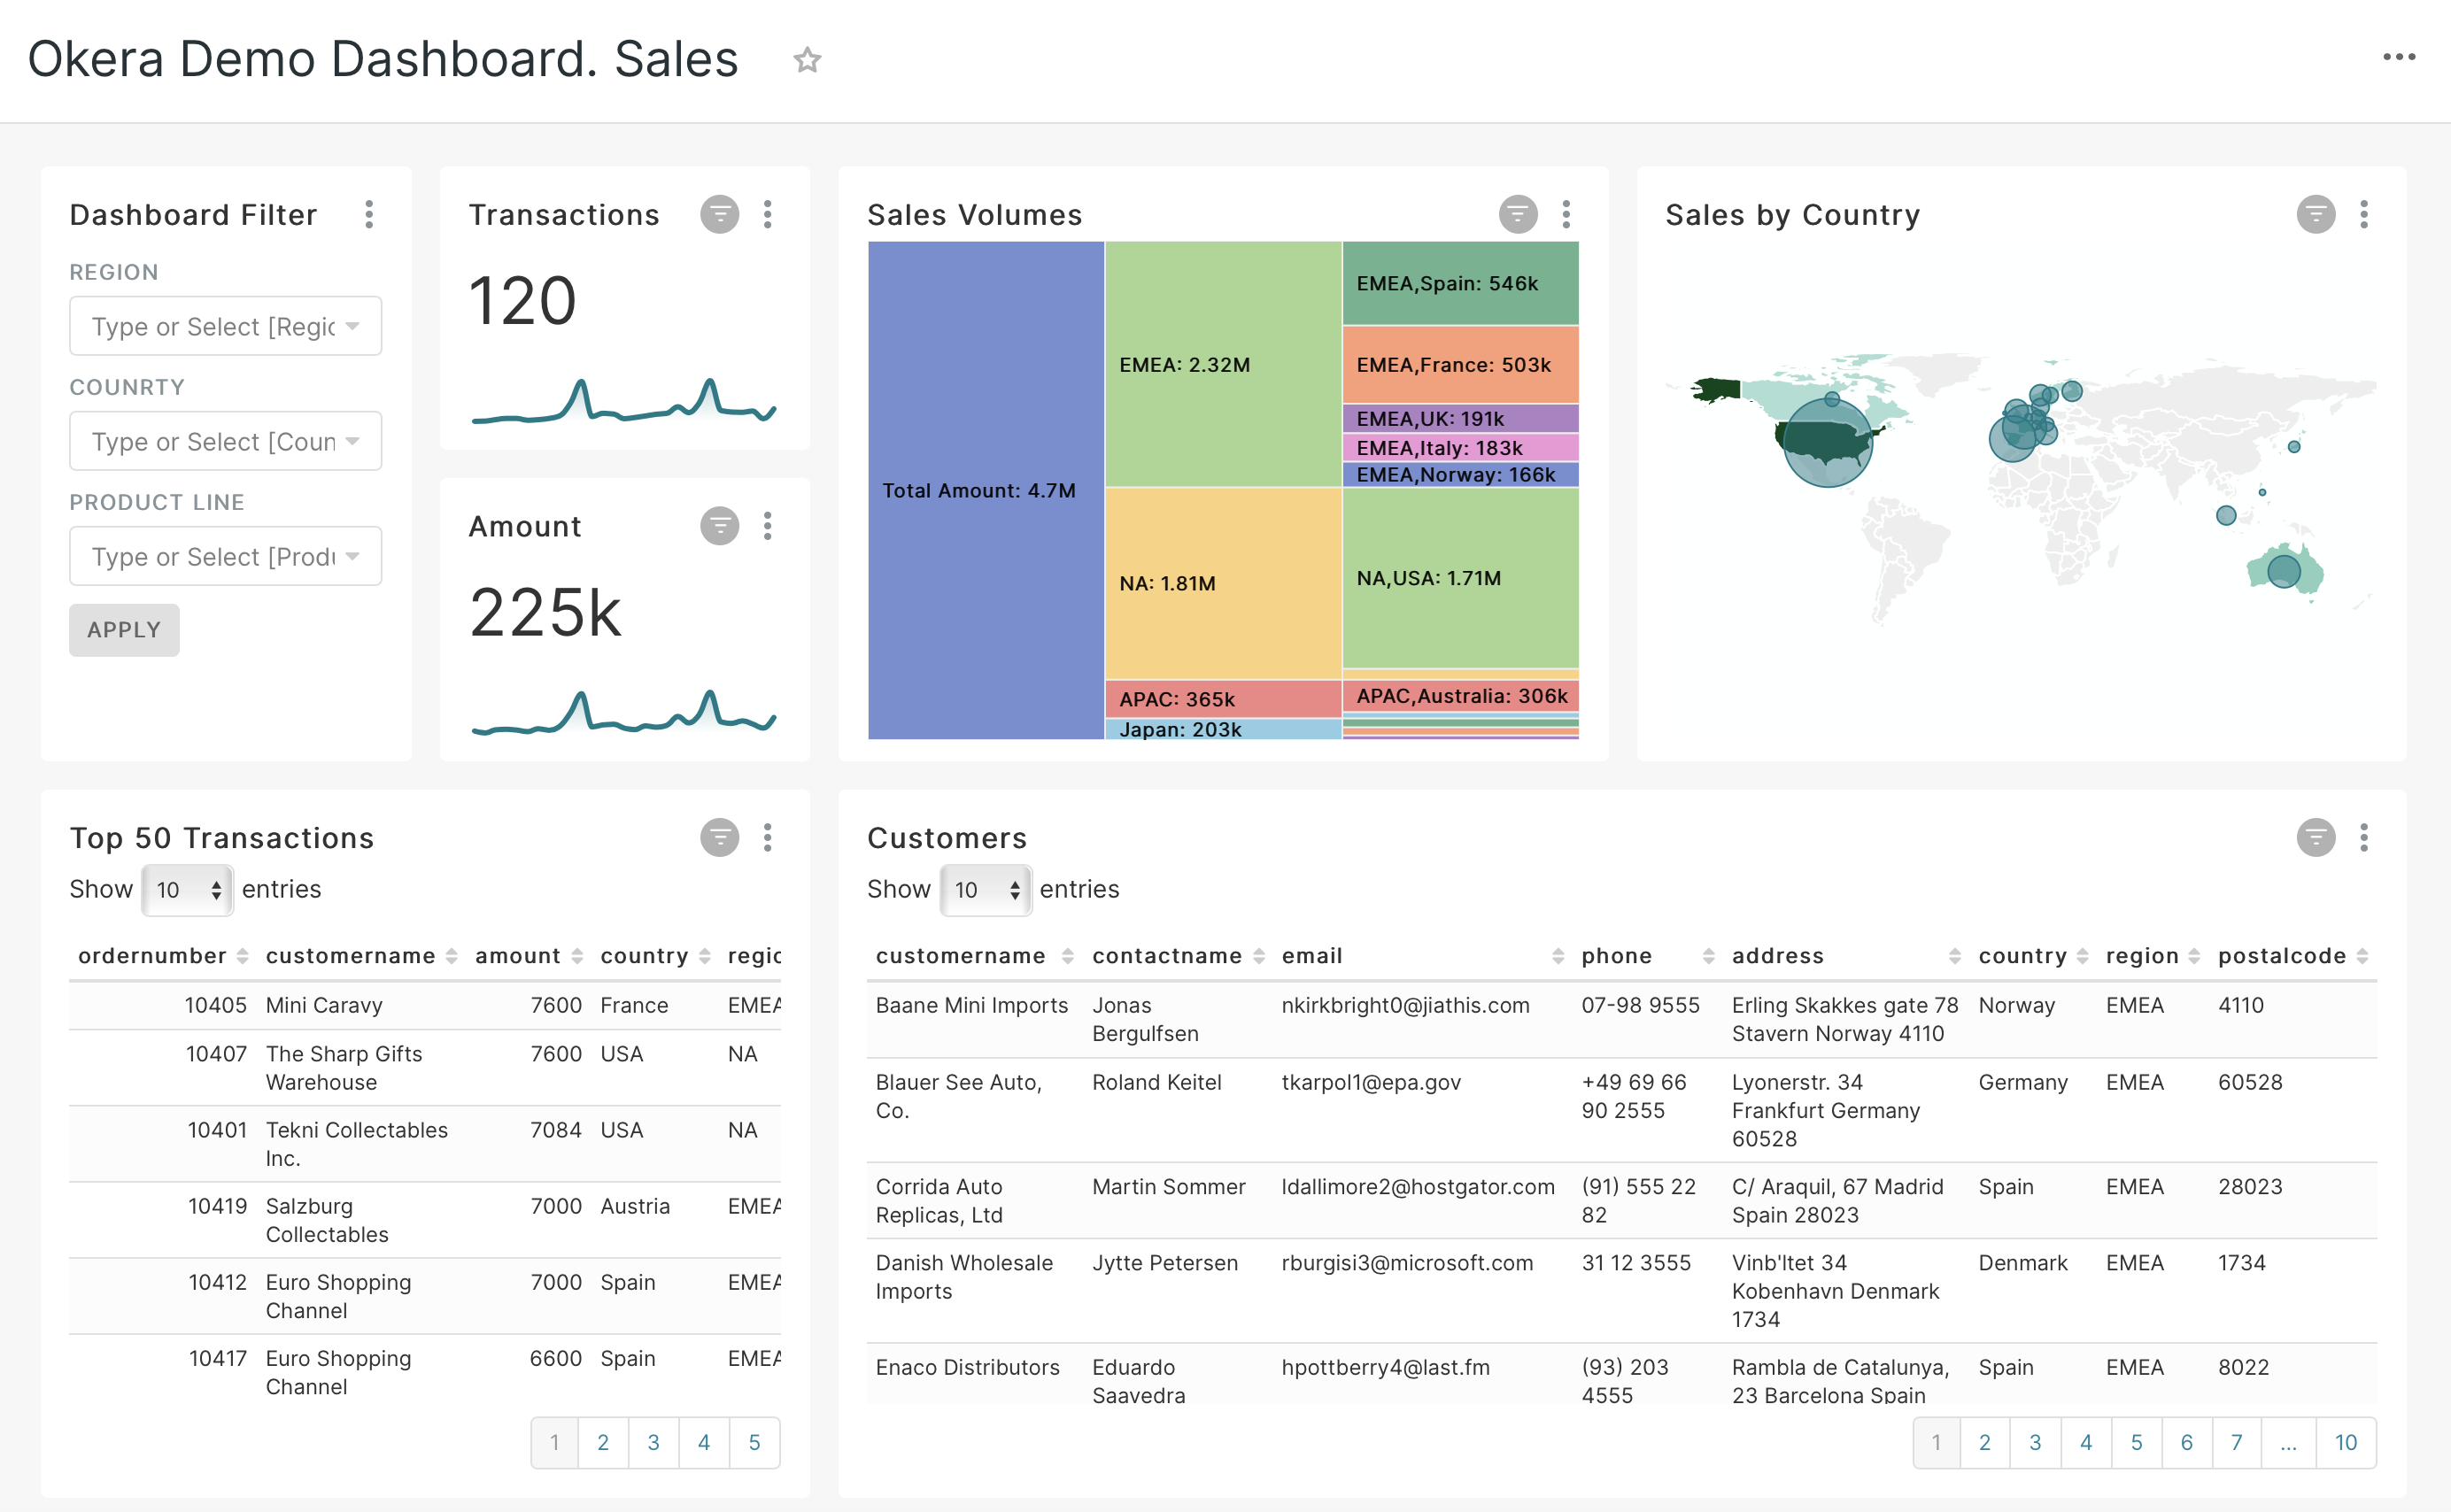
Select the dashboard called
Okera Demo Dashboard.Salesto view and interact with the data.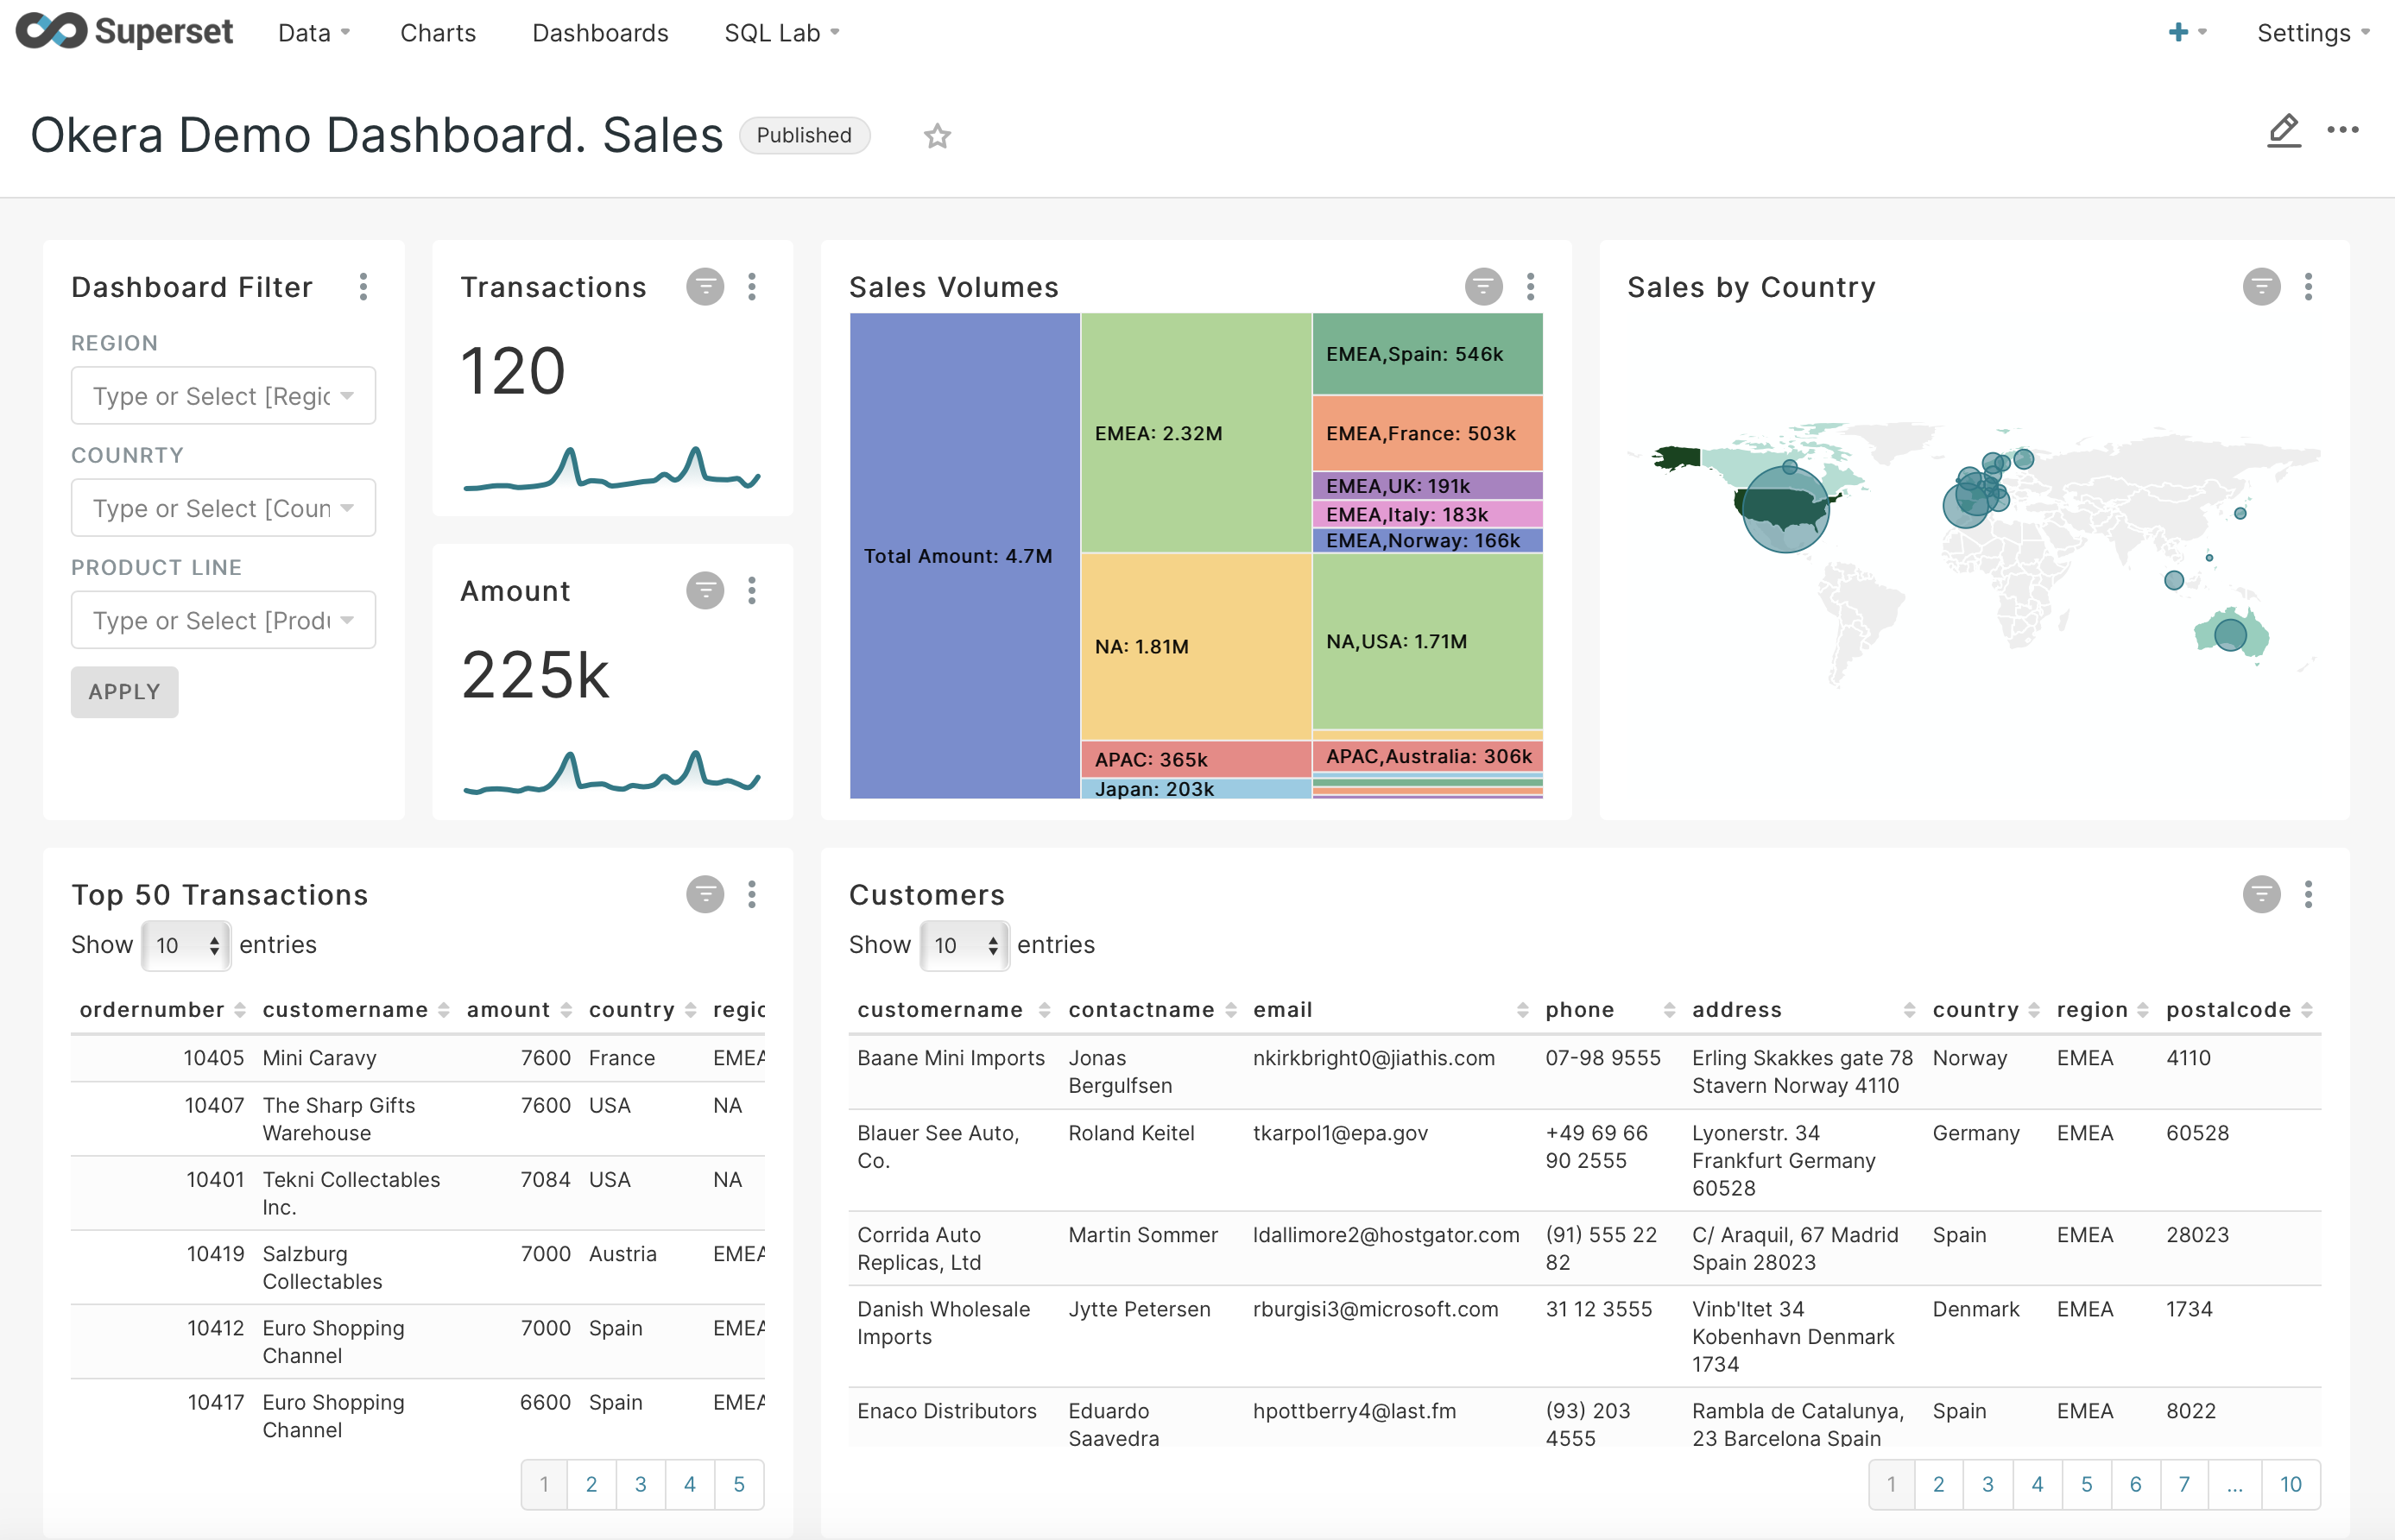
-
Browse other dashboards and log in as other users you may be interested in.
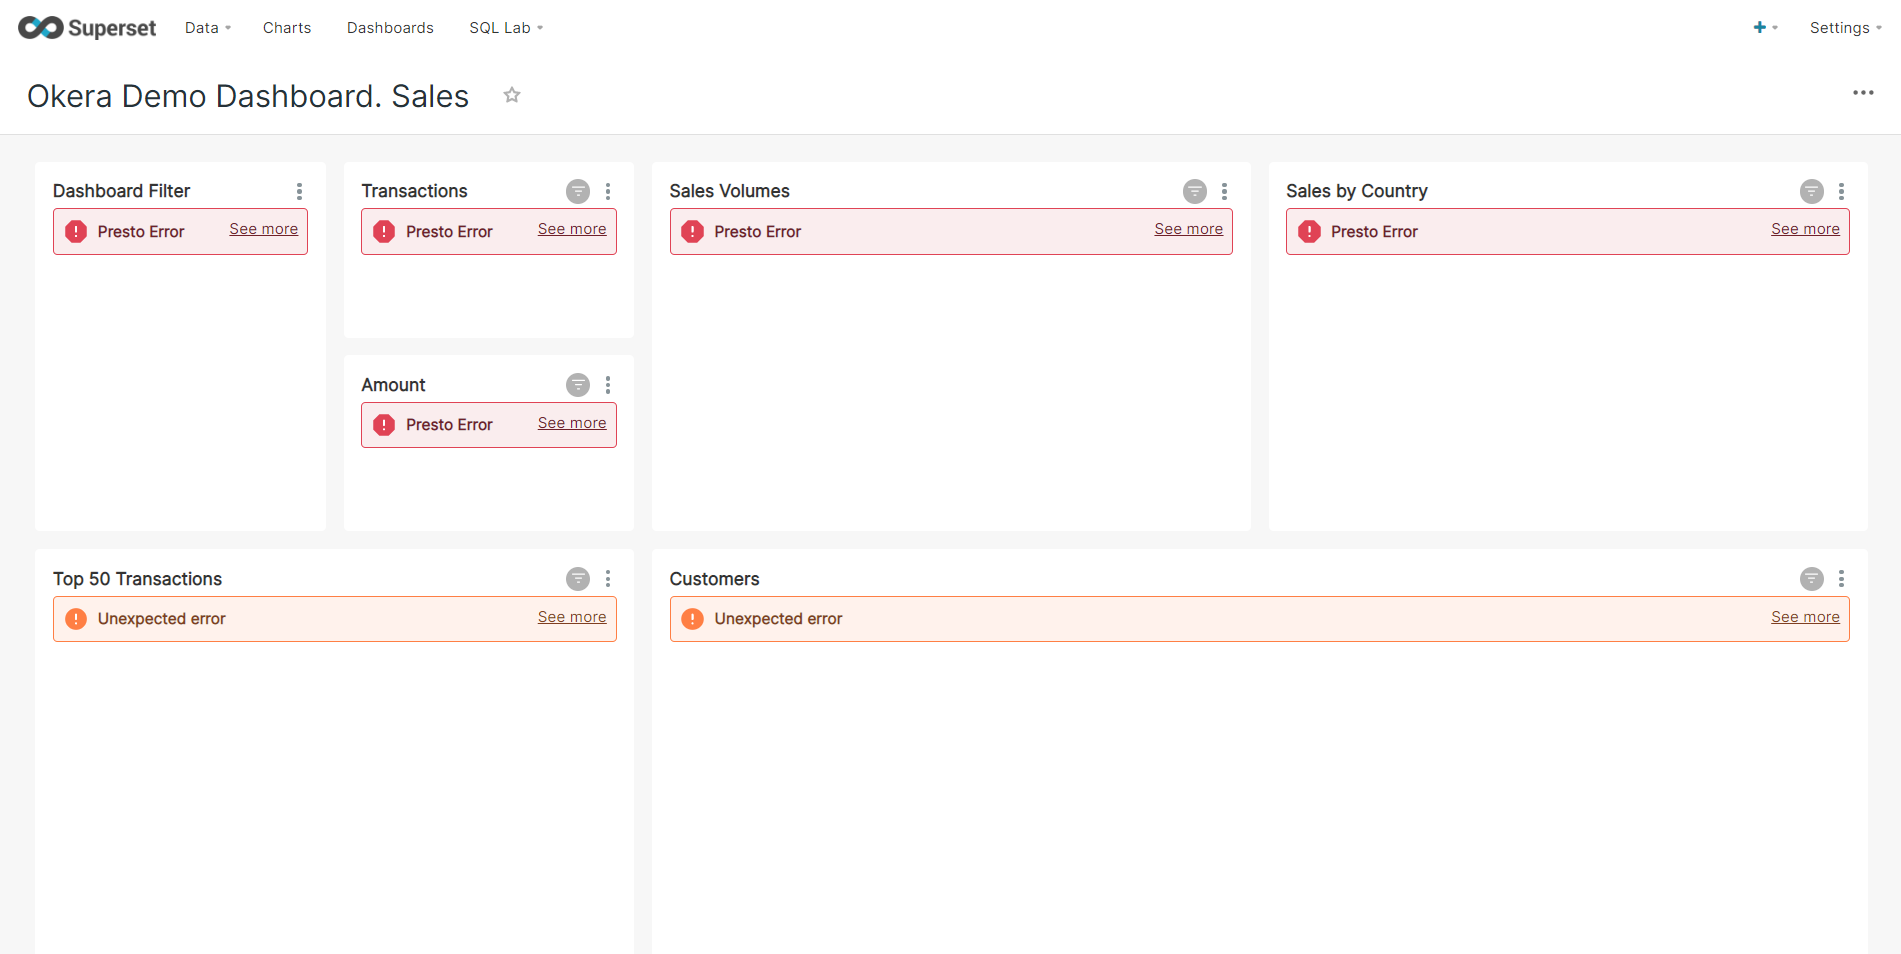
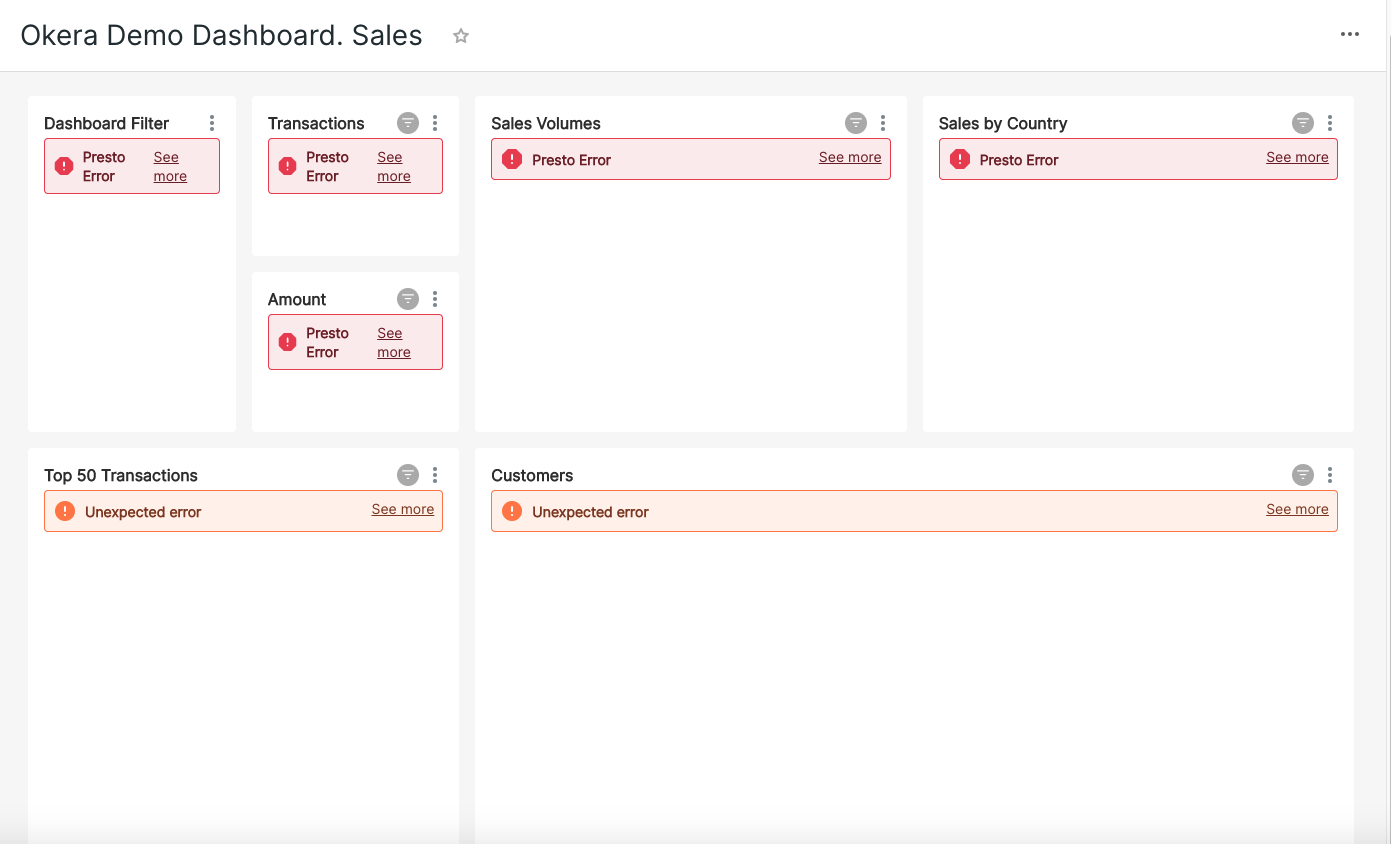
Note: When a user does not have access to a dashboard in Apache Superset, errors appear on the dashboard instead of actual data:
-
Return to your Okera test drive cluster.
Review the Provided Permissions
To review the permissions provided with your Okera test drive:
-
Log in to Okera as the
admin_<tenant>user. The password is provided in your test drive email. -
Select Data in the left-hand menu to access the Data page.
-
Select the
salesdatabase and then select the Permissions tab. Only users who are allowed to manage permissions, such as theadmin_<tenant>user, can see this tab. If you don't see it, make sure you are logged in asadmin_<tenant>.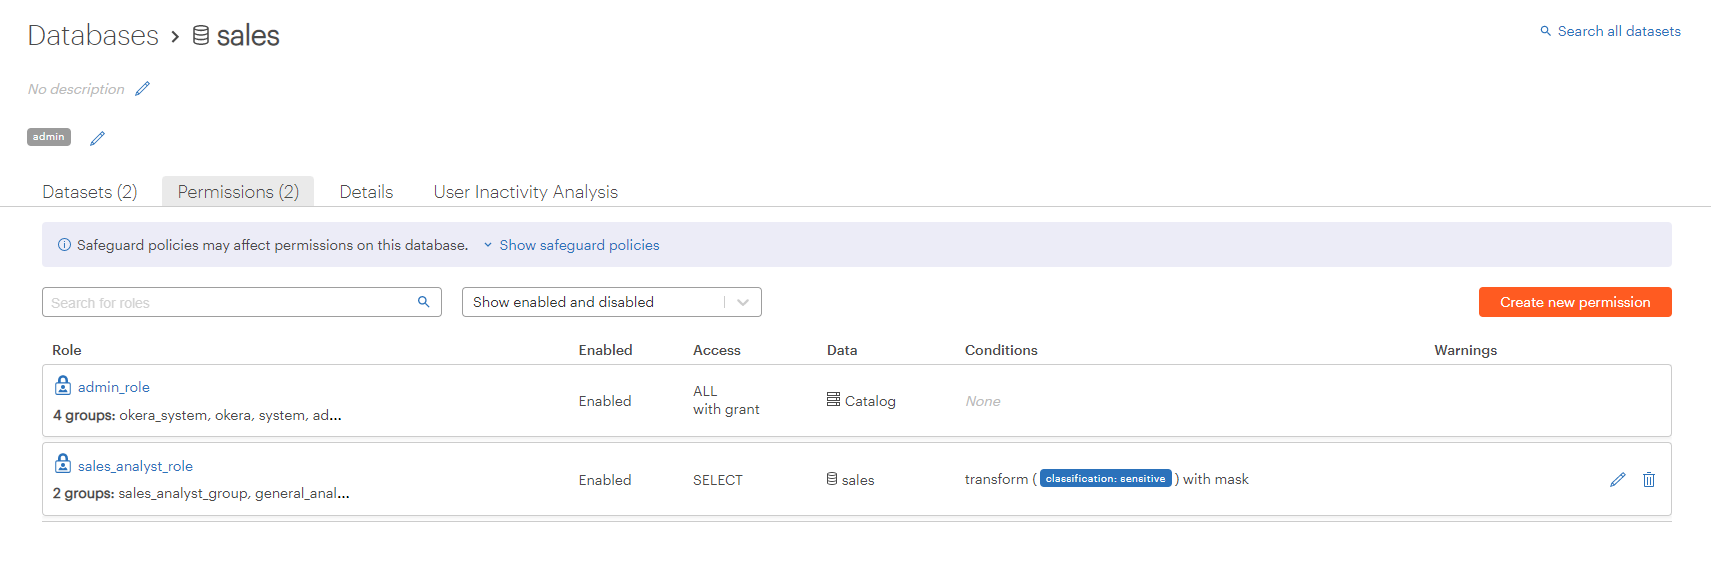
Two roles have been granted access to the
salesdatabase. Users assigned these roles can access it:- Users assigned the
admin_roleare granted ALL access across the catalog, which gives them unrestricted access to all data. - Users assigned the
sales_analyst_rolecan view the data, but data that is restricted is masked.
- Users assigned the
Note: Because these permissions have been granted at the database level, they apply to all datasets (tables) included in the
salesdatabase.
Review the Safeguard Policies
When you select the Permissions tab for a database, a banner displays that reads “Safeguard policies may affect permissions on this database.” Safeguard policies apply at the catalog-level and are automatically applied after access has been granted to a user through a permission.
Select Show safeguard policies to see the safeguard policies present in this test drive environment.
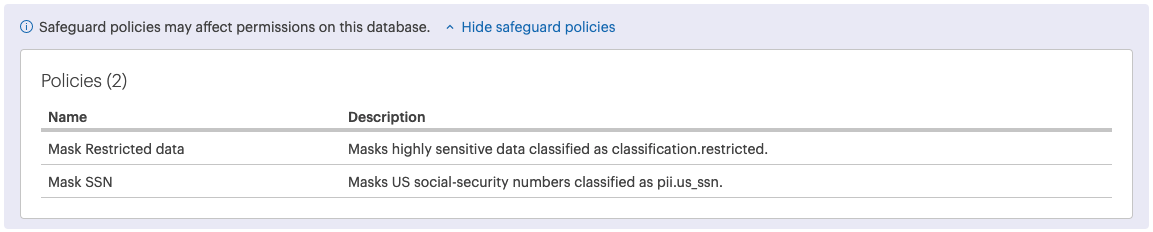
Two safeguard policies, Mask Restricted Data and Mask SSN are supplied to protect data across the catalog. These policies impact how the data appears for users within your organization after they are granted access to the database. These policies mask any data considered restricted (classified as classification.restricted) and social security numbers (classified as pii.us_ssn).
Grant Access for Sales Directors
The sales_director_role is currently not granted access to the sales database because it is a new role. Let's grant it access. Complete the following steps.
Note: At the end of this section, a video of these steps is provided.
-
Log in to Apache Superset as the sales director
danny_<tenant>, using his unique password provided in the test drive email. -
Navigate to the Sales dashboard in Apache Superset (select Dashboards at the top of the Superset page and then select Okera Demo Dashboard.Sales). You can see that because
danny_<tenant>does not have access to thesalesdatabase, his dashboard view shows Presto errors. -
Log in to Okera as
admin_<tenant>. -
Select Roles on the left-hand menu to navigate to the Roles page. Locate and select the role called
sales_director_role, used for territory directors for the sales organization (such asdanny_<tenant>). We want to grant users assigned this role access, while ensuring that they can only see data pertaining to the territory they manage.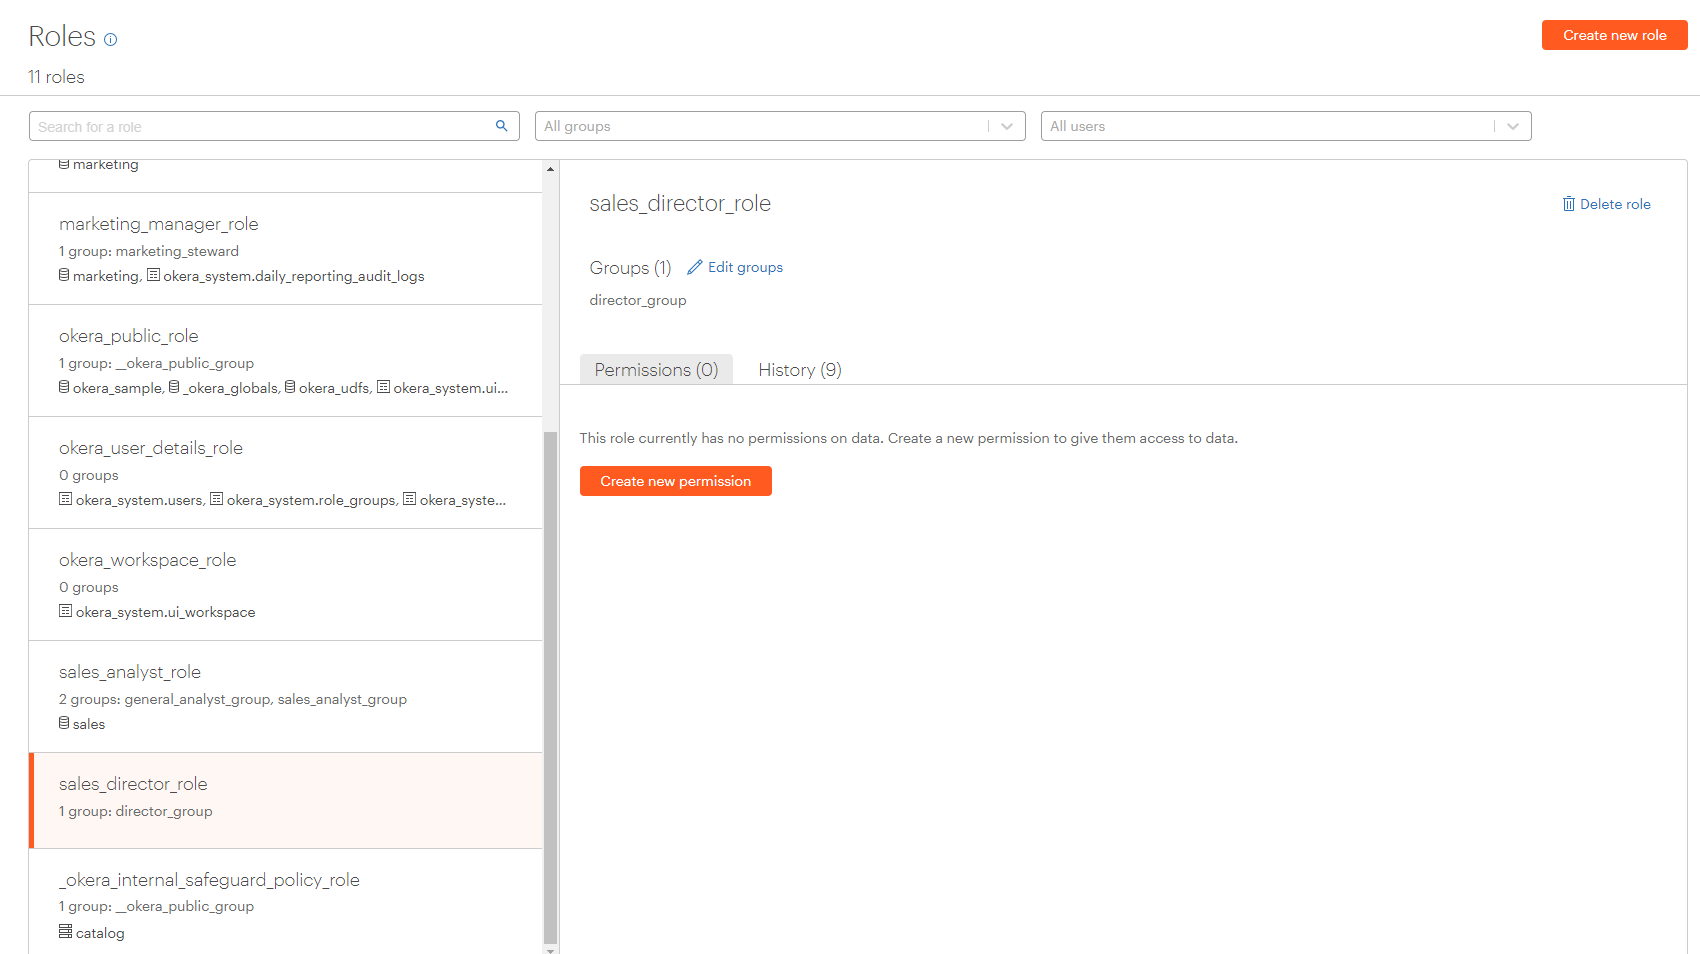
-
Select
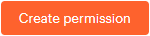 to open the permission builder dialog.
 -
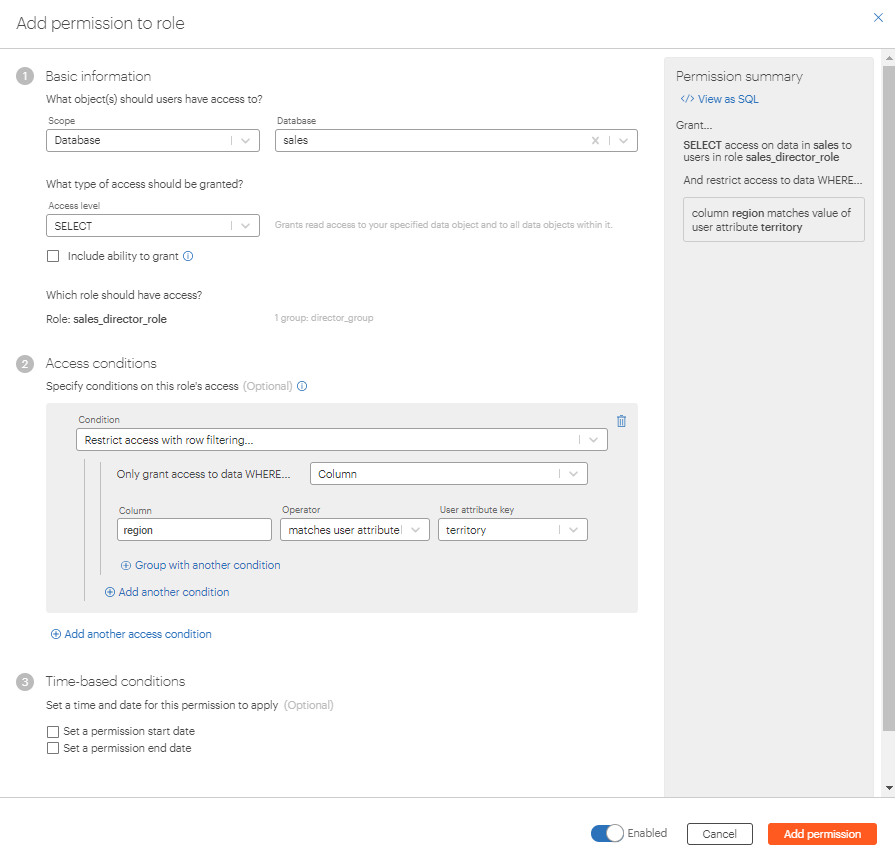
Leave the Scope selection set to Database but select the
salesdatabase from the Database dropdown list. -
Leave the Access level set to SELECT.
-
Select Add an access condition. The Access conditions section expands.
-
Select Restrict access with row filtering from the Condition dropdown list and Column from the "Only grant access to data WHERE..." dropdown list.
-
In the Column text box, type region. Select the matches user attribute operator from the Operator dropdown list. Finally, select territory in the User attribute key dropdown list. If territory does not exist in the User attribute key list, type it in and then select Create "territory" underneath the list.

The dialog should look like this:
-
Select
 . The “Permission added” confirmation dialog appears. (Select OK on this dialog.)
 -
Validate the new
sales_director_rolepermission by returning to Apache Superset, logging in as the userdanny_<tenant>, viewing theOkera Demo Dashboard.Salesdashboard. Confirm thatdanny_<tenant>can now see data, but only for North America. You might need to reload (refresh) the page.
Images
Here is a video of the steps above.
Limit Access for Sales Analysts by Region
To understand how sales analysts, such as sam_<tenant> or sally_<tenant>, might currently view data in the sales database, let's investigate their views in Apache Superset and then alter their access to limit it by the region or country to which they are assigned. Complete the following steps.
Note: At the end of this section, a video of these steps is provided.
-
Log in to Apache Superset as
sally_<tenant>. The password forsally_<tenant>is provided in your test drive email. -
Open the
Okera Demo Dashboard.Salesdashboard. You can see that while sensitive data is masked, she can still see data pertaining to all regions and countries. -
Log in to Okera as
admin_<tenant>, select Data from the left-hand menu and then select thesalesdatabase from the list. -
Select the Permissions tab for the
salesdatabase.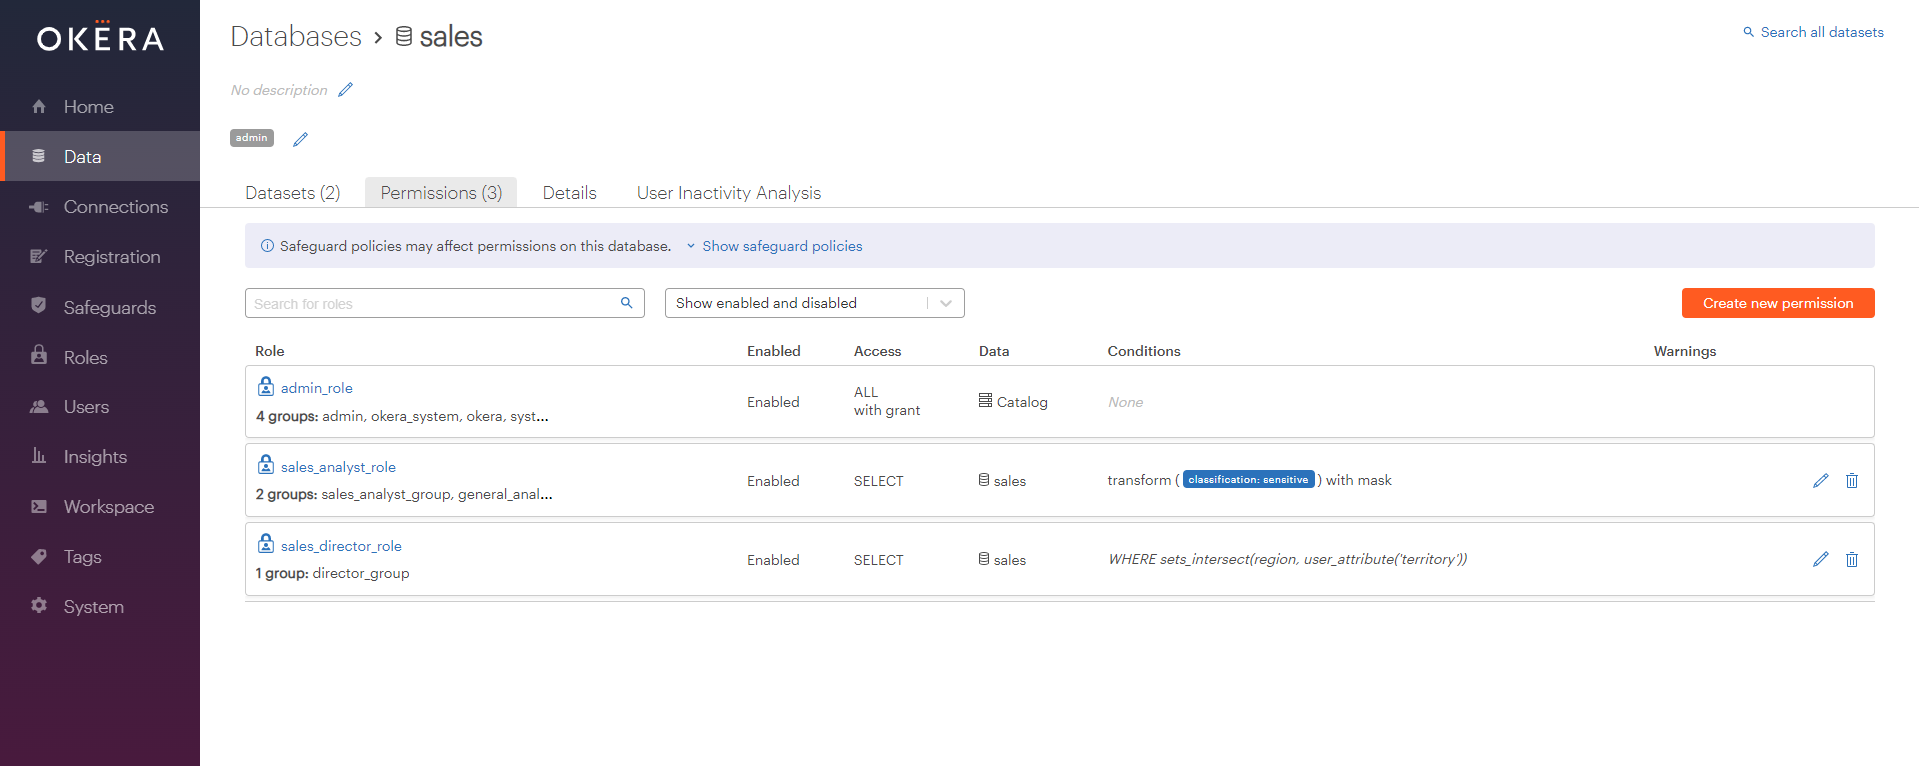
-
Select the edit icon (
 ) next to the permission at the end of the row for the
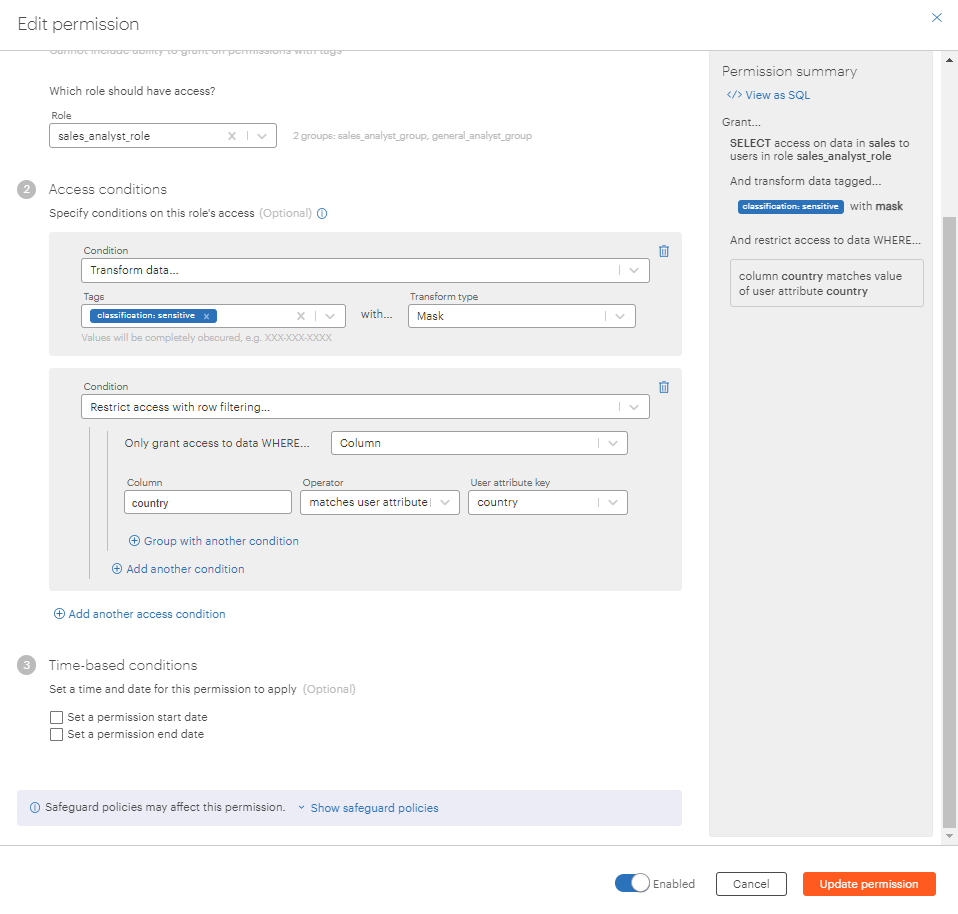
 sales_analyst_role. This opens the permission builder dialog, which is where you can grant access and create permissions that enforce fine-grained access control. -
In the permission dialog, select Add another access condition to add another access condition.
-
Select “Restrict access with row filtering” from the Condition dropdown list and Column in the "Only grant access to data WHERE..." dropdown list.
-
Type country in the Column textbox, select the matches user attribute operator from the Operator dropdown list, and select country from the User attribute key dropdown list, as shown in the screenshot below. If country does not exist in the User attribute key list, type it in and then select Create "country" underneath the list.
Note: The matches user attribute operator guarantees that if a user is responsible for multiple countries, then they are granted access to see all their countries. To learn about creating permissions with row filtering conditions, read Create Row-Level Security Permissions.
-
Select
 . The Permission added dialog appears confirming the update. (Select OK on this dialog.)
 -
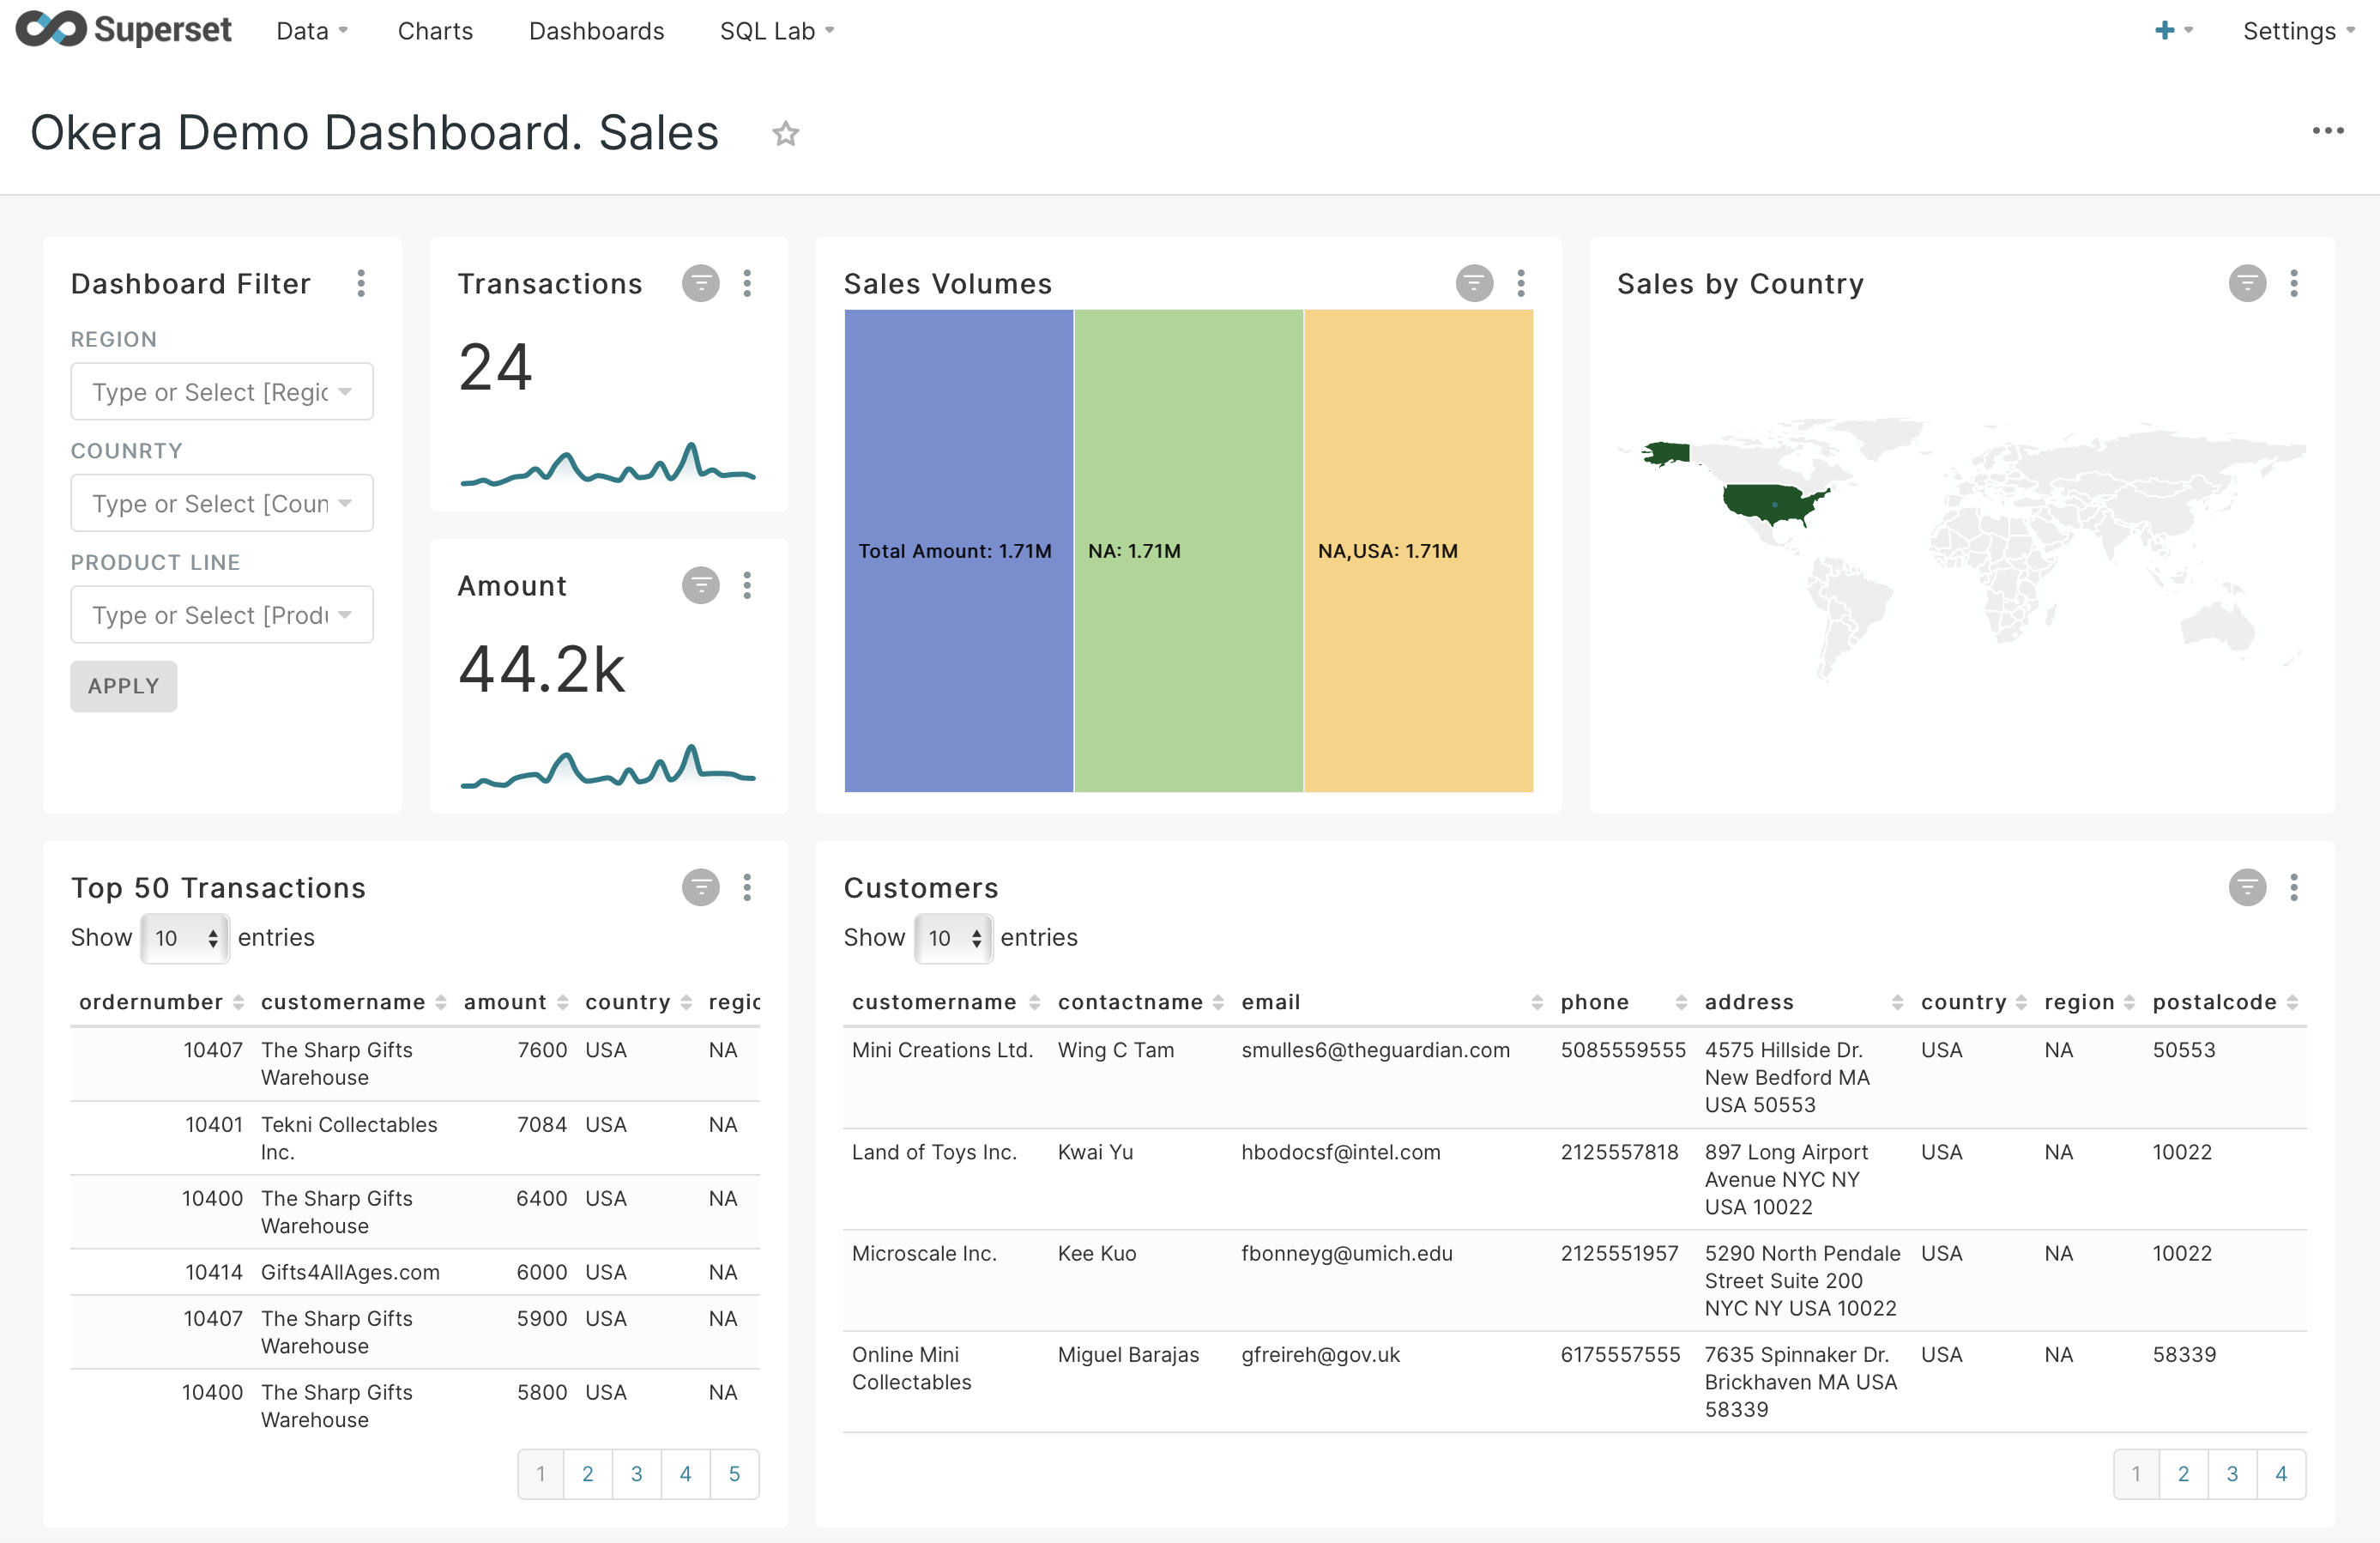
Validate that the permission has been applied correctly by logging into Apache Superset as
sally_<tenant>again and navigating to theOkera Demo Dashboard.Salesdashboard. You can see that she only sees data from the United States.Log out of Superset and log in again as
sam_<tenant>, using the password supplied in your test drive email. When you access theOkera Demo Dashboard. Salesdashboard again, you can see that Sam only sees data from France (which is the country to which he is assigned).You can see which country a user is assigned in the Okera UI using the User Attributes list on the Users page after selecting the user.
Images
Here is a video of the steps above.
Limit Sales Analyst Access to PII
Use tags in Okera to designate whether a field contains personally identifiable information (PII) and the type of PII data that is reflected. To ensure that the sales analysts, sally_<tenant> and sam_<tenant>, do not have access to sensitive customer data, let's review the tags that are available, apply them, and create a new access condition that restricts the sales analyst view.
Tags are attributes that can be applied to data. Attributes provide a powerful abstraction over physical metadata such as table and column names, allowing for more general policy definitions that are easier to maintain.
Note: At the end of this section, a video of these steps is provided.
-
Log in to Okera as
admin_<tenant>. -
Select Tags from the left-hand menu to access the Tags page and review the current tags in the test drive environment.
Tags are grouped by namespaces so if you are working with a specific domain (such as
sales), the corresponding tags are representative of the data in that business unit. Okera provides an out-of-the-boxpiinamespace.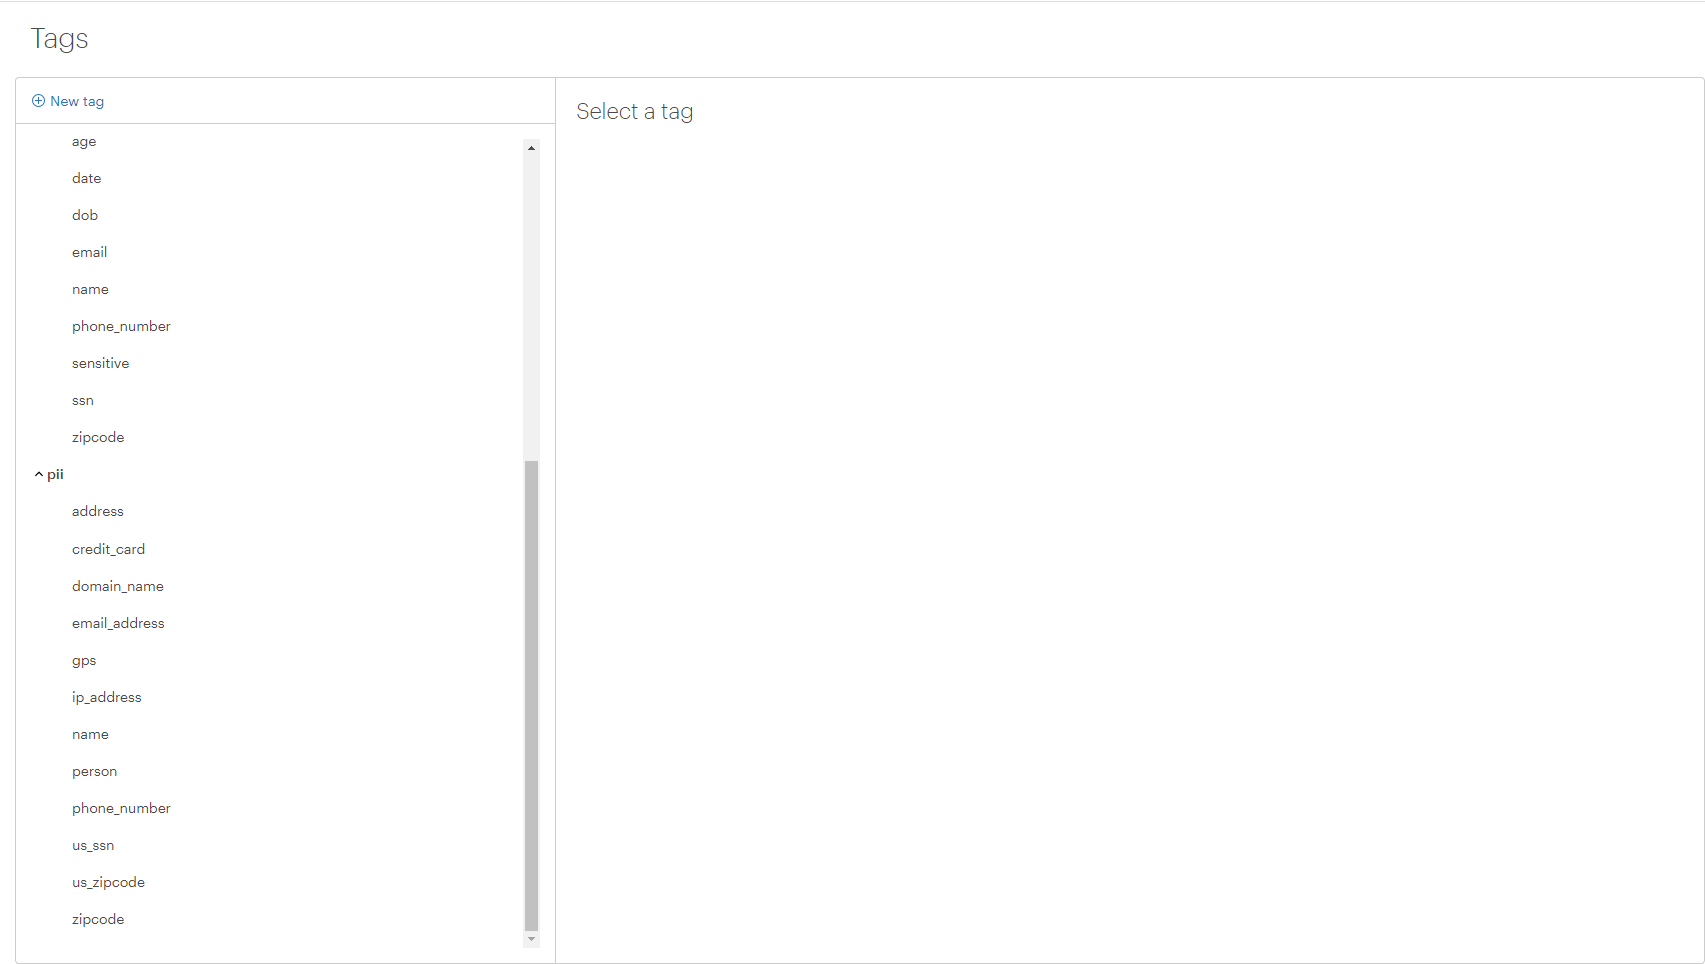
-
Select Data and navigate to the
salesdatabase. -
Select the
customer_contact_detailsdataset in thesalesdatabase. This opens the data schema, which is where tags and other additional information can be applied, as shown in the image below.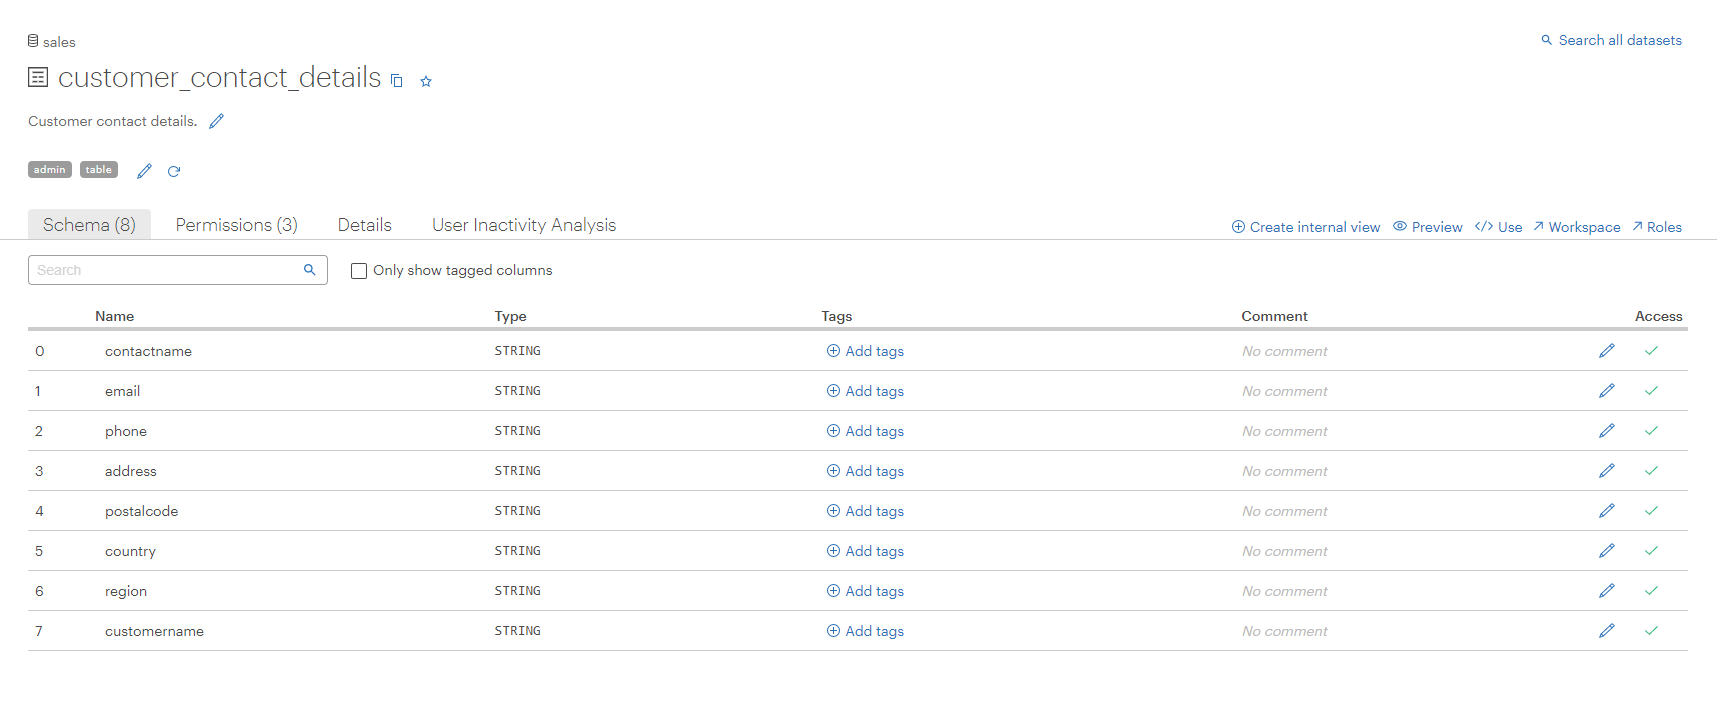
As you can see, several columns in the
customer_contact_detailstable include customer personally identifiable information (PII), however, they have not been tagged. -
Select
 for each of the following columns:
 contactname,email,phone, andaddress. For each column, select the corresponding tag within thepiinamespace, as shown in the following table and in the image below.Column Name Use This Tag contactnamepii: nameemailpii: email_addressphonepii: phone_numberaddresspii: address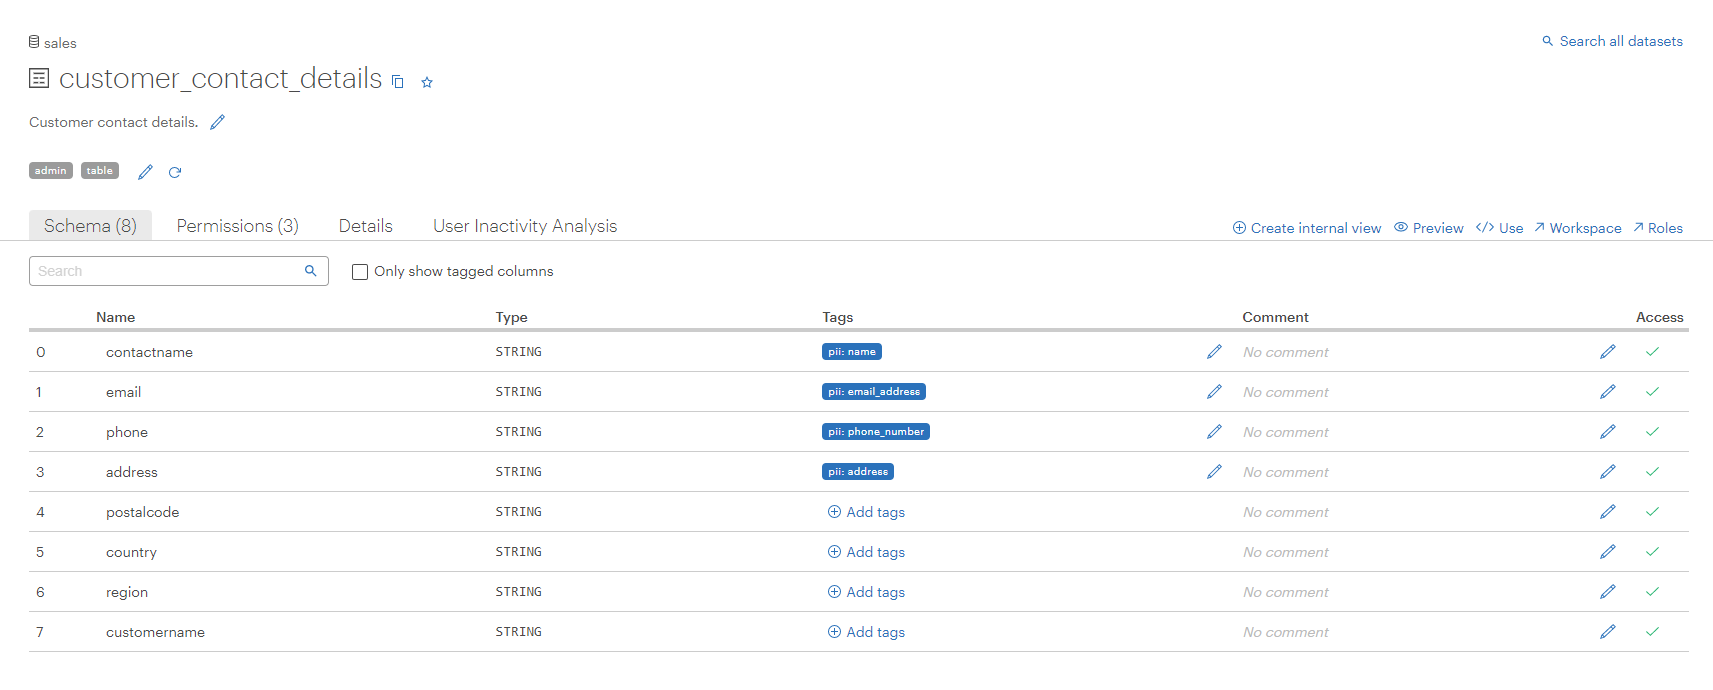
-
After your tags have been added to the
customer_contact_detailsschema, navigate back to thesalesdatabase. -
Select the Permissions tab and select the edit icon (
) next to the sales_analyst_role. -
Select Add another access condition and then select Transform data from the Condition dropdown list.
-
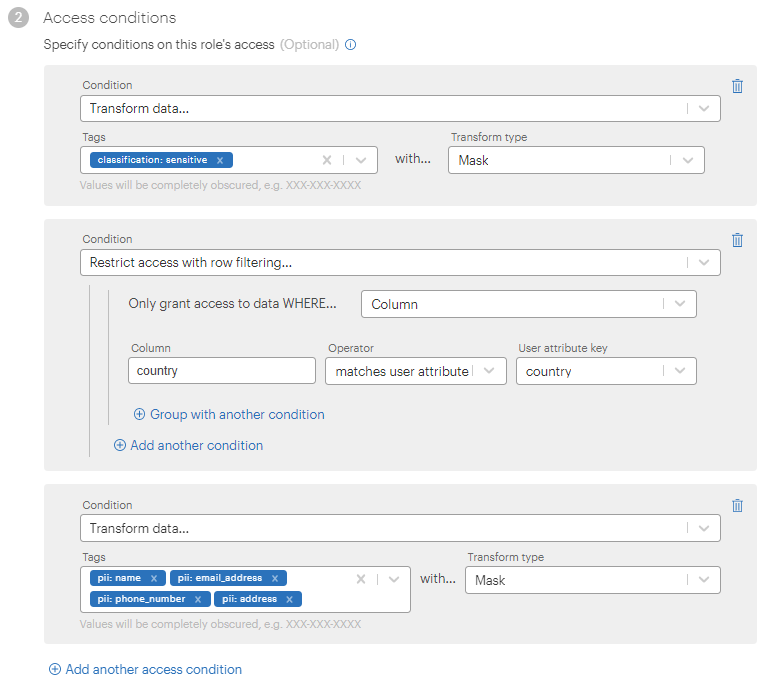
In the Tags box, select each of the
pii.*tags that you previously added to the data schema:pii:name,pii:email_address,pii:phone_number, andpii:address. -
Select "Mask" from the Transform type dropdown list. The access conditions for the permission should look like this:
-
Select
. The Permission added dialog appears confirming the update. (Select OK on this dialog.) -
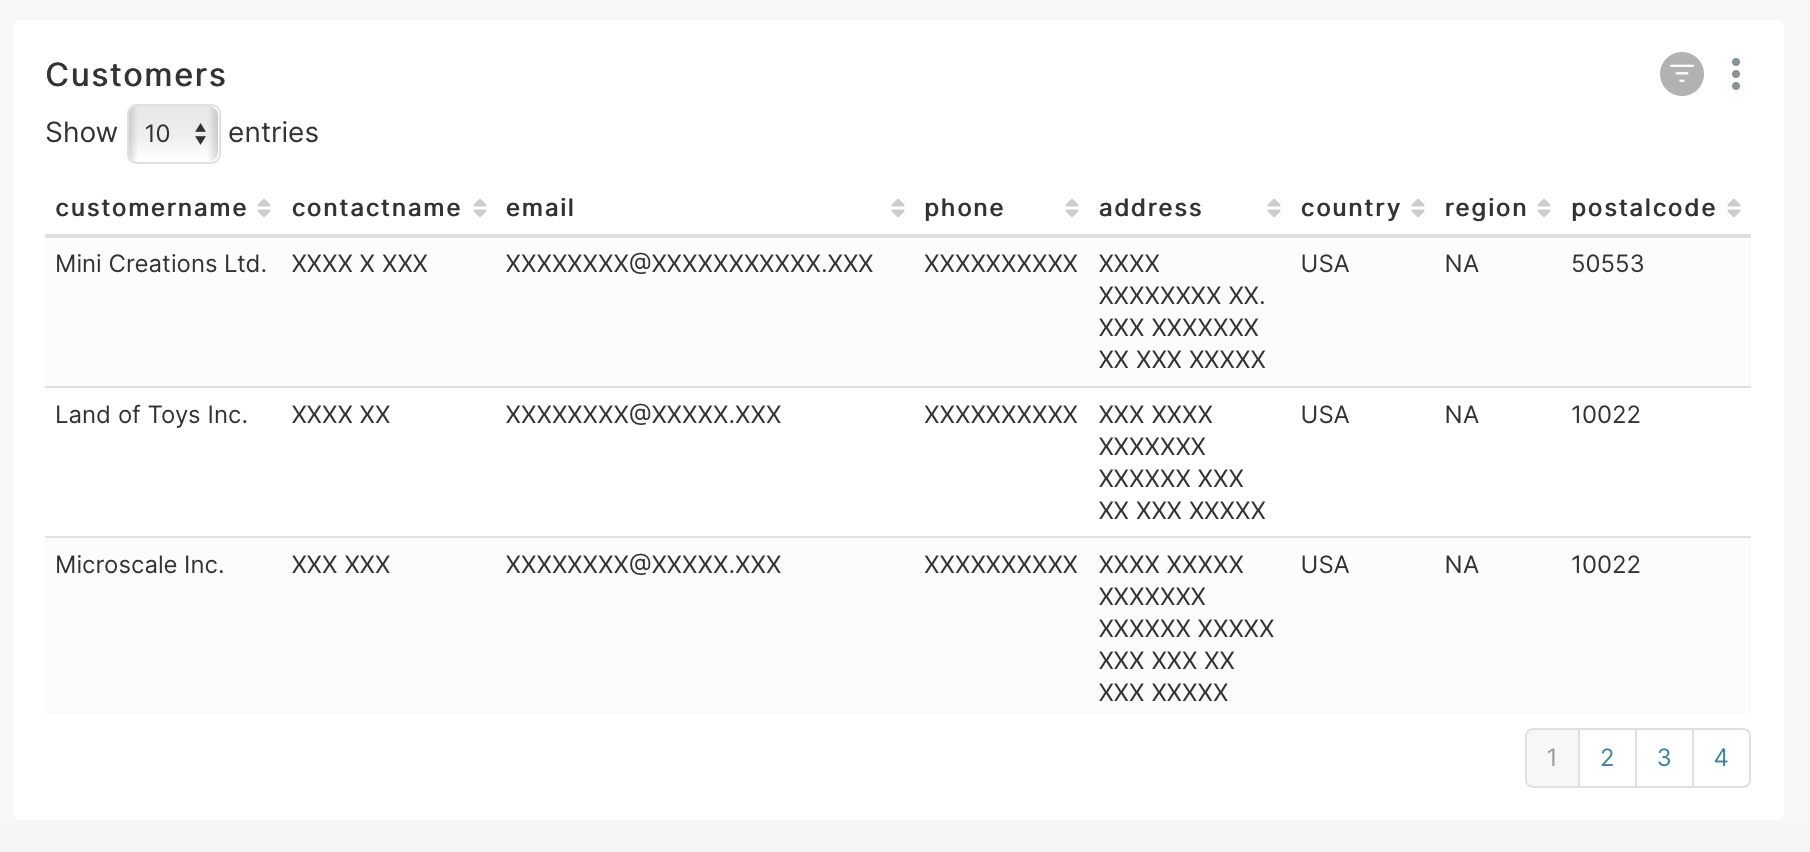
Open Superset, log in as the sales analyst
sally_<tenant>, and refresh theOkera Demo Dashboard.Salesdashboard. If the personally identifying data in the Customer chart is now masked, the access condition has been applied successfully.
Images

Here is a video of the steps above.
Useful Links
- Access Overview
- Role-Based Access Control (RBAC)
- Attribute-Based Access Control (ABAC)
- Access Delegation
- Policy Examples Guide